The ListView is a widget used extensively in Android applications to display data. Nowadays most high end phones can handle unoptimized code at tolerable speeds. However, a large percentage of Android devices are still using single core processors with limited memory. This post explains an easy way of optimization for developers.
To create our custom listview we need a custom adapter too. An adapter manage the list data and control how it is displayed.
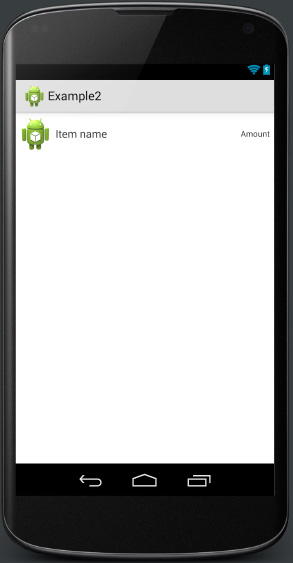
Our first step is to create de row layout with 3 elements, one icon, one name and one numeric value, we will name it listview_row.xml
<?xml version="1.0" encoding="utf-8"?>
<RelativeLayout xmlns:android="http://schemas.android.com/apk/res/android"
                android:layout_width="fill_parent"
                android:layout_height="?android:attr/listPreferredItemHeight"
                android:padding="6dip">

    <ImageView
    android:id="@+id/icon"
    android:layout_width="wrap_content"
    android:layout_height="fill_parent"
    android:layout_alignParentBottom="true"
    android:layout_alignParentTop="true"
    android:layout_marginRight="6dip"
    android:contentDescription="iconrow"
    android:src="@drawable/ic_launcher" />

    <LinearLayout
        android:layout_width="fill_parent"
        android:layout_height="wrap_content"
        android:orientation="horizontal"
        android:layout_alignParentBottom="true"
        android:layout_alignParentTop="true"
        android:gravity="center_vertical"
        android:layout_toRightOf="@id/icon">
        <TextView
            android:id="@+id/firstLine"
            android:layout_width="0dp"
            android:layout_height="wrap_content"
            android:gravity="center_vertical"
            android:text="Item name"
            android:layout_weight="1"
            android:textSize="16sp" />

        <TextView
            android:id="@+id/secondLine"
            android:layout_width="wrap_content"
            android:layout_height="wrap_content"
            android:ellipsize="marquee"
            android:singleLine="true"
            android:text="Amount"
            android:gravity="end"
            android:textSize="12sp" />
    </LinearLayout>
</RelativeLayout>
We create a simple class to bind our list data and our adapter could use it
public class MyListViewRow
{
    private long _id;
    private String _name;
    private int _amount;

    public MyListViewRow(long id, String name,int amount)
    {
        _id = id;
        _name = name;
        _amount = amount;
    }

    public long get_id(){ return _id;}
    public String get_name(){return _name;}
    public int get_amount(){return _amount;}
}
Now we coding the adapter class. We use the ViewHolder design pattern to avoid frequent calls of findViewById() during ListView scrolling improving the performance.
public class MyListViewAdapter extends BaseAdapter
{
    static class ViewHolder
    {
        ImageView iconIV;
        TextView nameTV;
        TextView amountTV;
    }

    private LayoutInflater _inflater;
    private Context _context;
    private ArrayList _values;

    public MyListViewAdapter(Context context, ArrayList values)
    {
        _context = context;
        _values = values;

        _inflater = LayoutInflater.from(_context);
    }

    @Override
    public int getCount() {
        return _values.size();
    }

    @Override
    public Object getItem(int position) {
        return _values.get(position);
    }

    @Override
    public long getItemId(int position) {
        return _values.get(position).get_id();
    }

    @Override
    public View getView(int position, View convertView, ViewGroup parent)
    {
        ViewHolder holder;
        if (convertView == null)
        {
            convertView = _inflater.inflate(R.layout.listview_row, null);
            holder = new ViewHolder();
            holder.nameTV = (TextView) convertView.findViewById(R.id.firstLine);
            holder.amountTV = (TextView) convertView.findViewById(R.id.secondLine);
            holder.iconIV = (ImageView) convertView.findViewById(R.id.icon);
            convertView.setTag(holder);
        }
        else
        {
            holder = (ViewHolder)convertView.getTag();
        }
        holder.nameTV.setText(_values.get(position).get_name());
        holder.amountTV.setText(Integer.toString(_values.get(position).get_amount()));

        return convertView;
    }
}
The first time that row is loaded, convertView is null. We will have to inflate our listview row layout, instantiate the viewholder and find the components using findViewById() to assign it to the viewholder, and set as tag of convertView.
The next times it was loaded, convertView is not null and we dont have to inflate the view row and, the best important thing to the performance, we dont have to call findViewById() again, we can now access to the components of the row using the viewholder of convertView.
Now we can modify the main layout adding a listview component
<RelativeLayout xmlns:android="http://schemas.android.com/apk/res/android"
    xmlns:tools="http://schemas.android.com/tools"
    android:layout_width="match_parent"
    android:layout_height="match_parent"
    android:paddingLeft="@dimen/activity_horizontal_margin"
    android:paddingRight="@dimen/activity_horizontal_margin"
    android:paddingTop="@dimen/activity_vertical_margin"
    android:paddingBottom="@dimen/activity_vertical_margin"
    tools:context=".MainActivity">

    <ListView
        android:layout_width="wrap_content"
        android:layout_height="wrap_content"
        android:id="@+id/mainLV"
        android:layout_alignParentTop="true"
        android:layout_alignParentLeft="true"
        android:layout_alignParentStart="true"/>

</RelativeLayout>
And we add some come in the main class to use the listview
private ListView _mainListView;
private MyListViewAdapter _mainListViewAdapter;
@Override
protected void onCreate(Bundle savedInstanceState) {
super.onCreate(savedInstanceState);
setContentView(R.layout.activity_main);
//Input list data
ArrayList _inputdata = new ArrayList();
MyListViewRow rowData;
for (int i = 0; i < 20; ++i)
{
rowData = new MyListViewRow(i*3,"Element "+ Integer.toString(i), i*2);
_inputdata.add(rowData);
}
//find list view
_mainListView = (ListView) findViewById(R.id.mainLV);
//create an adapter to listview and assign it
_mainListViewAdapter = new MyListViewAdapter(_mainListView.getContext(), _inputdata);
_mainListView.setAdapter(_mainListViewAdapter);
//click listener example
_mainListView.setOnItemClickListener(new AdapterView.OnItemClickListener()
{
@Override
public void onItemClick(AdapterView<?> adapterView, View view, int position, long id)
{
MyListViewRow clickRowData = (MyListViewRow) _mainListView.getItemAtPosition(position);
Toast.makeText(getApplicationContext(), Long.toString(clickRowData.get_id()) + " " + clickRowData.get_name() + " " + Integer.toString(clickRowData.get_amount()) , Toast.LENGTH_LONG).show();
}
});
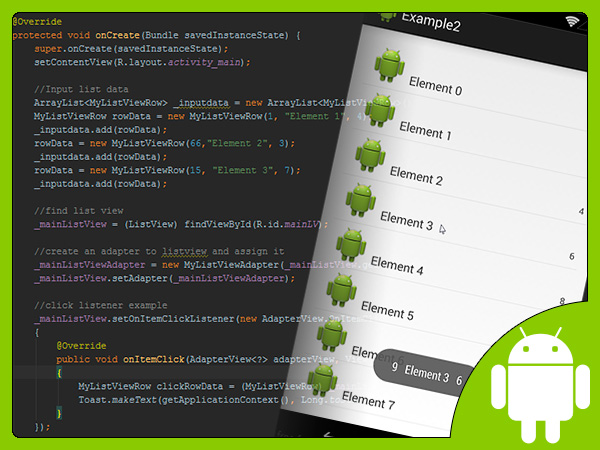
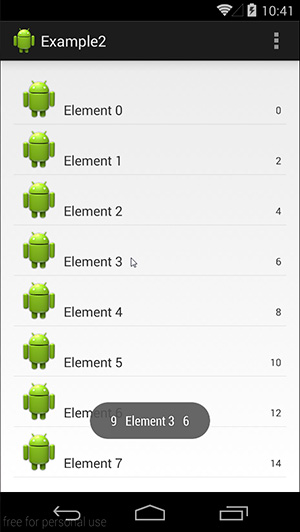
}Finally it will show our optimized list
Tutorial files
You may also like:

Support this blog!
For the past year I've been dedicating more of my time to the creation of tutorials, mainly about game development. If you think these posts have either helped or inspired you, please consider supporting this blog. Thank you so much for your contribution!


