This is a continuation of the previous tutorial Transition effects using materials (part 1) I will show you how to make more screen transitions, this time we will try to replicate some of the transitions used in Pokemon games.
To obtain the next transitions we will import a more complex masks made with an external graphics tool, like Adobe Photoshop or GIMP, instead of make it dynamically in the material. The texture node can be replaced at any time but now I want to avoid the complex calculations for its construction.
We have seen the more basic mask in the previous tutorial, the Linear gradient, and how to apply dynamically a cutoff using it.
Before start making complex masks I want to explain a little concept about Photoshop and linear gradient, and how to make the same UE4 gradient.
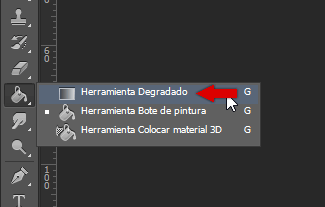
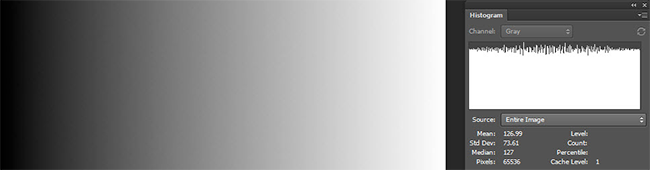
If we use the PS gradient tool, set it to linear and drag it from one side to another of the canvas we obtain a linear gradient.
We can check the histogram to discover that its no perfect linear
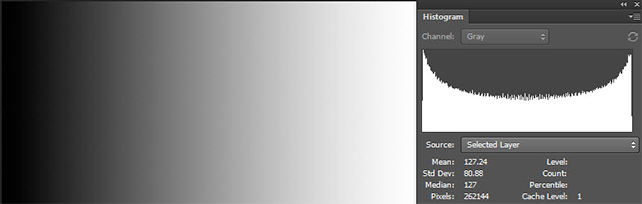
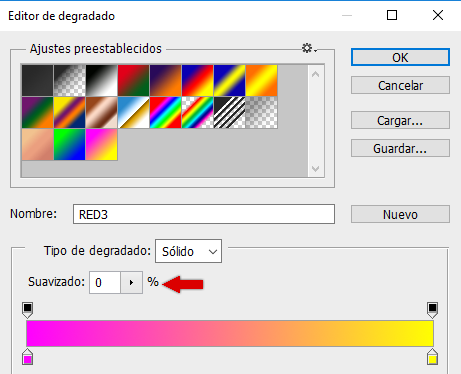
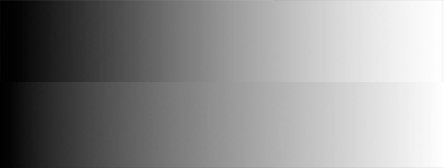
To obtain a real linear gradient we need to set the smoothness of the gradient option to 0%
Now the histogram has better aspect.
With a 100% of smoothness we would have obtained a faster transition progression in the edges of the texture than in the middle using a linear change in the cutoff threshold.
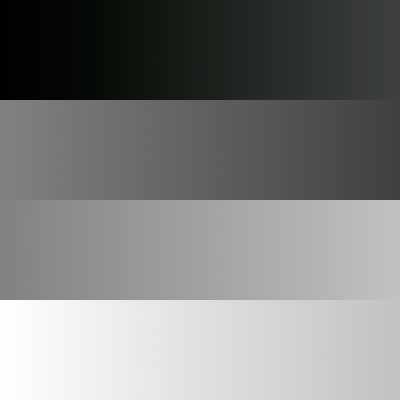
Now we can start to make a more complex gradient like that.
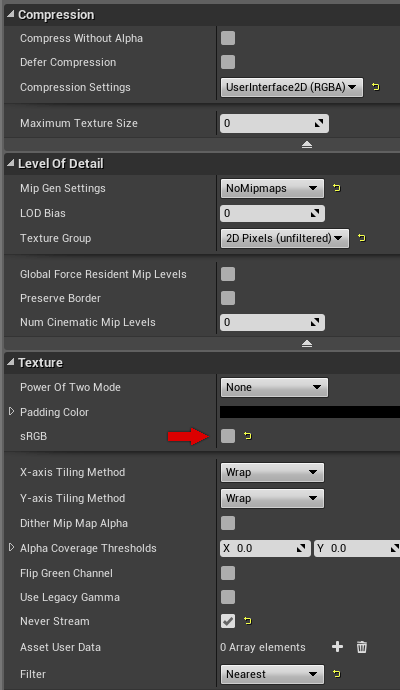
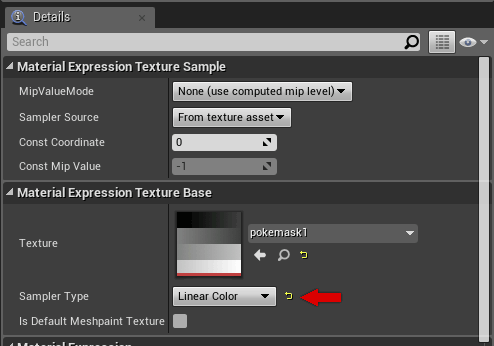
Then import the texture into UE4. Dont forget to uncheck the sRGB option. It makes the editor to interpret your texture as linear color with no gamma correction.
Now in the Texture Sample node we must select Linear Color as Sample Type
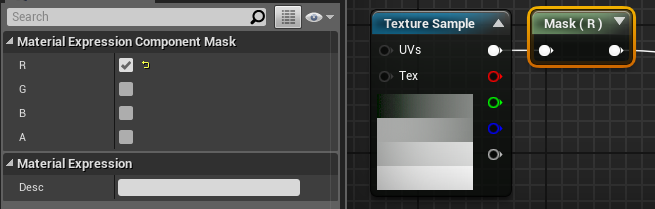
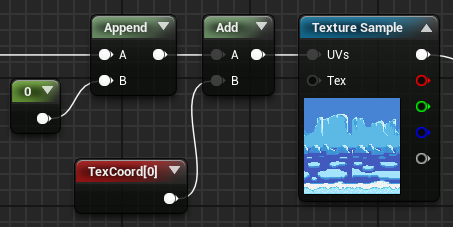
To extract the information of one channel of the texture we can use the Mask node and check the channels to the output. In this transition we only need one of the channels, so we can choose the red channel for example (All channels has the same value for each pixel in this texture)
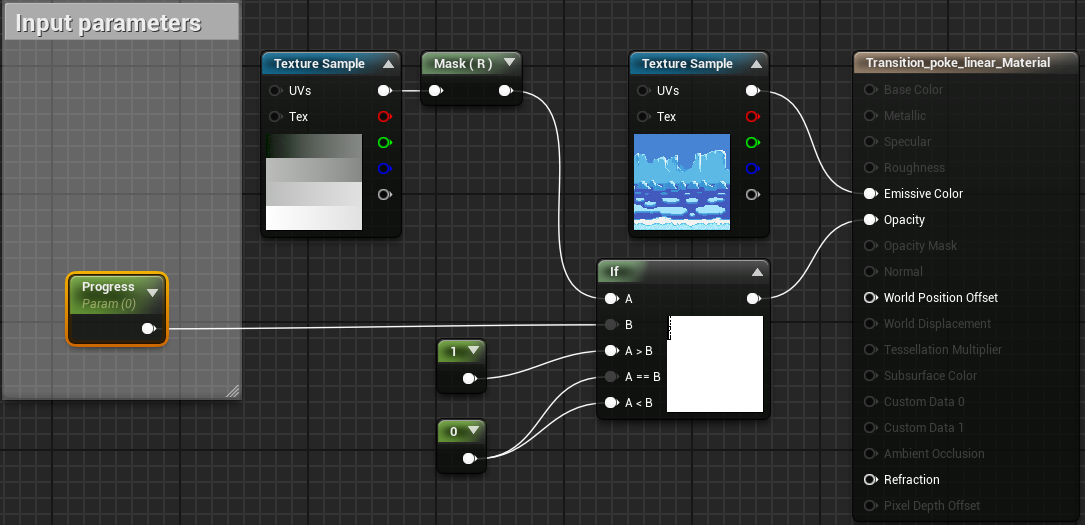
Now we can put the previously condition used to make a sharper transition

Diamond transition
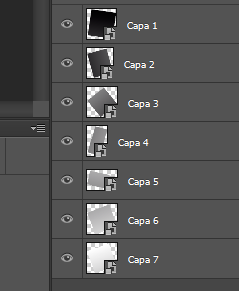
This mask is a little more complicated to make, yo need to take a linear gradient and use layers to set the chunks one above the others.
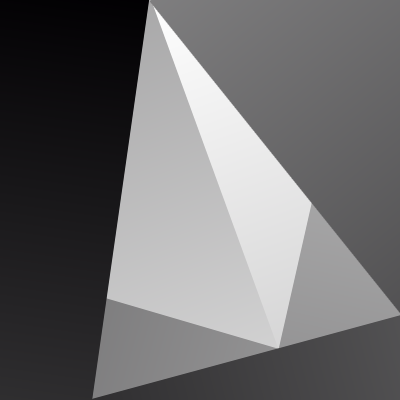
But we can reuse the same material of the previous transition, only need to change the gradient of the texture sample node.

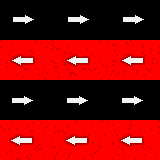
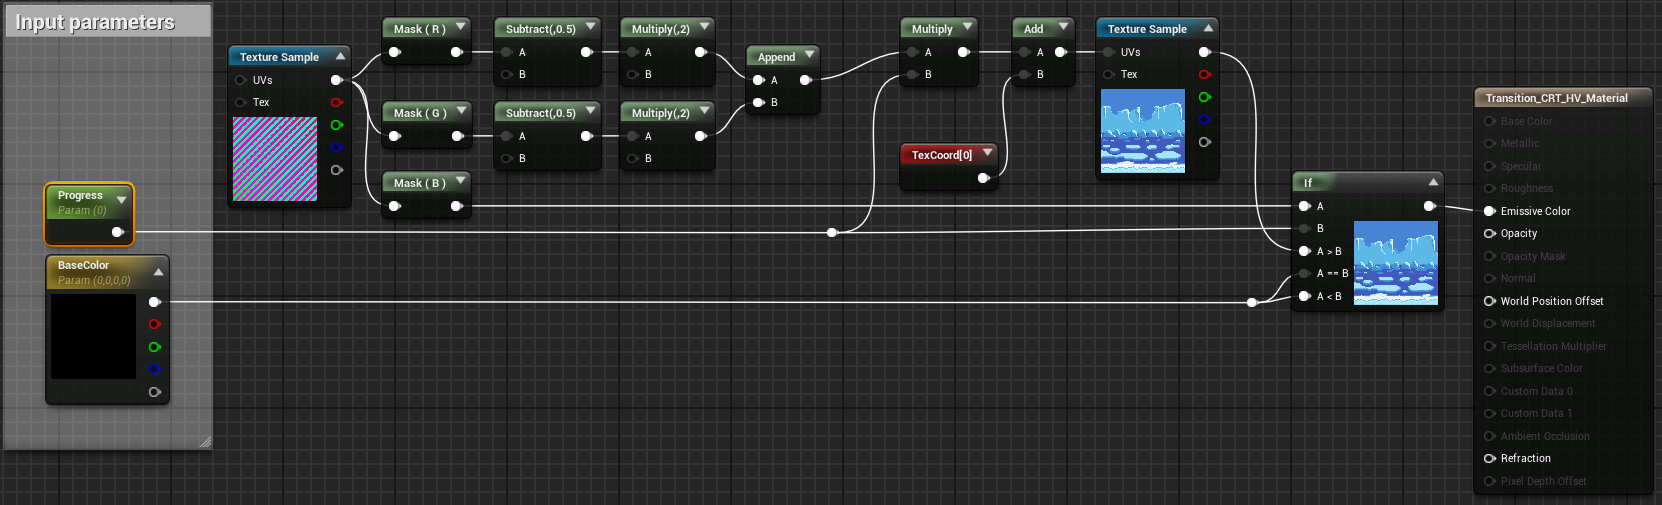
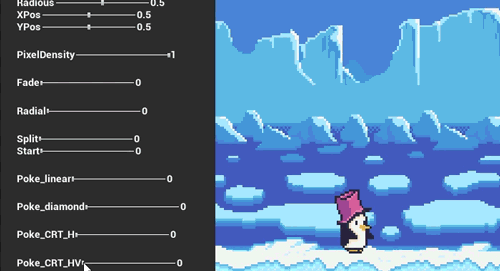
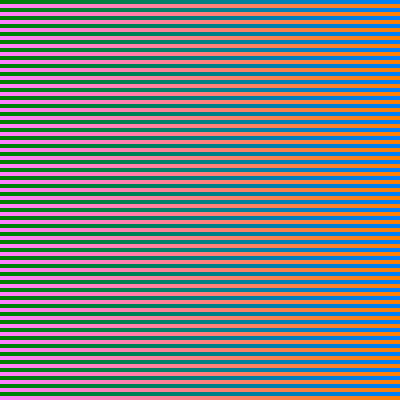
Horizontal stripes
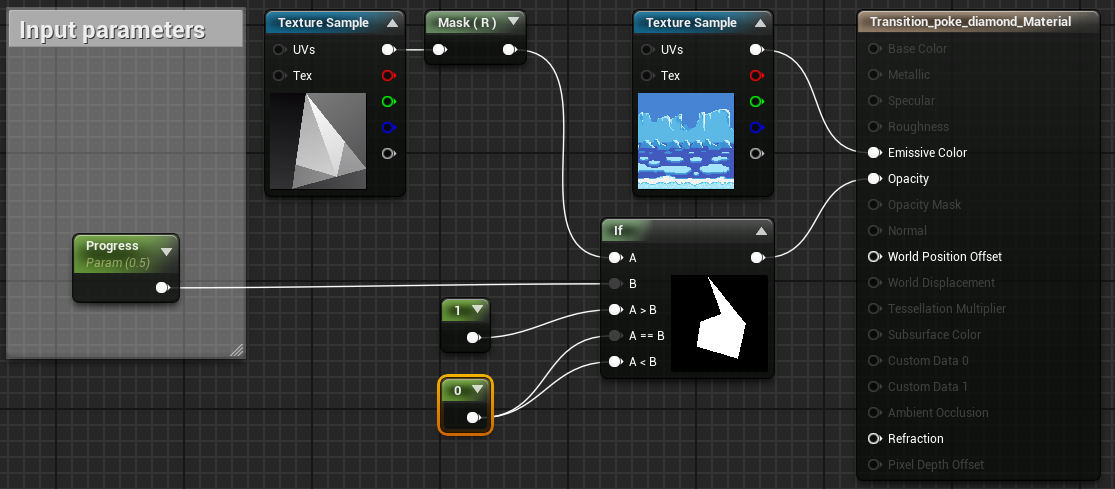
Ok, it’s time to use the potencial of the multiple color channels. Each pixel of the texture has 4 values (Red/Green/Blue + Alpha) that can be used to store data. We can store the data used during the cutoff in one of the channels and use the others to define a translation of the mask for example.
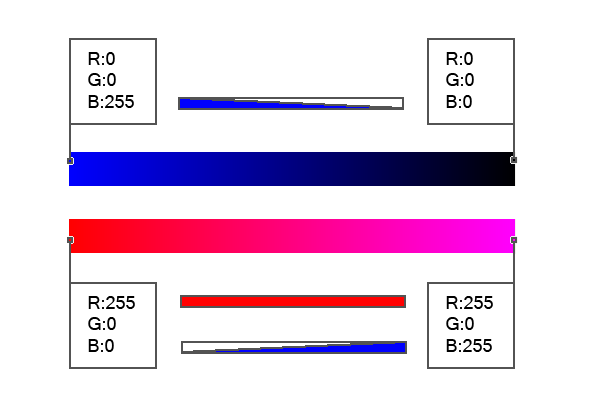
The first gradient will only apply the cutoff effect, the second will apply the cutoff and a translation along X axis. We could use the Green channel for a translation along Y axis in other example.
Now we can make our stripes mask applying this gradients as a pattern.
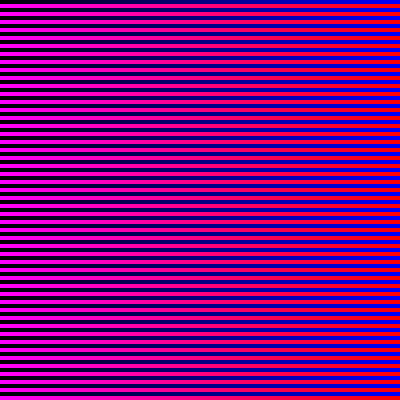
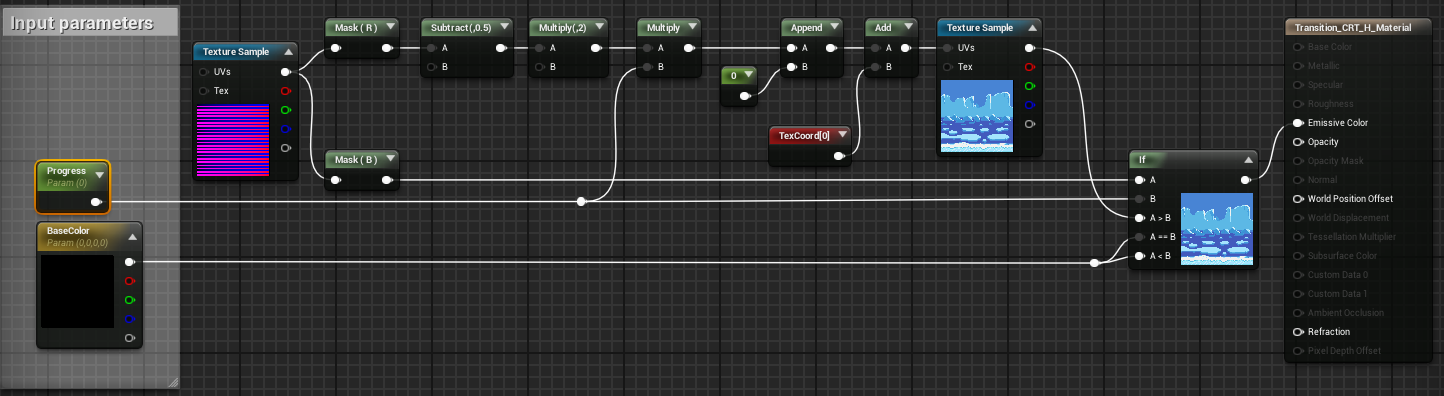
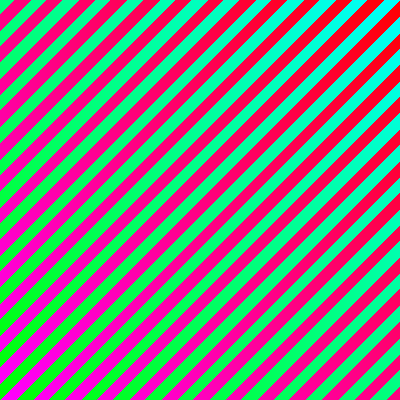
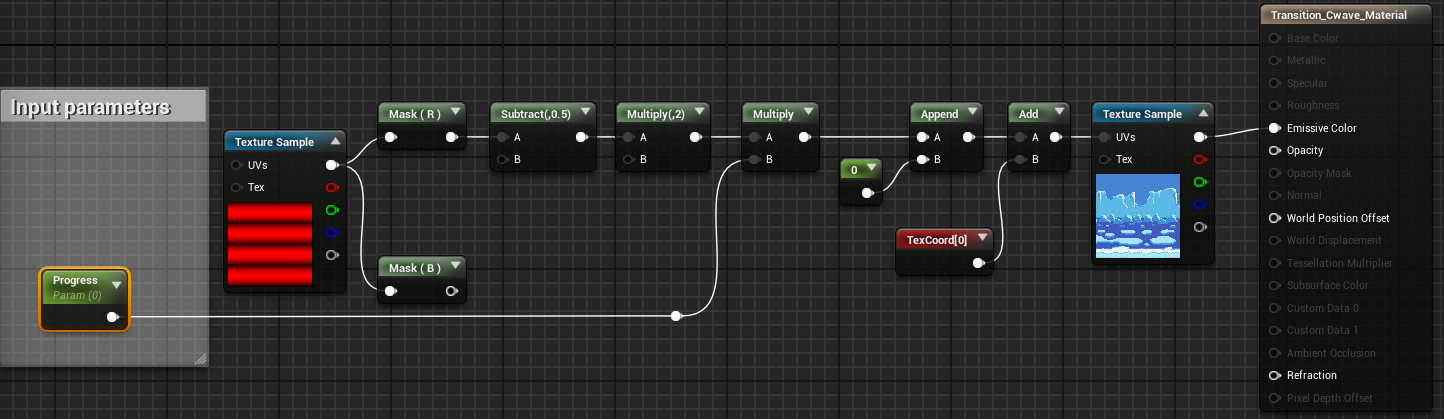
After import our texture in UE4 we can start with the material. We need to extract each channel using Mask nodes, and define the desired function to apply to each color data.
The blue channel is responsible of controlling the cutoff so we can connect it directly to our previous cutoff condition.

Now the red channel!. This channel will be used for X translation. To scroll a texture we need to apply an offset vector to its UV coordinates, the first component of the vector is the offset to apply to the U (horizontally) direction, the second is applied to the V (vertically) direction. We only want to use horizontal offset so we will put a zero in the second component of the vector.
But if we apply the red value directly to the UV coordinates we obtain only scroll in the even rows, because odd rows has a value of 0.0 and the even rows has a value of 1.0 (255). We want to split the screen by the middle, and move de right side to the right and the left side to the left, so we need to substract 0.5 to the red channel and multiply by 2 after that.
This will set a value of -1.0 in the odd rows, that will result in negative translation along X axis, and +1.0 in the even rows that will result in positive translation along X axis.
If we want to have no scroll, usign this algorithm, the value of the pixel on the Red channel must be 128 (0.5).

Now we can multiply our progress transition parameter to this mask to match the cutoff with the X translation, connecting it to the UV coordinates of the texture.
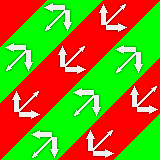
Diagonal stripes
We need to add scroll effect along Y axis. To do that we can modify the previous material to add functionality to the Green channel, and store in this channel the translation data along Y axis.
We need to apply the same algorithm used in the red channel, but now the vector added to the UV coordinates has the green channel data in the second component instead of a zero value.
Now we can make our texture. Remember that color values < 128 represent negative translation, and positive translation are represented with values >128.
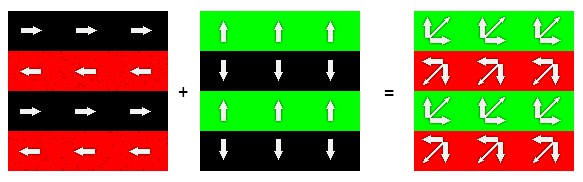
We can rotate the texture 45º to match the direcction of the cutoff and the translation.
If we wanted to use this material to replace the previous Horizontal stripes transition we would need to change the texture to consider the Green channel.
Wave distortion
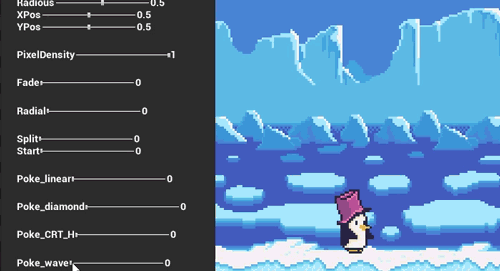
We can reuse the horizontal stripes transation material, removing the cutoff code and changing the input texture mask (or setting a value of 255 in the blue channel of each pixel of the wave texture with no material modifications).

If we choose to reuse the diagonal stripes transition material, we would modify the previous texture to set a value of 128 in green channel and 255 in blue channel fo each pixel to obtain the same effect.
You may also like:
Support this blog!
For the past year I've been dedicating more of my time to the creation of tutorials, mainly about game development. If you think these posts have either helped or inspired you, please consider supporting this blog. Thank you so much for your contribution!


