Blueprint Empty Project Sample
A basic sample to learn how to start with an empty project
Installation of the plugin
We can install the plugin form the UE4 Marketplace, if the engine version is supported (Only the last three engine version have direct support in the marketplace for Code Plugins).
If the engine version is older we can follow this guidelines to build the plugin for our version
Make an empty project
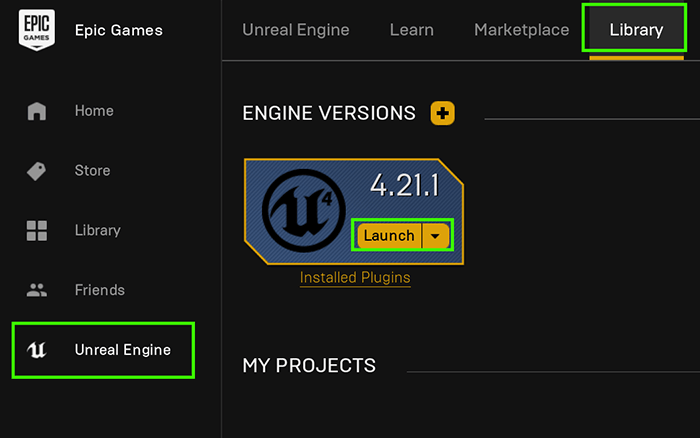
On the Epic Games Launcher go to Unreal Engine > Library and push the Launch button for your desired Engine Version
Now select the New Project tab > Blank Blueprint project > No Starter Content. Set a name project and Create Project

Project Setup
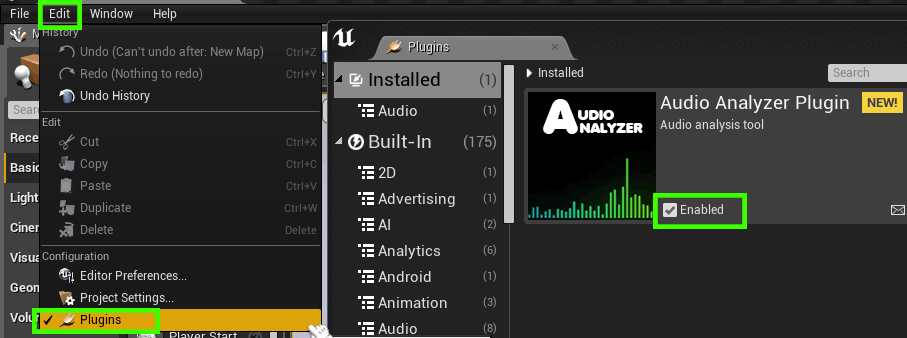
Enable the Audio Analyzer plugin and restart the Unreal Editor
Now we can make a folder to contain the Non-assets files in the Content folder. This files don’t need to be imported by the engine we will use the file directly from the folder.

The audio files can be copy directly to this folder. We don’t need to import this files using the engine.

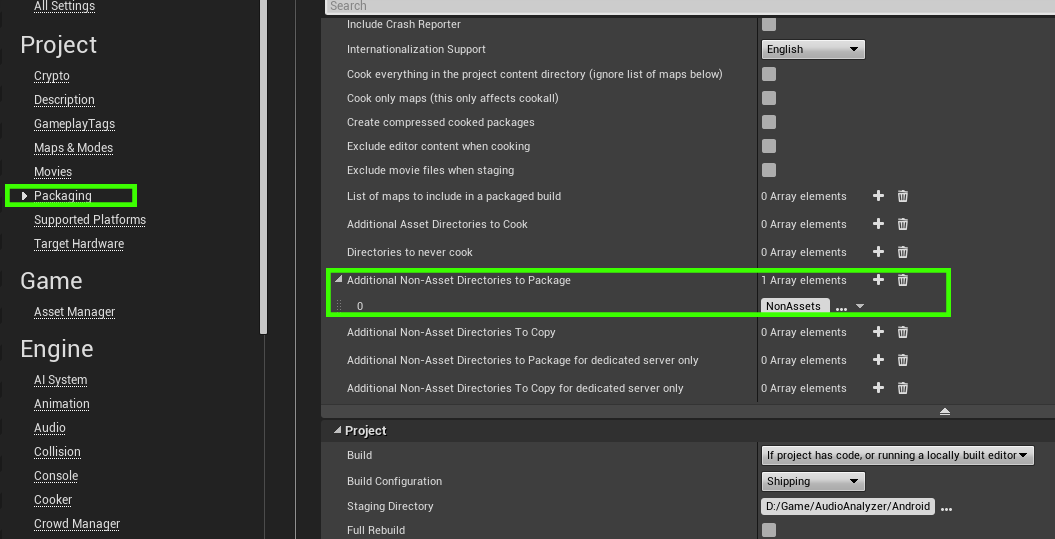
We need to include this folder explicity in our package build. Open the Project Settings > Project section > Packaging > Additional Non-Asset Directories to Package
Add the folder name to the list
Audio Analyzer Manager Setup
Now we can make the blueprint class of the Audio Analyzer Manager parent class.
Right click in our Content folder > Blueprint Class > Search for AudioAnalyzerManager class > Select
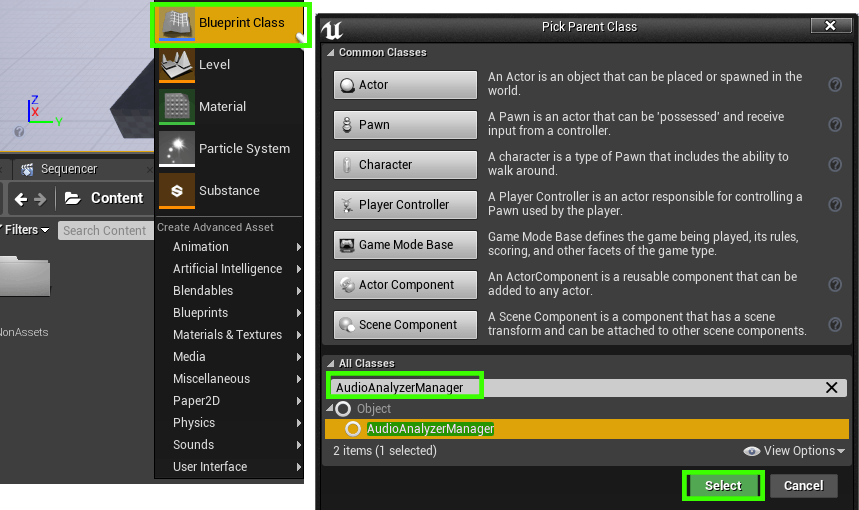
This Blueprint instance will be the used to make our Audio Analyzer Manager objects.
Playing the sound
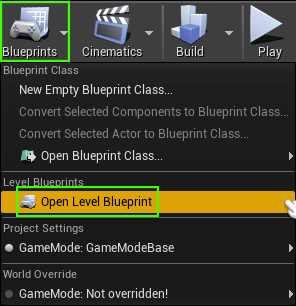
We will use the level blueprint to contain the logic of the project, but you can make an actor and put the same content inside it and spawn the actor in the level.
We can open the level blueprint using the Toolbar > Blueprints > Open Level Blueprint
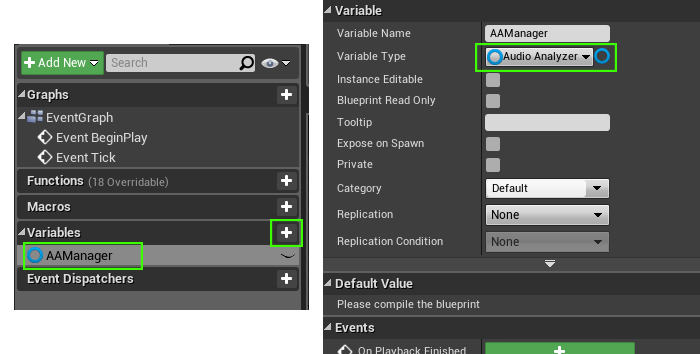
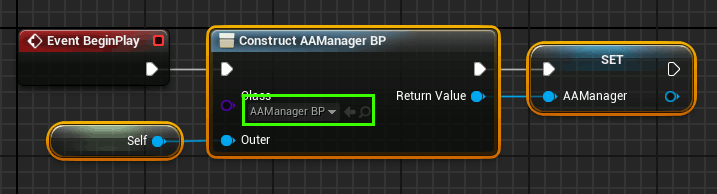
Now we are going to create a variable to contain the AudioAnalyzerManager. The Type for this variable is the blueprint previously created.
To instanciate the object we can use the Construct Object from Class node and set the class to the blueprint class of the Audio Analyzer
Synchronous nodes
Now we need to initialize the audio source, we are going to use the player in this example, so we need to use the Init Player Audio node with the path to the audio file.
We can use Get Project Content Directory to retrieve the path to the Content folder in runtime, we need to add the non-asset folder and the filename to this path.
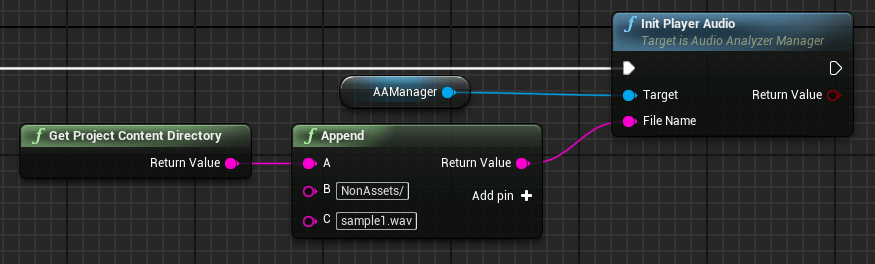
After the initialization we can add a playback controler. In this case a Play node

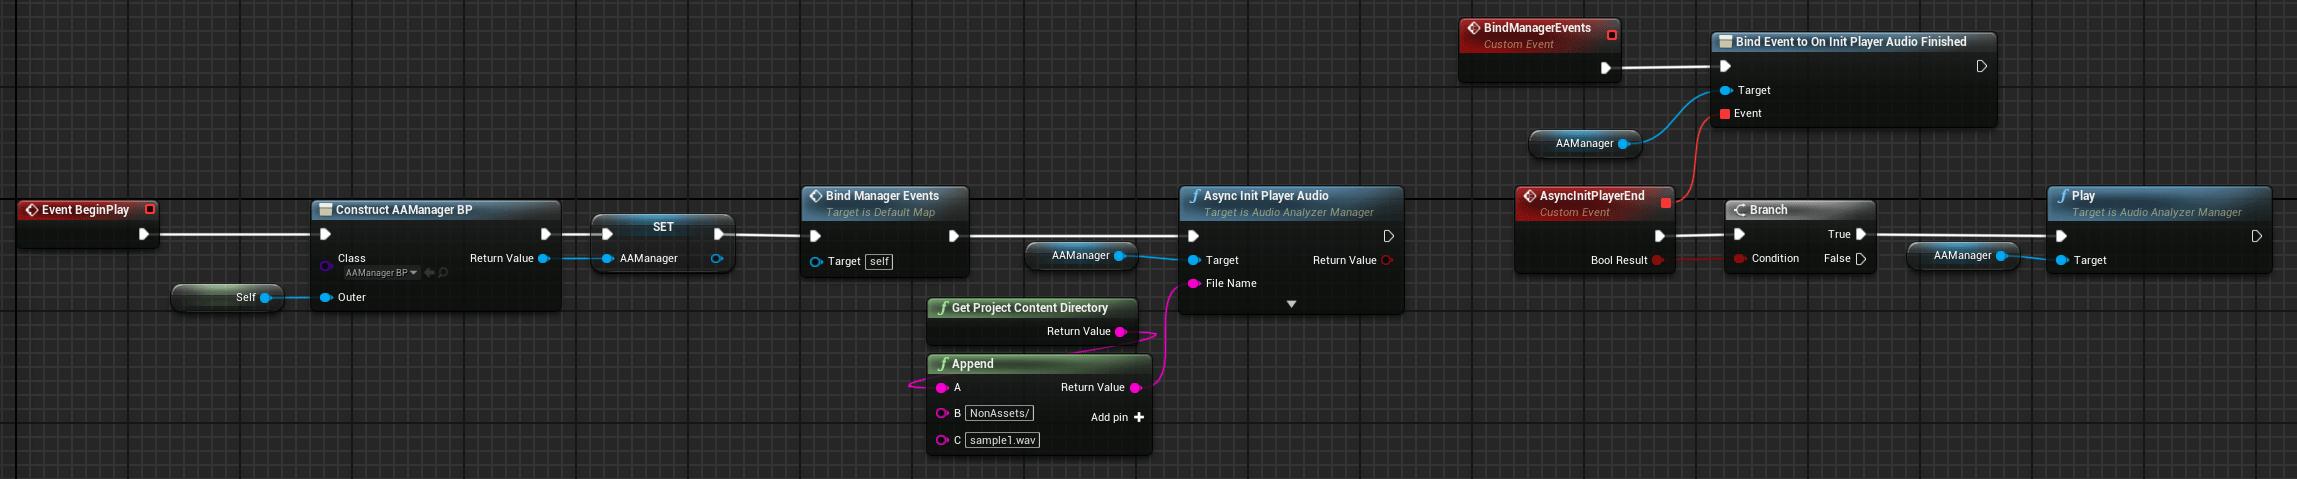
So the Event BeginPlay of the Level looks like that:

Asynchronous nodes
Note
With big audio files is better to use asynchronous initialization node to avoid the app hang during the audio decode process.
With the asynchronous node an AsyncTask is generated to decode the file in other thread. When the decoding process end an event is triggered with the result of the operation.
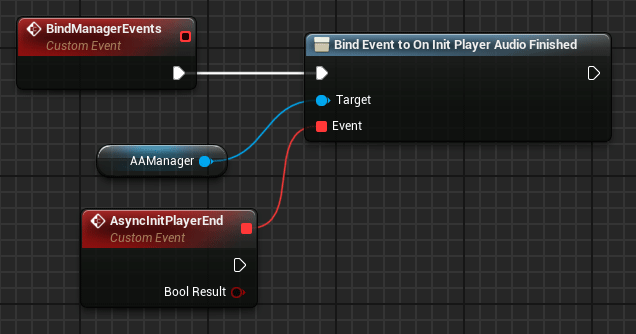
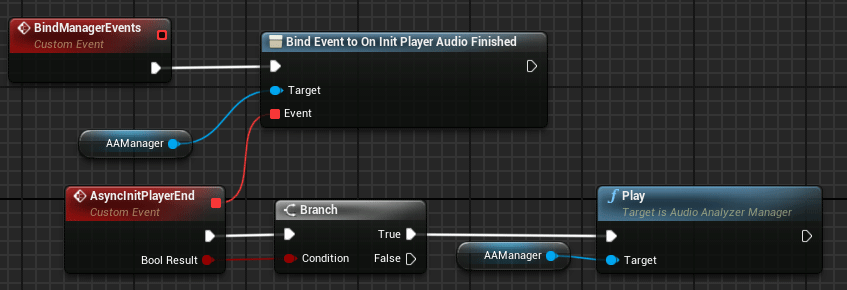
Before to be able to use asynchronous we need to bind the events that will be triggered when the asynchronous task ends. To do that we need to use the Bind Event to On Init Player Audio Finished node and delegate the result to other event.
This event will be executed when the async Player initialization task ends. We are going to translate all the nodes that come after the initialization node in the synchronous part to this new event.
Now we need to initialize the audio source, we are going to use the player in this example, so we need to use the Async Init Player Audio node with the path to the audio file.
We can use Get Project Content Directory to retrieve the path to the Content folder in runtime, we need to add the non-asset folder and the filename to this path.
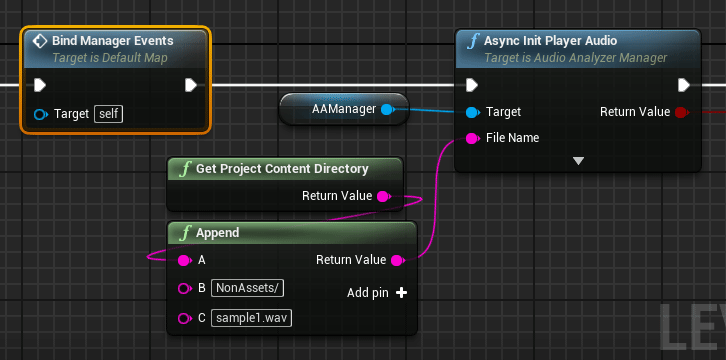
After the initialization we can add a playback controler. In this case a Play node
So the Event BeginPlay of the Level looks like that:
Setting up the visualizer
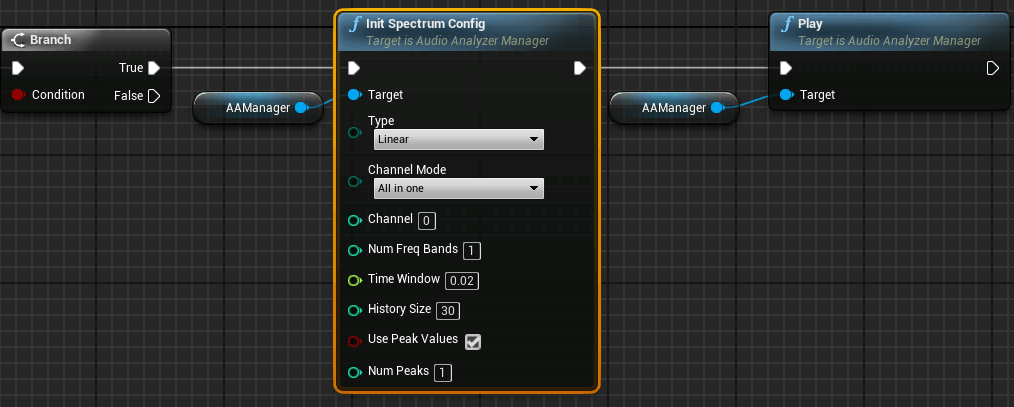
We are going to set up a frequency spectrum visualizer, so the first step is to initialize this visualizer using the Init Spectrum Config
We can put this node just after the Init Player Audio node
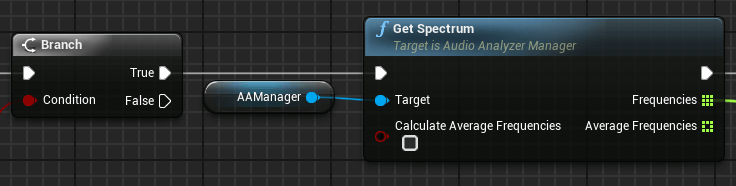
Now in the Event Tick we can request the visualizer data
We can add a check to only update the data when the audio is playing

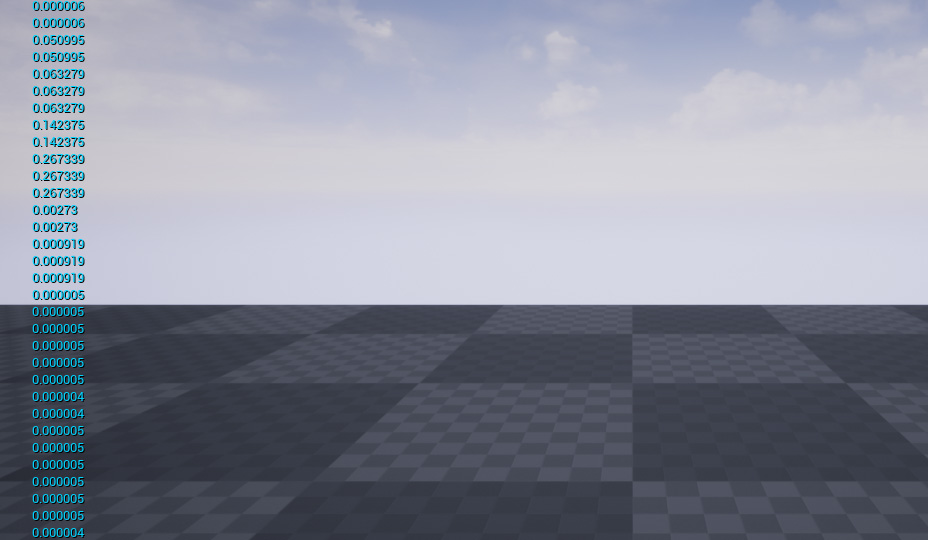
And request the frequency spectrum data using Get Spectrum and, for example, display this values using a Print String node
So the Event Tick of the Level looks like that:

Now the frequency spectrum values will be displayed on the screen during the playback
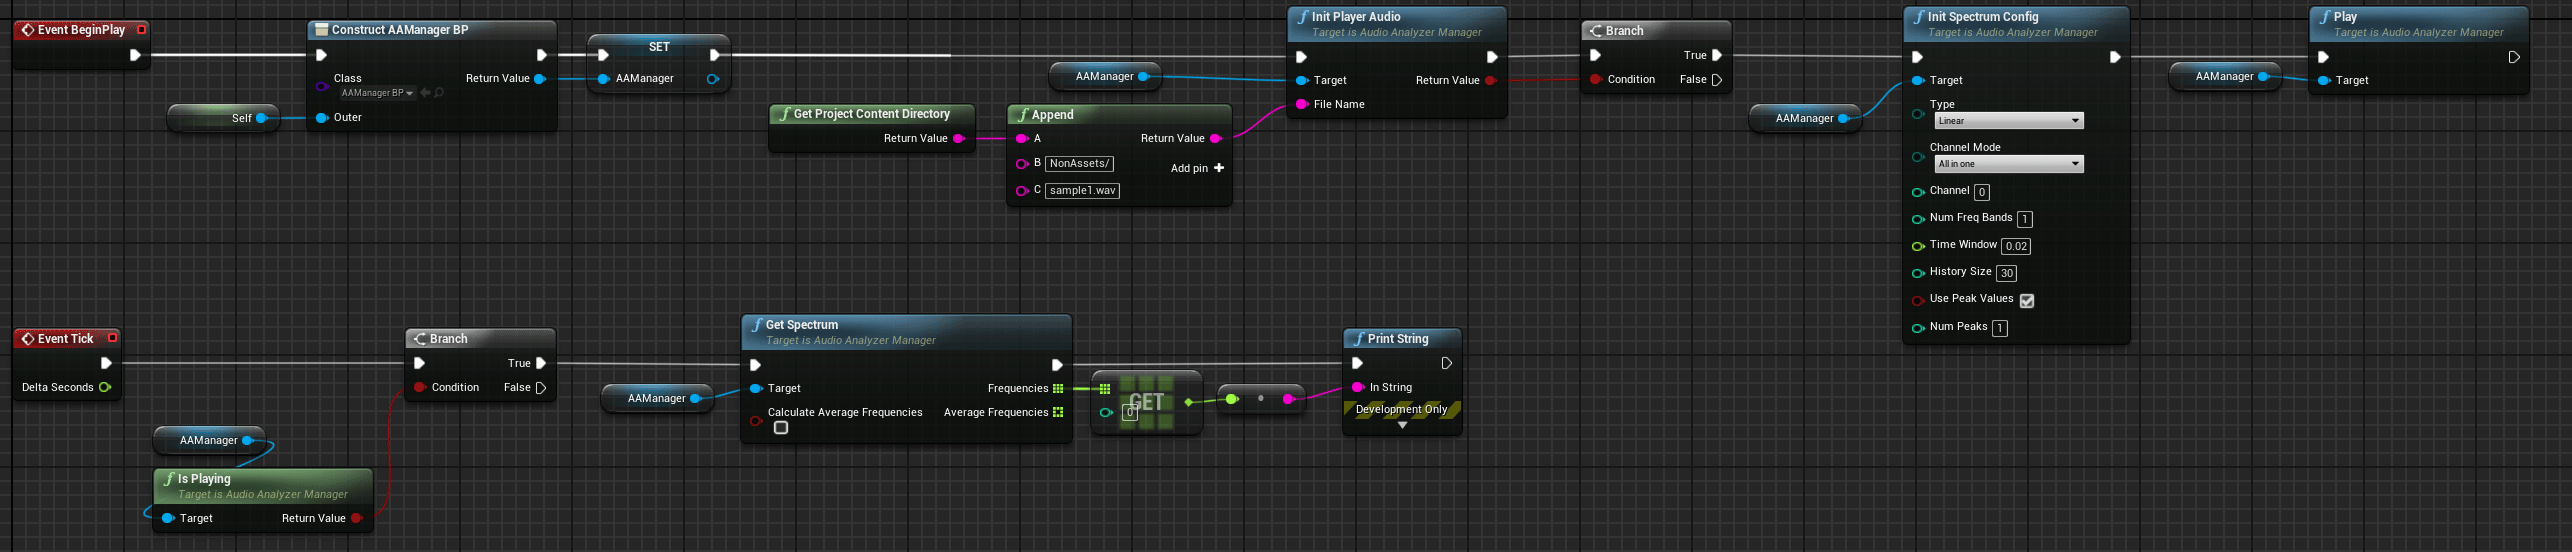
Level Blueprint (Synchronous version)
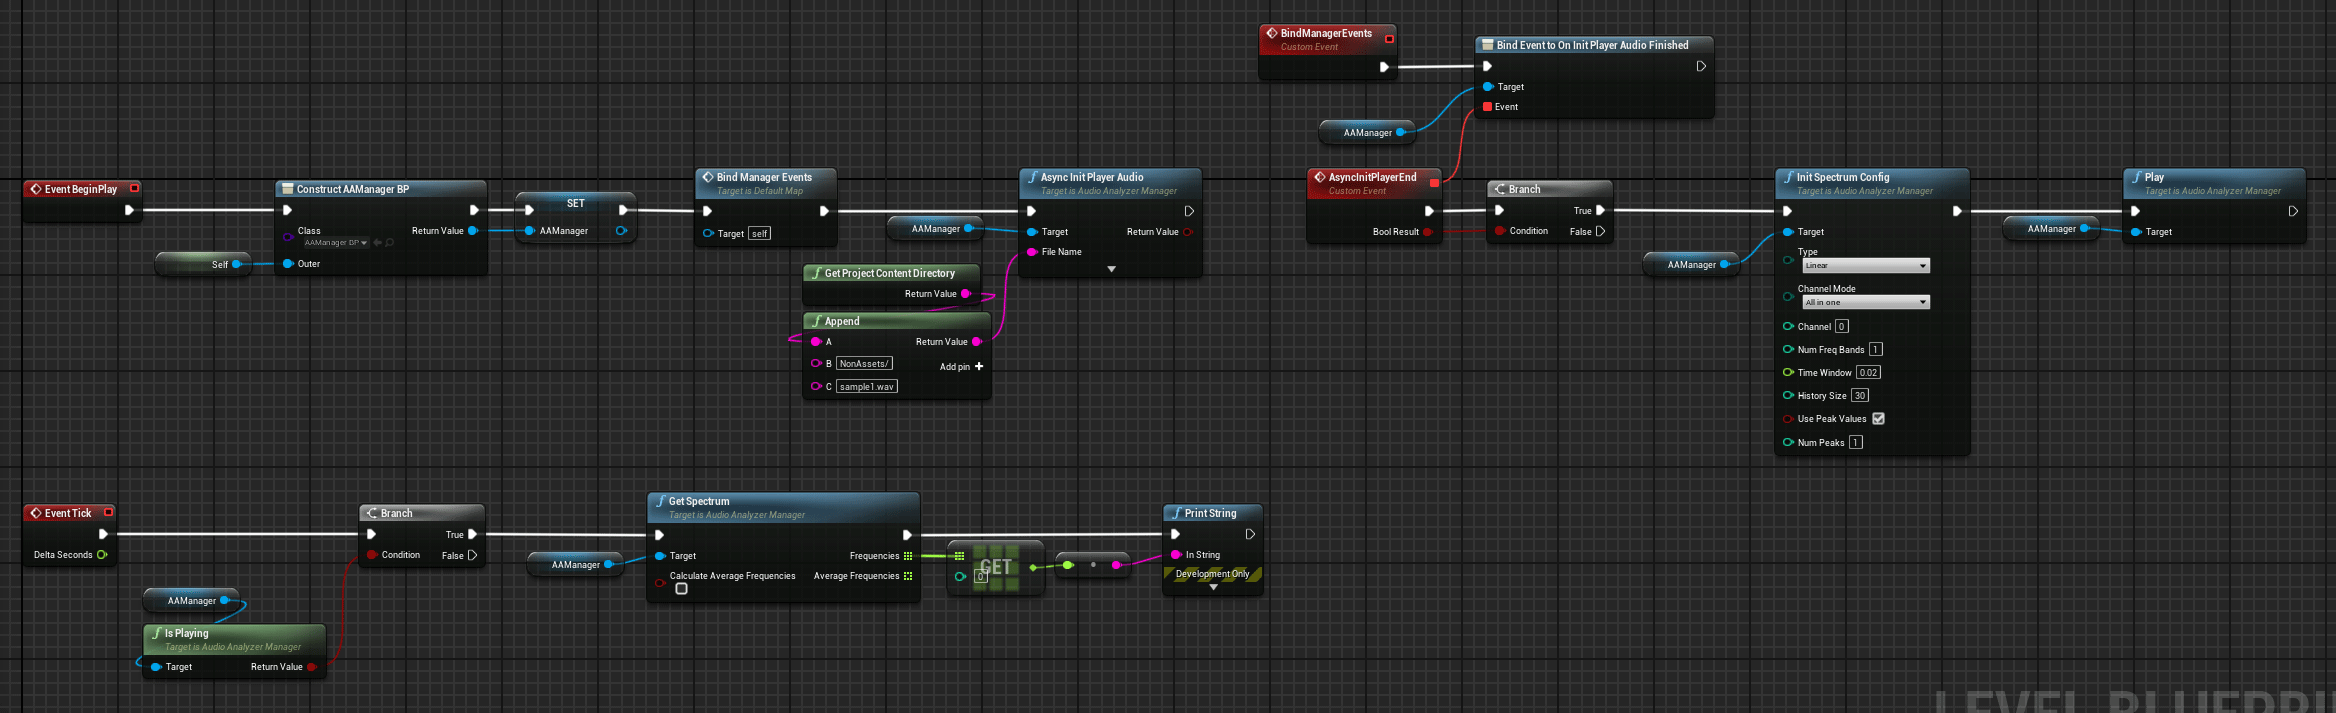
Level Blueprint (Asynchronous version)
Now we can launch the game to see the spectrum data on screen