A brief tutorial explaining how to configure and set-up a remote iOS build process on Unreal Engine 4 (v4.22+) for testing purposes, without spend money and time on a iOS developer license.
Creating mobile provision files
Remote iOS project set-up
Mobileprovision tester
Creating mobile provision files
The first step is to create the two files needed to sign the IPA the mobileprovision and the certificate. To make this files we need a Mac OS X, this method works on a Mac machine or a virtual enviroment, we only need the SO.
For this tutorial we are using macOS Mojave 10.14.6 and Xcode 11.1
Creating a self-signed certificate
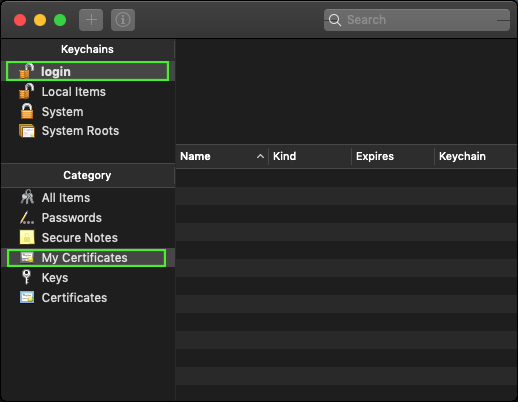
We can start creating the certificate for code signing, In the Mac OS machine go to Applications > Utilities > Keychain Access

Select login keychain and My Certificates category
In the menu bar Keychain Access > Certificate Assistant > Create a Certificate

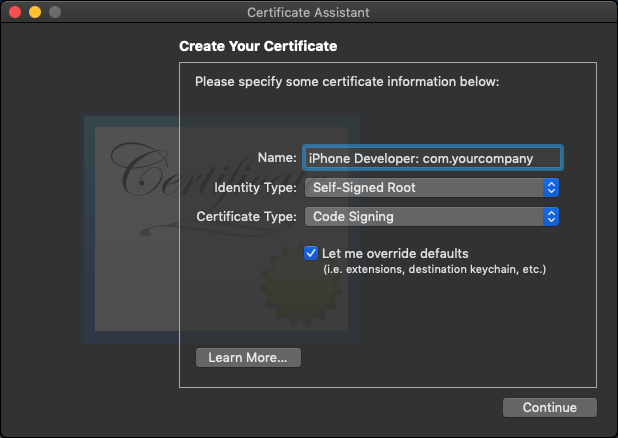
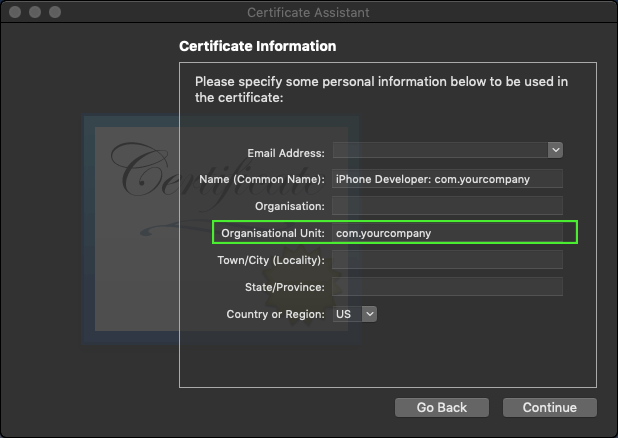
Now we need to fill the certificate information
- Name: Must starts with “iPhone Developer”, we can add more info like the company name after that
- Identity Type: “Self-Signed Root”
- Certificate Type: “Code Signing”
- Check “Let me override defaults”
Click on Continue
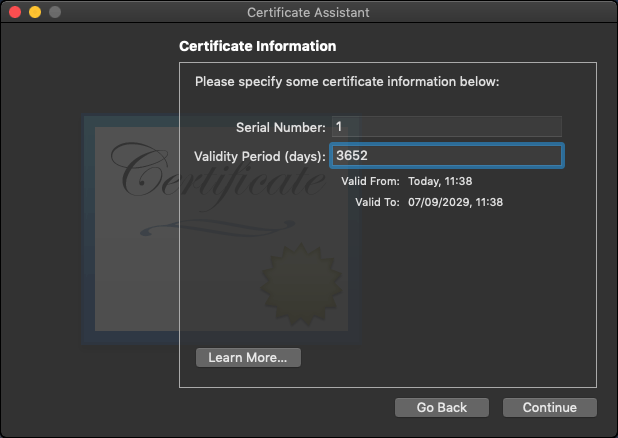
Now we need to define the valid period of the certificate. We are going to establish a perior of 10 years (3652 days).
In the next form we only need to fill the Organization unit field.
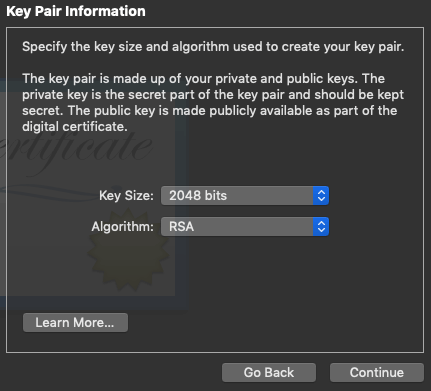
We can leave the next form with the default options
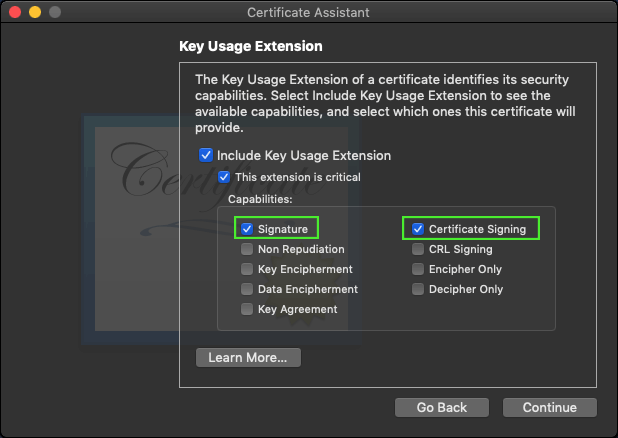
In Key Usage Extension check:
- Signature
- Certificate Signing
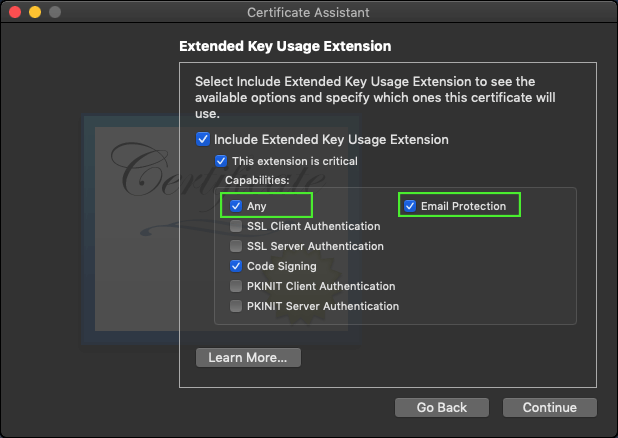
In Extended Key Usage Extension form check:
- Any
- Email protection
- Code Signing
We can continue until the end of the process with the default options.
Now in My Certificates appears our new self-signed certificate. Copy the value of the Expiration date, we will need it in the provision plist.
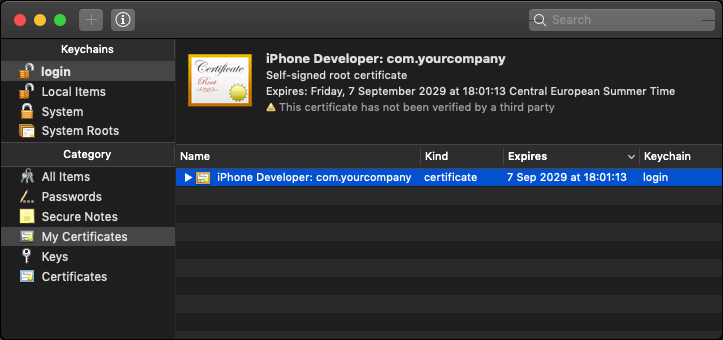
Our certificate is ready, now we need to create a mobileprovision file
Creating a mobile provision file
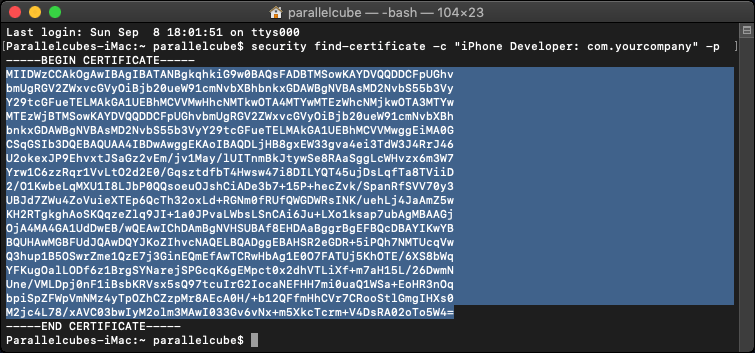
Before create the plist file we need the previous certificate in Privacy-Enhanced Mail (PEM) format. To obtain that we can Open a terminal and run
security find-certificate -c “iPhone Developer: com.yourcompany” -p
Now we can create the provision.plist file to configure the mobile provision file.
There is a plist template that can be used:
<?xml version="1.0" encoding="UTF-8"?>
<!DOCTYPE plist PUBLIC "-//Apple//DTD PLIST 1.0//EN" "http://www.apple.com/DTDs/PropertyList-1.0.dtd">
<plist version="1.0">
<dict>
	<key>AppIDName</key>
	<string>selfsigned: any app</string>
	<key>ApplicationIdentifierPrefix</key>
	<array>
	<string>com.yourcompany</string>
	</array>
	<key>CreationDate</key>
	<date>2019-09-07T18:01:13Z</date>
	<key>Platform</key>
	<array>
		<string>iOS</string>
	</array>
	<key>IsXcodeManaged</key>
	<false/>
	<key>DeveloperCertificates</key>
    <array>
        <data>MIIDWzCCAkOgAwIBAgIBATANBgkqhkiG9w0BAQsFADBTMSowKAYDVQQDDCFpUGhvbmUgRGV2ZWxvcGVyOiBjb20ueW91cmNvbXBhbnkxGDAWBgNVBAsMD2NvbS55b3VyY29tcGFueTELMAkGA1UEBhMCVVMwHhcNMTkwOTA4MTYwMTEzWhcNMjkwOTA3MTYwMTEzWjBTMSowKAYDVQQDDCFpUGhvbmUgRGV2ZWxvcGVyOiBjb20ueW91cmNvbXBhbnkxGDAWBgNVBAsMD2NvbS55b3VyY29tcGFueTELMAkGA1UEBhMCVVMwggEiMA0GCSqGSIb3DQEBAQUAA4IBDwAwggEKAoIBAQDLjHB8gxEW33gva4ei3TdW3J4RrJ46U2okexJP9EhvxtJSaGz2vEm/jv1May/lUITnmBkJtywSe8RAaSggLcWHvzx6m3W7Yrw1C6zzRqr1VvLtO2d2E0/GqsztdfbT4Hwsw47i8DILYQT45ujDsLqfTa8TViiD2/O1KwbeLqMXU1I8LJbP0QQsoeuOJshCiADe3b7+15P+hecZvk/SpanRfSVV70y3UBJd7ZWu4ZoVuieXTEp6QcTh32oxLd+RGNm0fRUfQWGDWRsINK/uehLj4JaAmZ5wKH2RTgkghAoSKQqzeZlq9JI+1a0JPvaLWbsLSnCAi6Ju+LXo1ksap7ubAgMBAAGjOjA4MA4GA1UdDwEB/wQEAwIChDAmBgNVHSUBAf8EHDAaBggrBgEFBQcDBAYIKwYBBQUHAwMGBFUdJQAwDQYJKoZIhvcNAQELBQADggEBAHSR2eGDR+5iPQh7NMTUcqVwQ3hup1B5OSwrZme1QzE7j3GinEQmEfAwTCRwHbAg1E0O7FATUj5KhOTE/6XS8bWqYFKugOalLODf6z1BrgSYNarejSPGcqK6gEMpct0x2dhVTLiXf+m7aH15L/26DwmNUne/VMLDpj0nF1iBsbKRVsx5sQ97tcuIrG2IocaNEFHH7mi0uaQ1WSa+EoHR3nOqbpiSpZFWpVmNMz4yTpOZhCZzpMr8AEcA0H/+b12QFfmHhCVr7CRooStlGmgIHXs0M2jc4L78/xAVC03bwIyM2olm3MAwI033Gv6vNx+m5XkcTcrm+V4DsRA02oTo5W4=</data>
    </array>
	<key>Entitlements</key>
	<dict>
		<key>keychain-access-groups</key>
		<array>
			<string>com.yourcompany.*</string>
		</array>
		<key>get-task-allow</key>
		<true/>
		<key>application-identifier</key>
		<string>com.yourcompany.*</string>
		<key>com.apple.developer.associated-domains</key>
		<string>*</string>
		<key>com.apple.developer.team-identifier</key>
		<string>com.yourcompany</string>
		<key>aps-environment</key>
		<string>development</string>
	</dict>
	<key>ExpirationDate</key>
	<date>2029-09-07T18:01:13Z</date>
	<key>Name</key>
	<string>Self Signed Provisioning Profile</string>
	<key>ProvisionedDevices</key>
	<array>
		<string>49d262568f2b366fc4c09b5b25354f63d6b2a5b2</string>
	</array>
	<key>LocalProvision</key>
	<true/>
	<key>TeamIdentifier</key>
	<array>
		<string>com.yourcompany</string>
	</array>
	<key>TeamName</key>
	<string>com.yourcompany</string>
	<key>TimeToLive</key>
	<integer>3652</integer>
	<key>UUID</key>
	<string>B5A2908D-D6EE-476E-AF18-D99AE14684AA</string>
	<key>Version</key>
	<integer>1</integer>
</dict>
</plist>
Available changes:
- Company, group, team names: the same used in Organization Unit during the creation of the certificate (com.yourcompany), don’t forget the wildcards in some keys
- CreationDate, ExpirationDate, TimeToLive: The same values than our selfsigned certificate
- DeveloperCertificates: The PEM of our selfsigned certificate
- ProvisionedDevices: If you have a device for testing can be added here
- Name: The name that will appear in the mobile provision profiles list
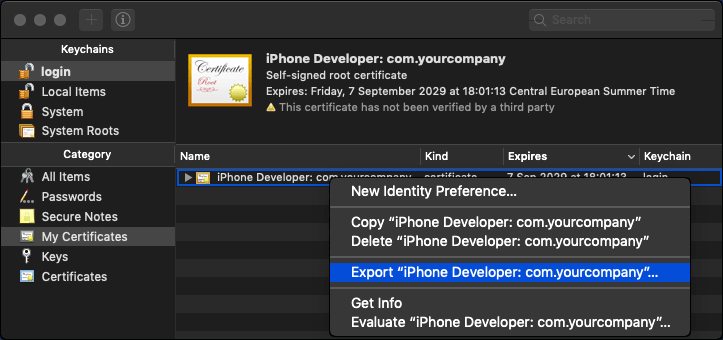
Now we need to go back to the keychain and export the certificate in p12 format
Fill the output name and set the file format to Personal Information Exchange (.p12)
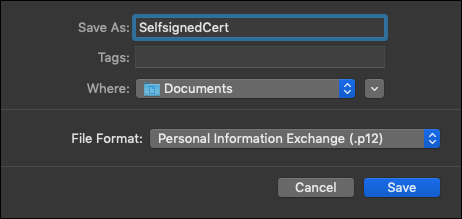
A promt appears to set a password to protect the access to this file, this password will be used in the next step. Now we have a SelftsignedCert.p12 file.
Now we need an OpenSSL version with support for cms.
Error: ‘cms’ is an invalid command.
The version included in OS X has disabled the CMS support. In order to enable CMS support we will have to compile your own version of OpenSSL.
We can compile it in mac using the source code with enable-cms in the configure options, or we can use the version of other platform, like windows, that have the cms support enabled by default.
(I have openssl with cms support already installed in my windows platform so I’m going to copy the SelftsignedCert.p12 and continue the rest of the tutorial using that version, but the process must work in Mac too)
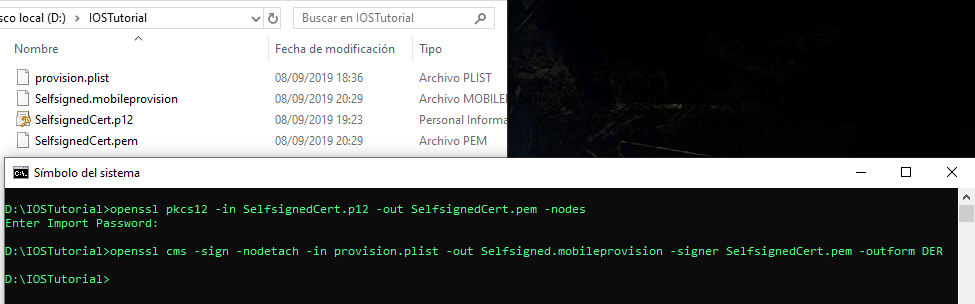
Open a command prompt and run:
openssl pkcs12 -in SelfsignedCert.p12 -out SelfsignedCert.pem -nodes
And put the export password. Now we have created a SelfsignedCert.pem file
In the same command prompt run:
openssl cms -sign -nodetach -in provision.plist -out Selfsigned.mobileprovision -signer SelfsignedCert.pem -outform DER
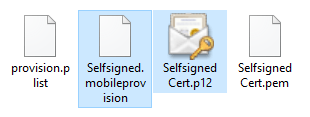
Finally a Selfsigned.mobileprovision have been created in the folder
With this two files now we can go to configure our Unreal Engine 4 project for iOS remote build:
- Selfsigned.p12
- Selfsigned.mobileprovision
Part2: Remote iOS project set-up
2020/10/06 – Updated to macOS 10.14.6 and Xcode 11.1


Support this blog!
For the past year we have been dedicating more of our time to the creation of tutorials, mainly about game development. If you think these posts have either helped or inspired you, please consider supporting this blog. Thank you so much for your contribution!


