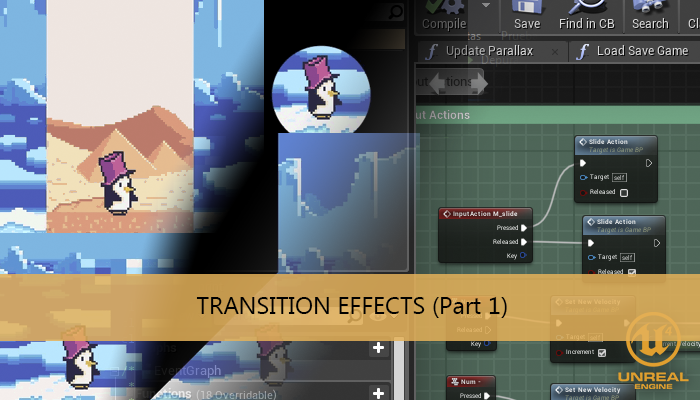
With this tutorial I will show you how to make basic transition using materials. A transition can be used to separate a map scene with a battle scene, or show the pause screen, it have a lot of applications.
During this tutorial we are using surface materials that can be applied to the background sprite and UI materials that can be used in UI widget components
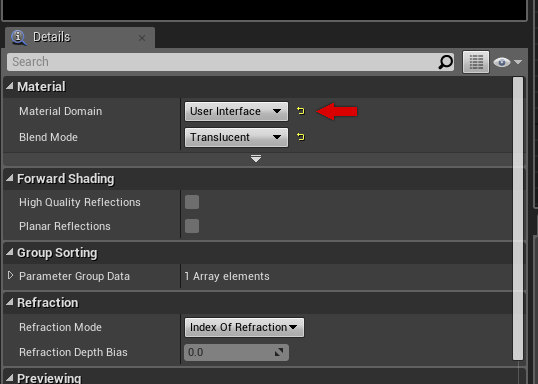
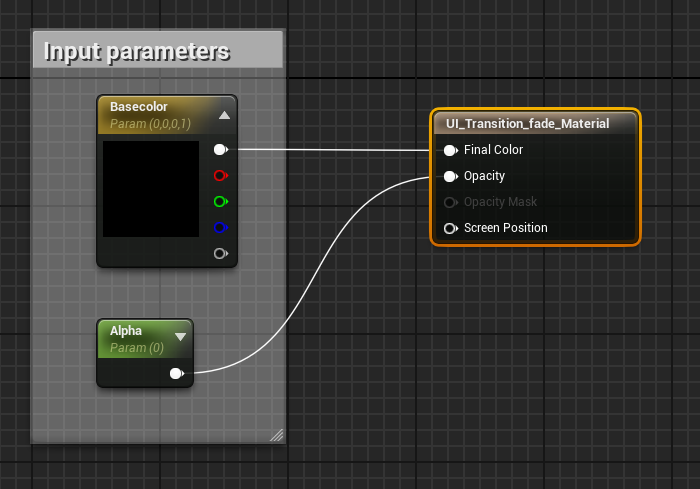
We must select User Interface in the material domain drop down to be able to use this material on UI widgets.
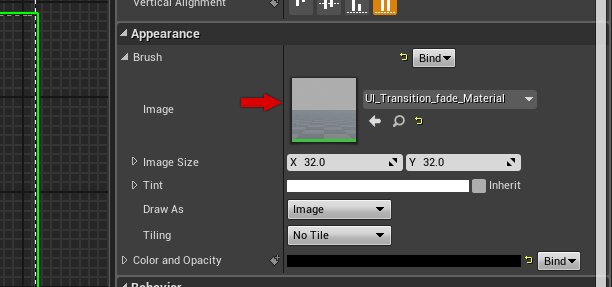
We can create an image component in the UI widget and set our material in the Image field
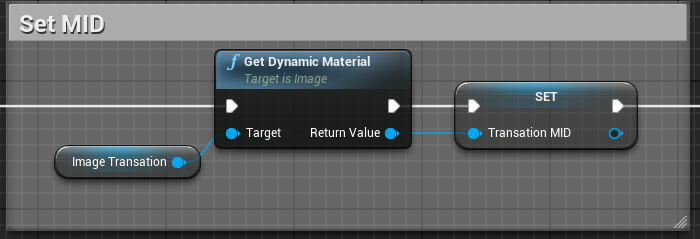
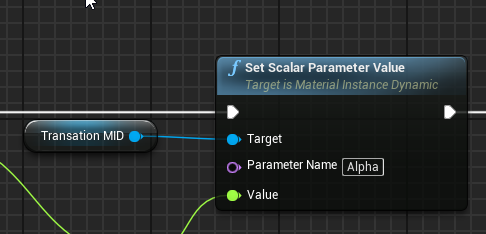
The initialization of our MID variable is similar to the surface material but we must use Get Dynamic Material function instead of the Create Dynamic Instance Material
To set the material parameter we can use the same functions
Now I can show you some examples.
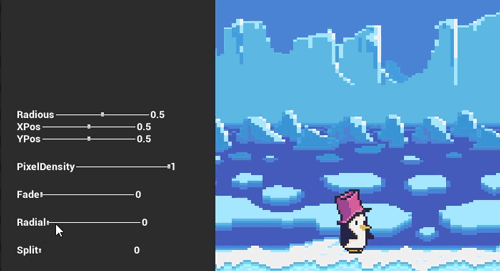
Fade to black
The most basic transition, a fade to color transition. We can put an image component in our UI widget covering the screen and can change the alpha value over the time.
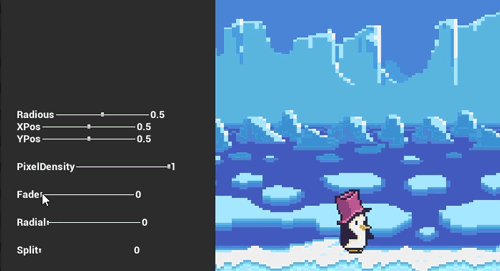
The material has one input to select the color and other for the alpha value
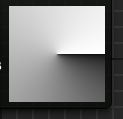
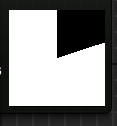
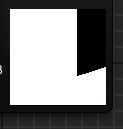
Angle cutoff
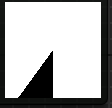
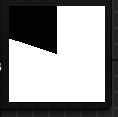
To do this type of transition we must use a gradient texture, and set a variable to increment the alpha threshold. When the pixel color is greater than the threshold we set the alpha to the maximum alpha value 1, if it is smaller we set the minimum value 0. This method will result in a sharp angle transition.
To do a dynamic gradient texture we can use VectorToRadialValue function, the result is a smooth angle gradient

Using the above if statment we can obtain a more sharp shape

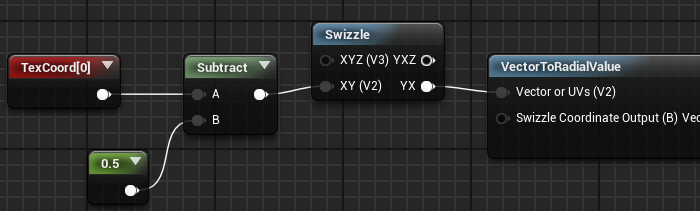
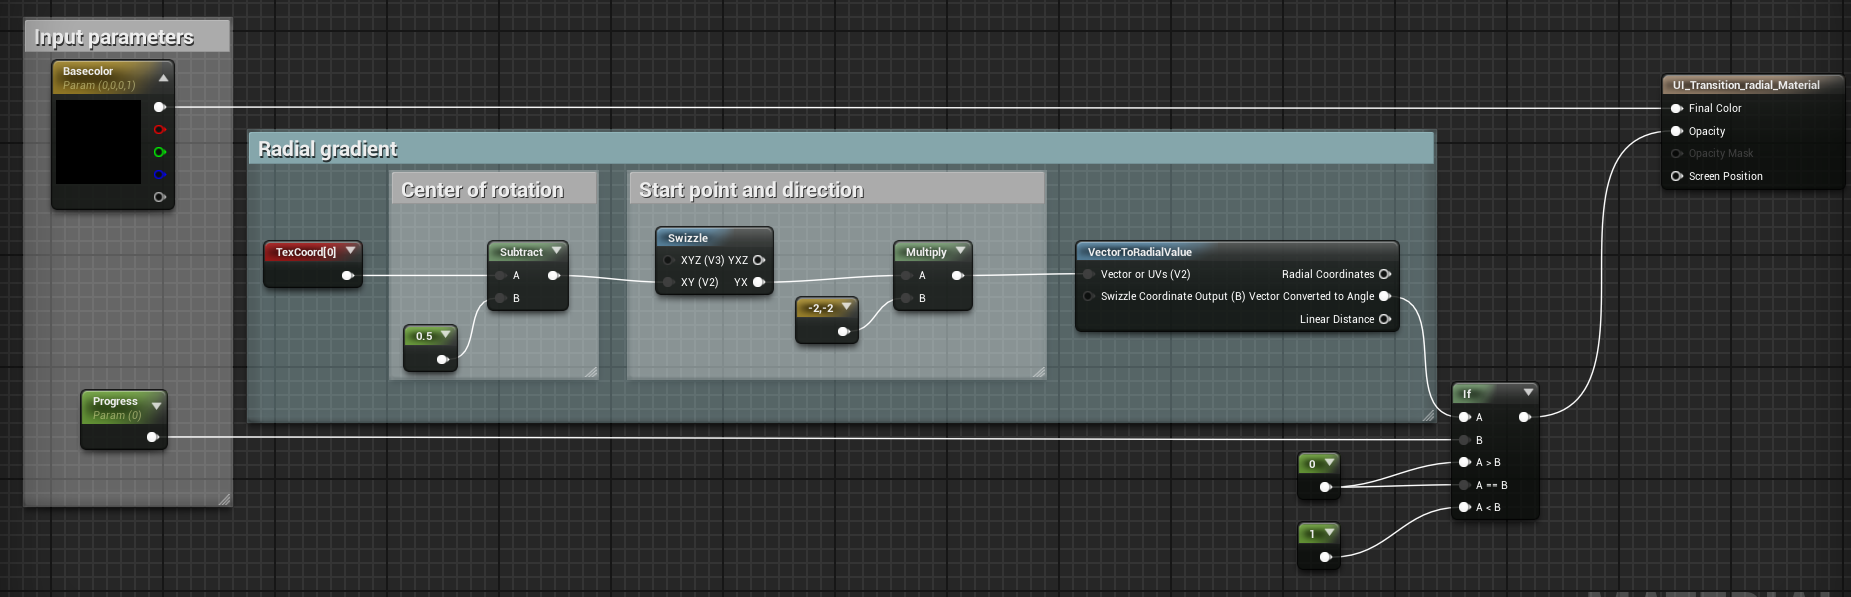
To edit de direction of the transition we can connect a Swizzle function between the textcoord node and the UV input of VectorToRadialValue but before that we must shift the coords to center the gradient so we will substract 0.5 to the textcoord node. We can apply a 2d vector instead of a scalar parameter to vary independently the X and Y coordinate, and center the transition in a screen object for example.
Center param
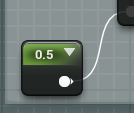
0.5 value
0.8 value
But we want to start the animation from the top so we need to insert a flip, apply a multiply using a 2d vector will do that.

Flip factor
Vector (-2,-2)
Vector (-2,2)

Vector (2,-2)
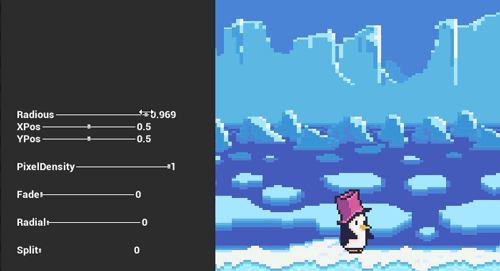
Radial cutoff

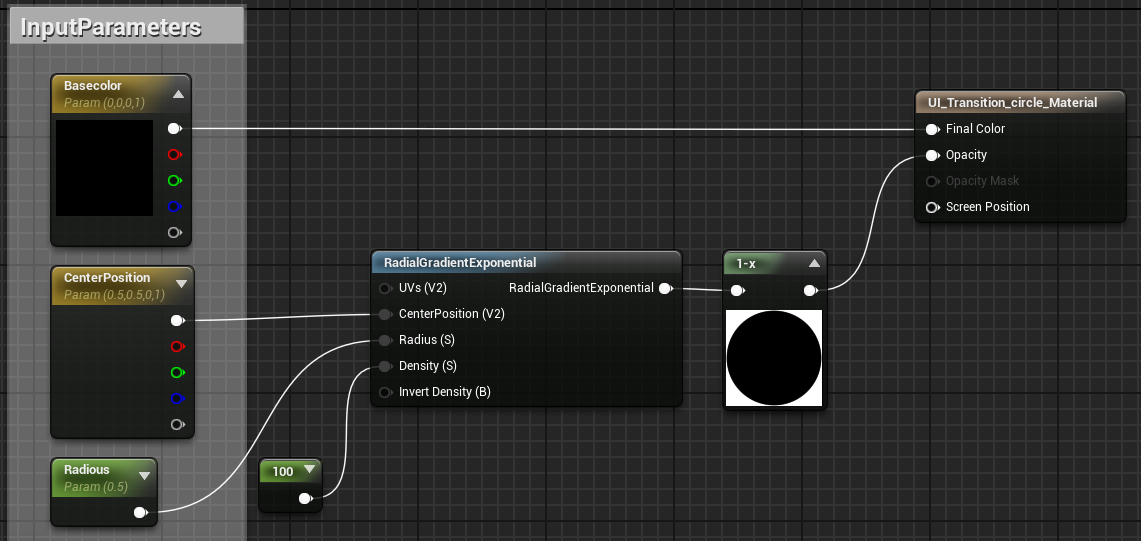
The main function of this material is RadialGradientExponential
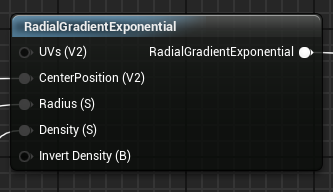
This function creates a smooth circle shape gradient. The smoothness of the shape is controlled by the Density input, lower values result in a smoother shape, higher values in a sharper edge.
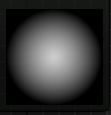
Density 1
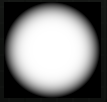
Density 4
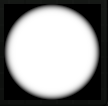
Density 10
We can control de center of the shape using de CenterPosition input, using a 2D vector can especify different values for X and Y axis. Material UV coordinates take values between 0.0 and 1.0 so to center the shape in the material we must set the vector (0.5,0.5)
The value of radious needed to fill the texture must be calculated using the center position, if we set the circle in the middle of the material only need a value of 0.71 to fill the texture, with a center on (0.25,0.25) we need to increase the radious until 1.06.
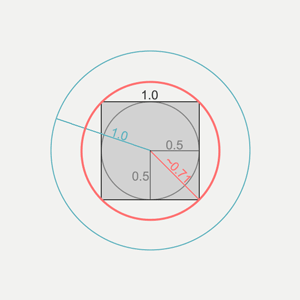
Center (0.5, 0.5) only need radious 0.7 to fill
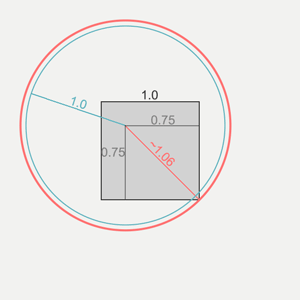
Center (0.25, 0,25) need radious 1.06 to fill
We can make funny animations using all the parameters
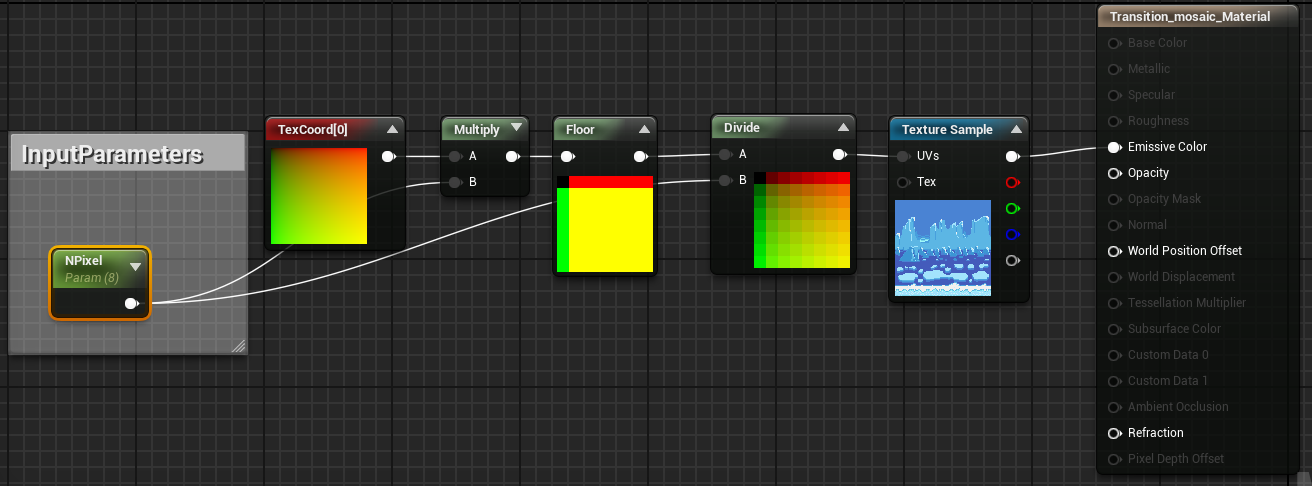
Mosaic or pixelation
This transation will be applied to the background so we will set the domain of material on surface

To pixelate a material we have to modify the UV coordinates so that they are no longer a smooth gradient. We can add a scalar parameter to control the pixel density of the transition.
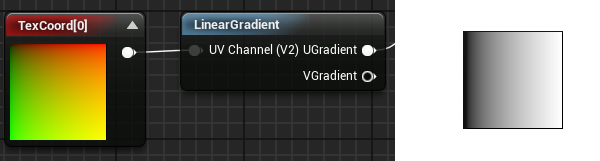
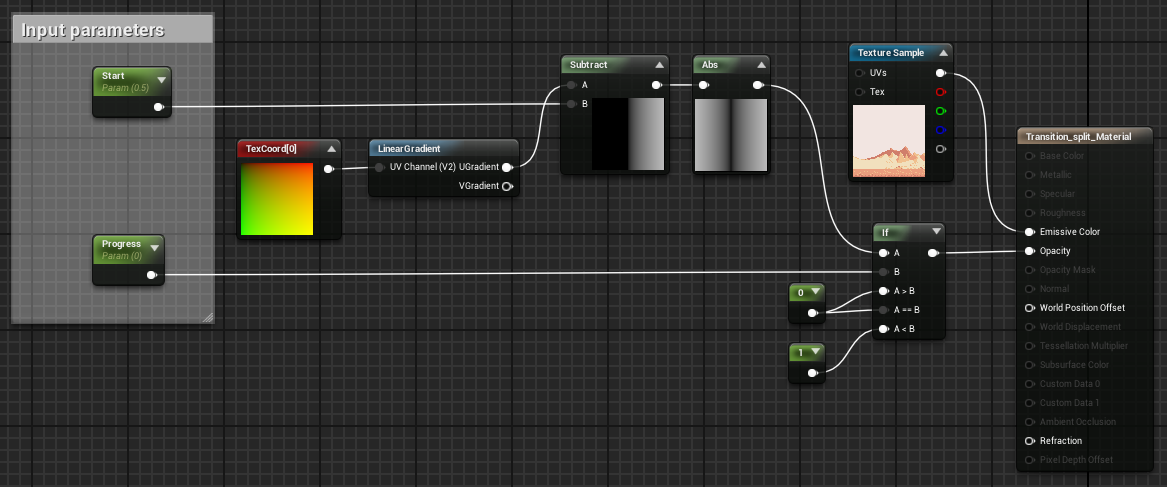
Linear cutoff
To obtain this transition effect we can use the LinearGradient function with the same if statement used in the previous angle transition to reduce the smoothness
Simple but effective transition
We can add a parameter to establish the start position of the split. Using the Abs function the result is a split spreading to both sides.

To be continued…. (part 2)
You may also like:

Support this blog!
For the past year we have been dedicating more of our time to the creation of tutorials, mainly about game development. If you think these posts have either helped or inspired you, please consider supporting this blog. Thank you so much for your contribution!


Hello Thanks for these tutorials.
My Image with material work fine in editor but in standalone build it does not work.
Is there any help ??
Hi!
We need more data to investigate the problem, like the unreal engine version and the build platform.
Can you provide a minimal example project to reproduce the error? Or at least the material with the image to check if there is any error.
You can send me a zip to [email protected]