This is a recopilation of the tweaks that I consider the most useful to optimize your SSD (Solid state drive) performance on Windows 10 platform
One of the considerations to increase de lifespan of an SSD is to reduce the unnecessary writing to disk. Write times can be a little slower than read times so reducing the write operation will result in a performance increase.
Remove pagefile
Disable Indexing
Disable prefetch and superfetch
Verify TRIM
Disable Fast Startup
Move Temp folders
Move User folders
Set Recycle Bin size
Remove pagefile
Windows uses a page file to store memory data that can’t be held by the RAM. This is useful only if you have a low RAM size. If you have enough RAM installed you can disable the pagefile in this drive, or move it a different disk.
Start button > search Control Panel and select System
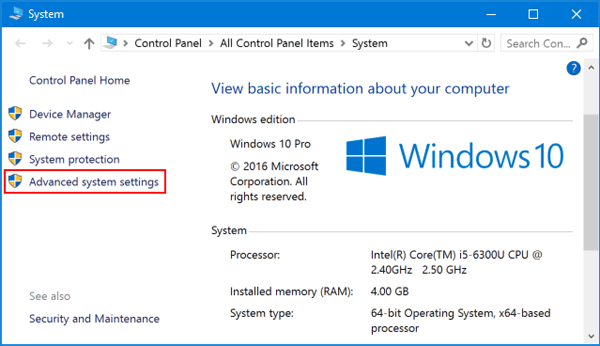
Go to Advanced system settings
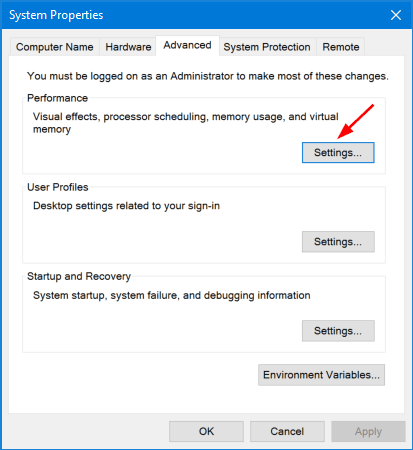
Advanced tab > Performance section > Settings
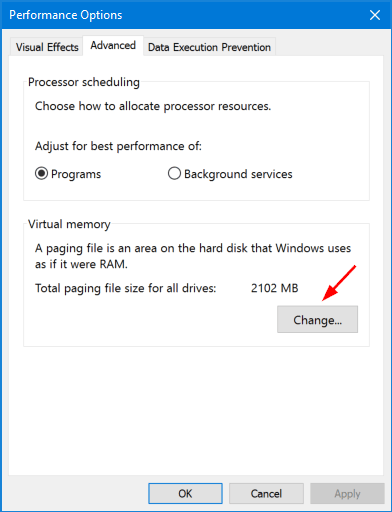
Advanced tab > Virtual Memory section > Change
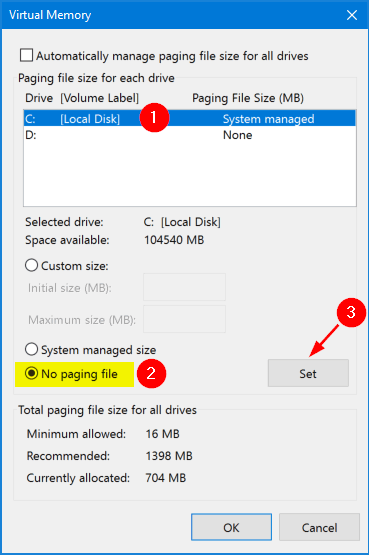
Uncheck “Automatically manage paging file size for all drives”
Select your SSD drive > Select No paging file > Set
Disable Indexing
The indexing service in Windows is implemented to make the search function perform faster by storing an index of file locations. The quick response times of SSDs make this service obsolete and unnecessary
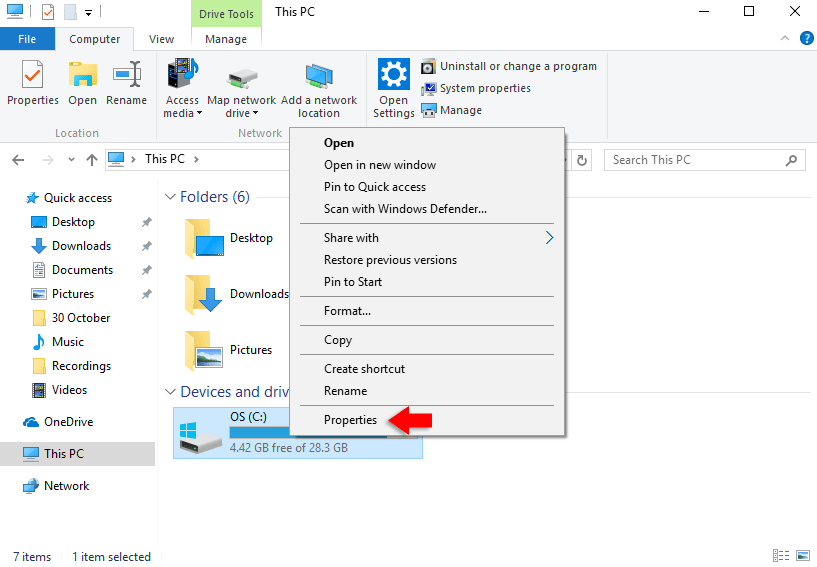
Select your SSD drive > Right click > Properties
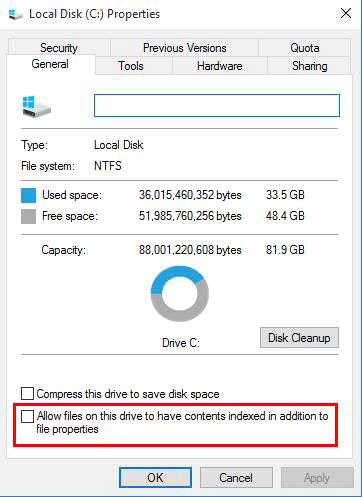
Uncheck “Allow files on this drive to have contents indexed in addition to file properties”
Apply
OK
Disable prefetch and superfecth
Those techniques is to speed up visiting in Windows XP and Vista system. SSD doesn’t need this at all.
Start button and search Regedit
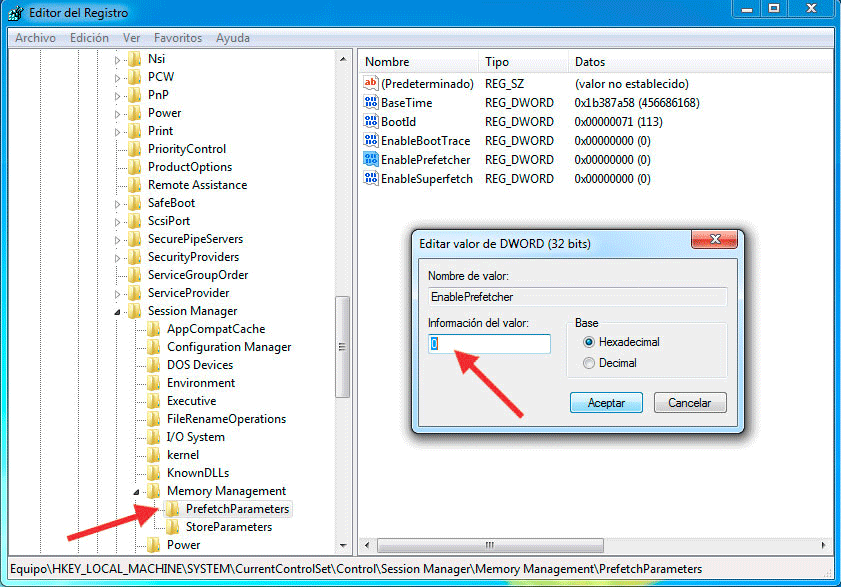
Navigate to HKEY_LOCAL_MACHINE\SYSTEM\CurrentControlSet\Control\Session Manager\Memory Management\PrefetchParameters
Set EnablePrefetcher and EnableSuperfetch to 0
If you don’t have an entry for EnableSuperfetch only disable the Sysmain Service.
Start button > search for Services
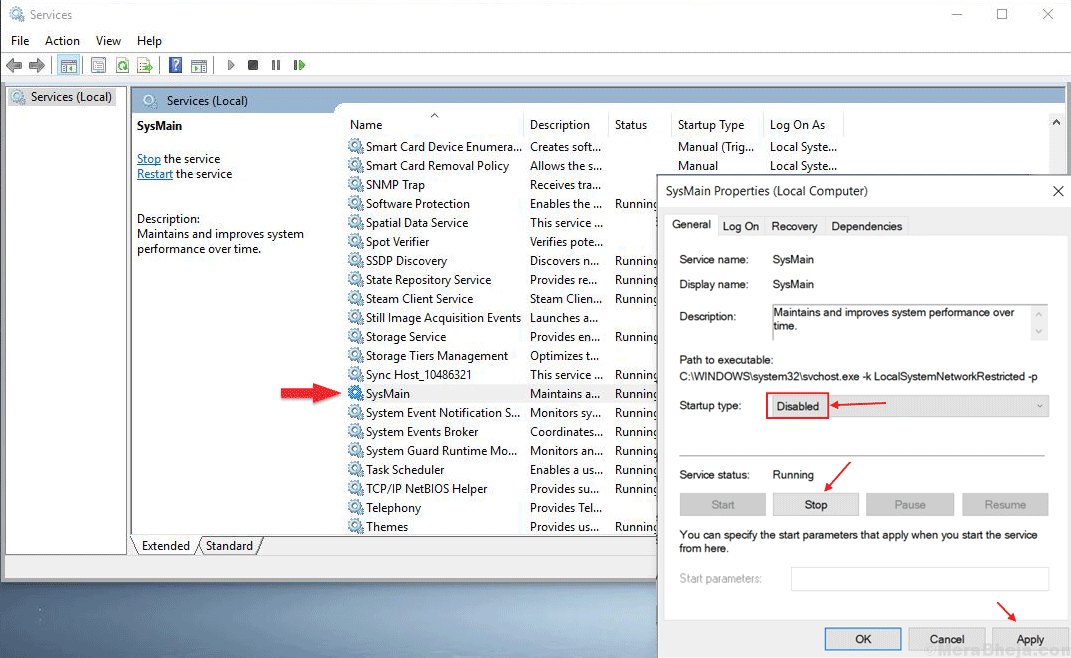
Search for SysMain service and set Startup type to Disable and you can Stop it if it’s already running.
Verify TRIM is Functioning
Open a Command Prompt window and run the command:
fsutil behavior query DisableDeleteNotify
If it’s set to “0”, TRIM is enabled and everything is good. If it’s set to “1”, TRIM is disabled and you need to enable it
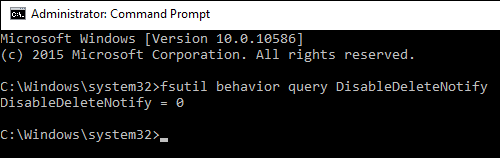
If TRIM is disabled you can enable it using this command:
fsutil behavior set DisableDeleteNotify 0

Disable Fast Startup
When you shut down your computer with Fast Startup enabled, Windows closes all applications and logs off all users, at this moment saves the current system state to the hibernation file, and turns off the computer.
When you start the computer again, Windows does not have to reload the kernel, drivers, and system state. Instead, it just refreshes your RAM with the loaded image from the hibernation file and delivers you to the login screen. This technique can save considerable time off your start up but it’s a substancial increase on disk writes. SSD drives has an aceptable startup speed so we can disable this option.
Start button > search Control Panel and select Power Options
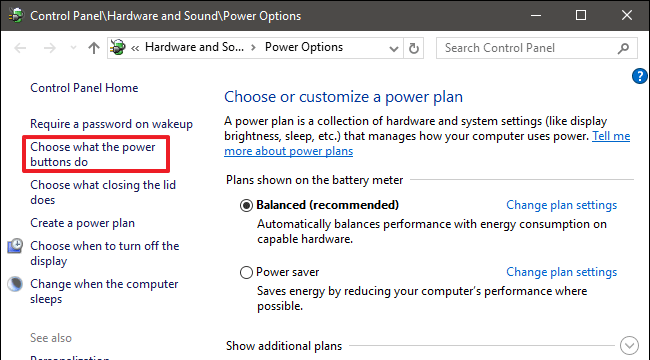
Click “Choose what the power buttons do”
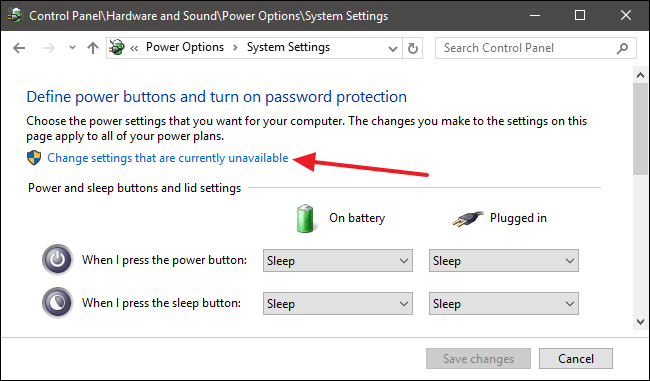
Click “Change settings that are currently unavailable”

Uncheck “Turn on fast startup (recommended)” and Save Changes
Move temp folder
One of the folders more overwrited are the temporary folders. If you have a HDD you can move the windows temp folders to this drive.
Create two new folders TEMP and TEMPUSER in your HDD drive.
TEMP folder will be used for the system when no user is logged.
Now we need to change the temp folder enviroment variables, so:
Start button > search Edit the system environment variables
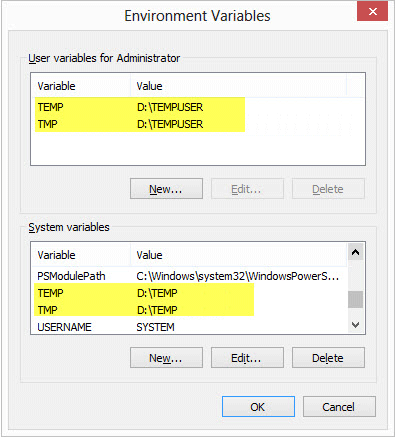
Change the TEMP and TMP variables to point to the new folders location in both sections.
Move User Folders
We can move some folders related to our user account like Downloads or Documents to other drive. This folders has no big impact in our SSD but it all adds up.
The first step is to create the new folders in our HDD drive, we need one folder for each user folder. I prefer to maintain the original folders hierarchy, so I will create:
D:\
D:\Users\
D:\Users\Downloads
D:\Users\Documents
D:\Users\Desktop
Now Right click on the first folder to move
(Downloads e.g.) in the left panel of the Windows explorer > Properties
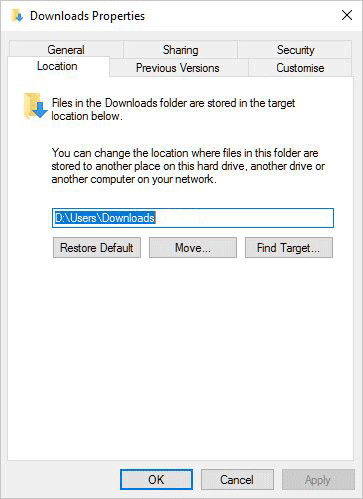
Select the Location tab, and put the path to the new folder.
Now Move
Apply
Ok
Repeat this steps with the other folders
Set Recycle Bin Size
By default the space reserved to the recycle bin for each disk is oversized.
I, personally, don’t need a recycle bin of 40 gb
To set the size of the recycle bin for each disk:
Right click on the Recycle Bin icon on yout Desktop.
Select Properties
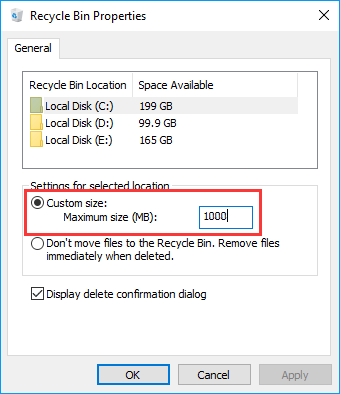
Select your SSD Drive
Set a new maximum size value in the Custom size field
Apply

Support this blog!
For the past year we have been dedicating more of our time to the creation of tutorials, mainly about game development. If you think these posts have either helped or inspired you, please consider supporting this blog. Thank you so much for your contribution!


