A short tutorial explaining how to make a simple clone of a third person character that can replicate all their movements. We are going to talk about some details of the Player Controller of Unreal Engine 4 and how it works.
We can start learning some concepts about the Third Person Character class that is included in the Third Person project template.
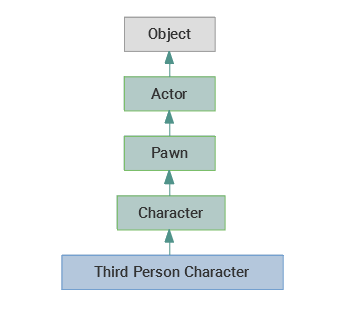
A Third Person Character is a Pawn that can be moved around the level. And a Pawn is and Actor that can be “possessed” and received input from a controller.
An important detail is that a Pawn must be possessed to be able to move around. Can be possessed with a Player Controller, in which case they accept and process the input of an user, or an AI Controller, we shall define their movement programmatically with this controller.
On the Details tab of the Third Person Character we can find the Pawn section.
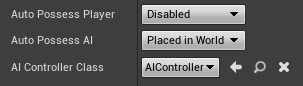
Here we have two important parameters to control the first possession. First we need to know that a Pawn can be only be possessed by one Controller of any type. We can’t have a Pawn controlled by a player and a AI controller at the same time.
Note: If we set All the Auto Possess to Disabled, we will have to use the node Spawn Default Controller. This node will add an AI Controller instance to the level and use it to control the pawn of their Target parameter.

We need to be careful with this node because with each call it will create a new Controller but leaves the previous controller in the level resulting in a leak of AI controller that do nothing besides waste resources.
For our purposes we will not need this node. We are going to add two Third Person Characters to our level with Auto Possess AI set to Placed in World.
When the level start without a Pawn possessed by a player then a Default Pawn is created automatically and the player takes their control. This is the class that we can find in the Default Pawn Class of the GameMode object.
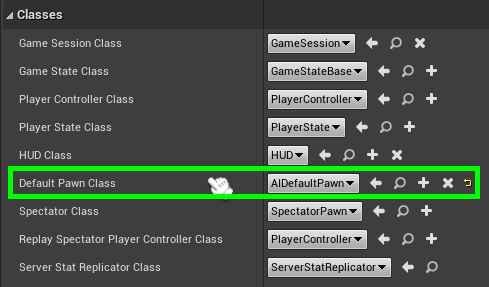
In our example we are going to use a Default Pawn but with their mesh hidden on render and without collisions, so we avoid to see an sphere in the level when it spawns.
Our Third Person Character
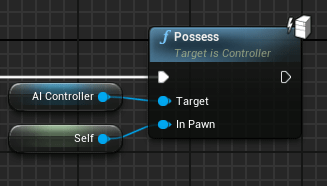
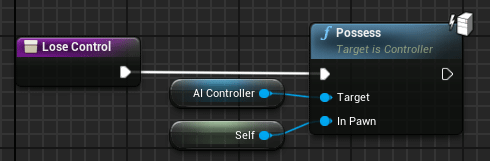
We want to be able to switch the player and clone in any moment so we need to store in each character a reference to their AI Controller to be used when the character is a clone. Using the Possess node we can make that the Controller of Target parameter take control of the Pawn (our character) of In Pawn parameter. This will be used when the character must be converted to a clone.
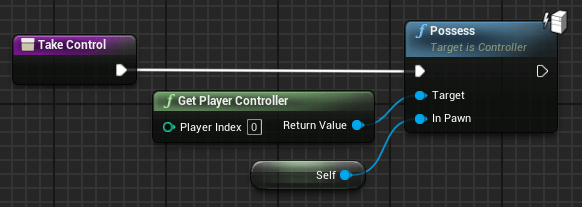
For the player controller we don’t need to store any reference as we can access to that using the node Get Player Controller and a player index. This option will be used when we want to take control of the character.

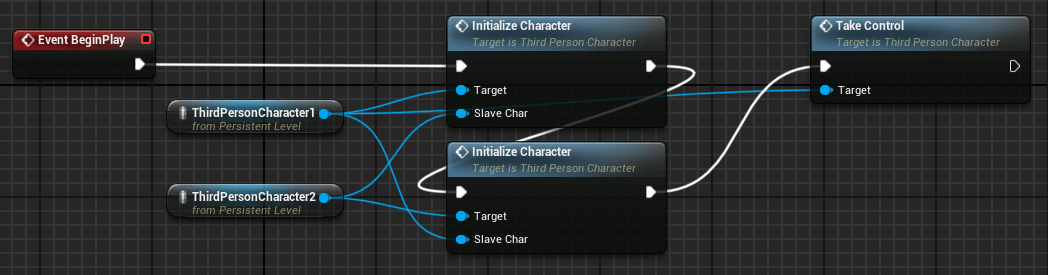
Each character will have a reference to the other character to switch their control easily. And with this our initialization function can be defined as:
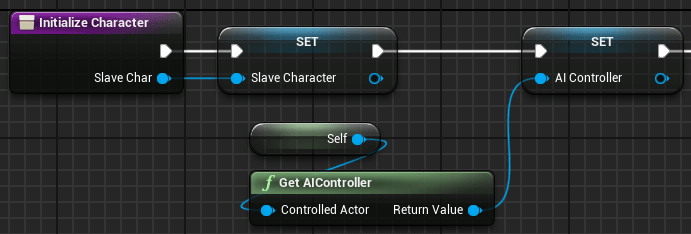
In the Blueprint of the level we must call to the Initialize Character function of each Third Person Character to connect both characters and possess one of them with the player controller.
Now we can continue with the movement events. We can start with the jump event, and easy way to look how we need to distribute the player input.

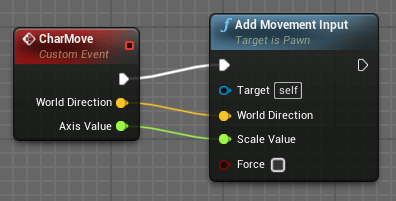
An important note: The input event will trigger only on the character controlled by the player, so we need to take the reference to the other character and propagate the movement to both characters. Actions over pawn, like Jump or Add Movement Input, only will move a character if it is controlled by a Player Controller or an AI Controller, so we can’t have a character without a controller.
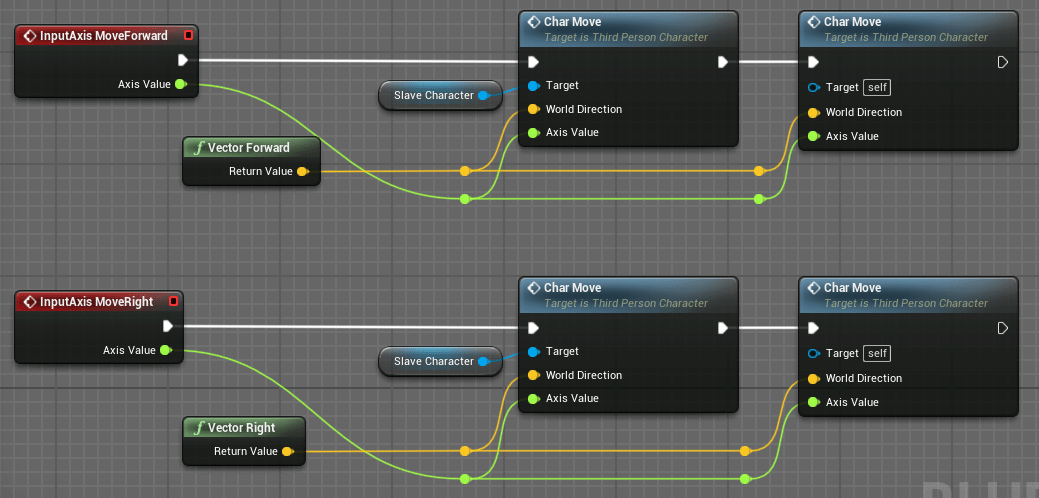
The other two movement events are to control the other two axis, one for forward/backward and other for Right/Left. We need to propagate the movement using the same flow that with the Jump event.
Now the last part, to switch our character controller we are going to use the Tab key to initiate the sequence of possession change.

Remember, this event is only triggered in the character with the player controller. So we need to change their controller to their AI Controller and call the function using the reference to the other character to take possession of the player controller.
After the controller change, the movement events will stop trigger in the master character and the slave character will capture this events.
The nodes used to change the controllers are the same that we have explained a few lines above. To take the control of the character using the Get Player Controller node as input
And to lose the control using the AI Controller reference stored in the character variable
Level Blueprint
In the Blueprint level, after both character has been initialized, we need to possess one of the them, and that’s all!
Always two there are, no more, no less. A master and an apprentice
Yoda
Now when the player moves around the level the clone does the same movements. As we are propagating the player inputs, if one of the character collides with an object the other will continue their movement. Pressing Tab key our characters switch their roles.
Tutorial files
You may also like:

Support this blog!
For the past year we have been dedicating more of our time to the creation of tutorials, mainly about game development. If you think these posts have either helped or inspired you, please consider supporting this blog. Thank you so much for your contribution!


Thank you so much.
Have a good day.
I would love to see a video explanation (even in Spanish) tutorial as nobody seems to be explaining this.
Hi there, thanks for the tutorial. is there a way we can get a more in-depth photo from Blueprin or a video tutorial maybe explaining the full process?