We have received several requests for the outline effect tutorials so we have decided to open a new tutorial talking about two of this requests: Opaque zones and distance effect.
Part 1: Outline effect
Part 2: Occlusion, colors and glow
Part 3: Opaque zones
Part 4: Depth limit
Depth limit
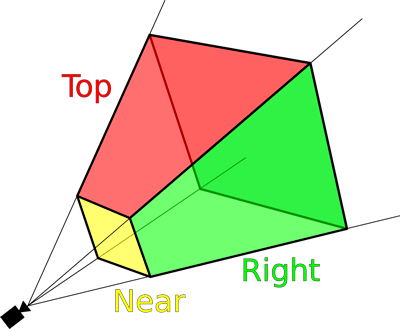
Our first task is to understand how to measure the depth. The value of the Custom depth is relative to the camera view position, to measure this we can draw (use your imagination) a frustum from the camera position. The height of the frustum is the maximum depth to witch the outline effect will be applied.
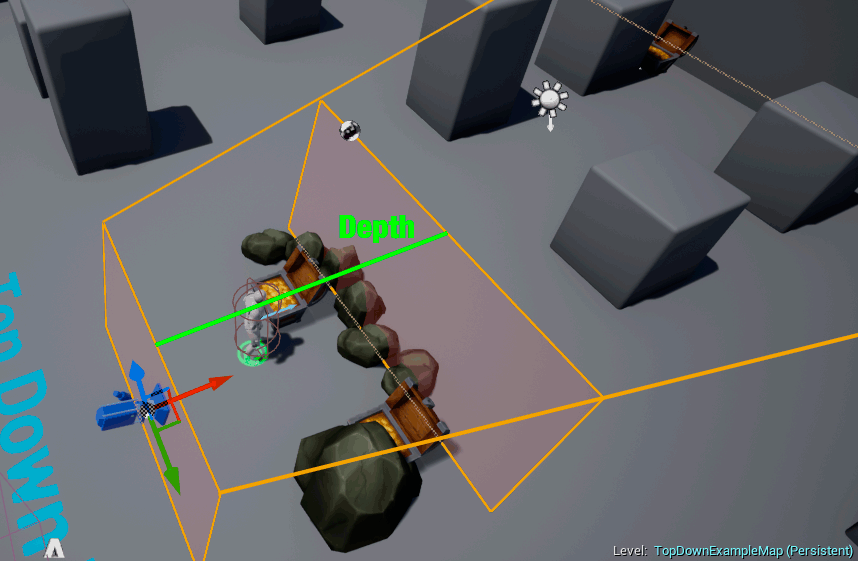
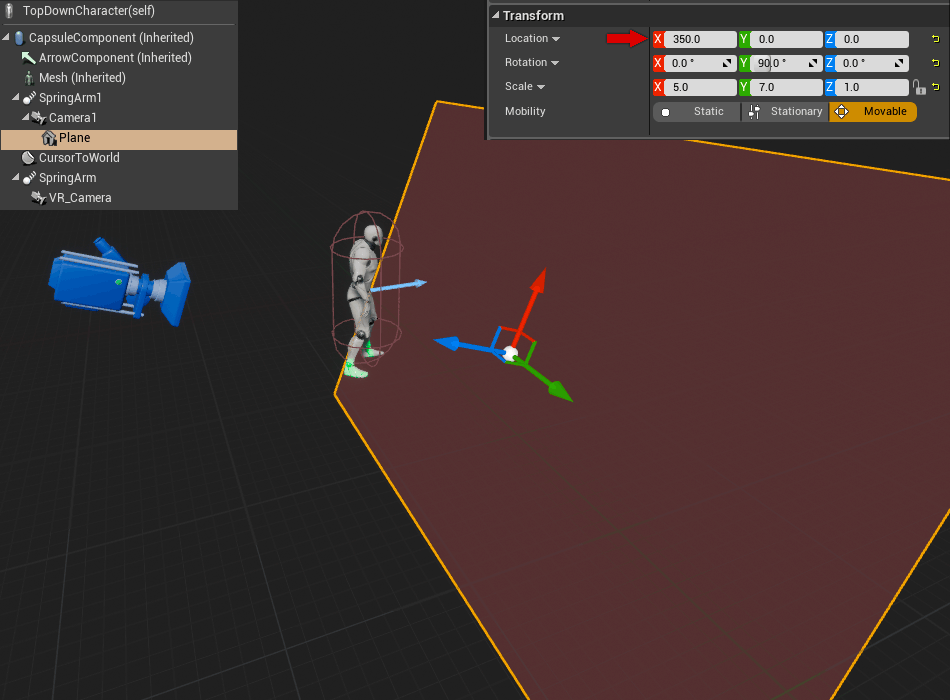
One option to see the limit in realtime is to add a plane to the character camera with a translucent material. For our example the X-coord will determinate the effect frontier.
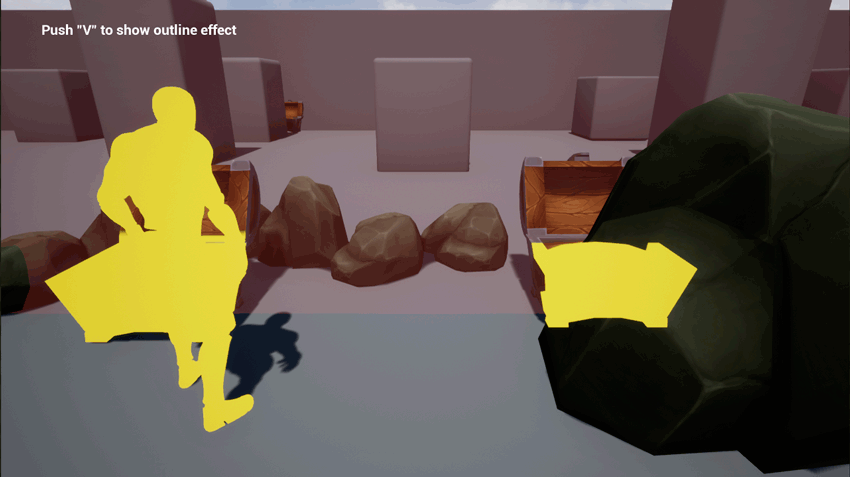
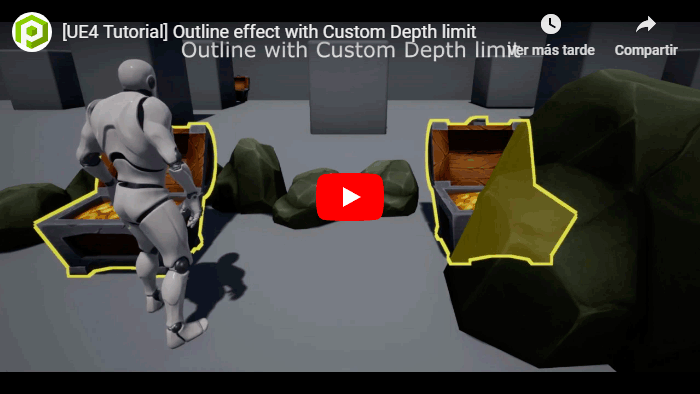
Now in the scene we can see a red translucent panel to indicate the limit of the effect, if the character moves around the map this plane goes with it.
The unreal material
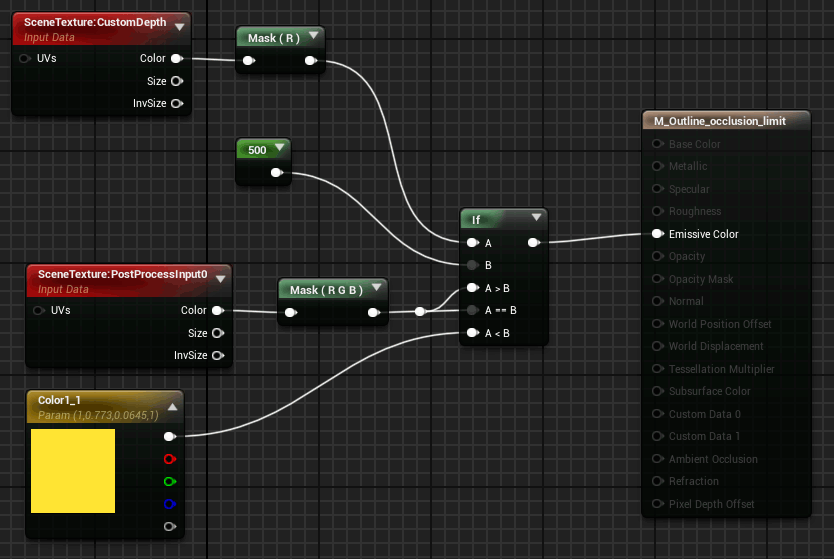
We can start making a material to paint the area effect. With this simple material we can see easily the zone our effect will be applied, we have set a maximum depth of 500 for this example
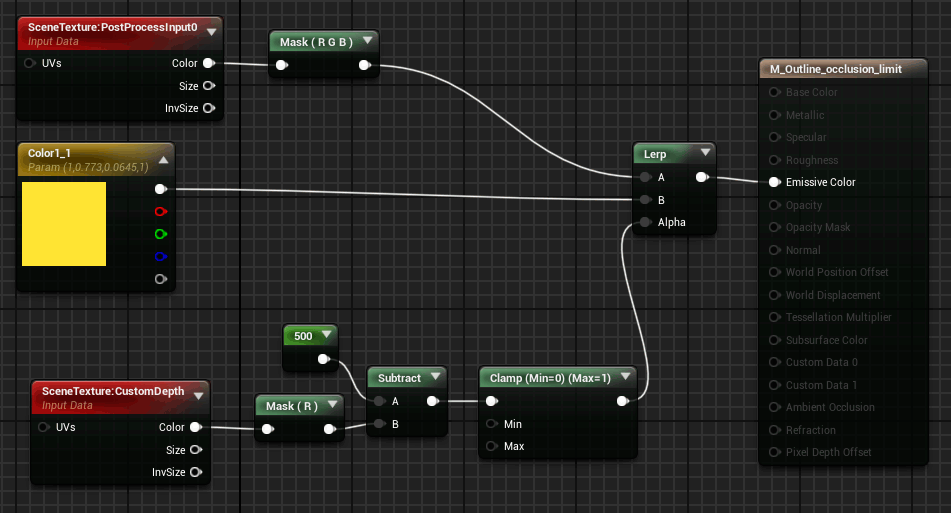
Using a more elegant way but with the same result
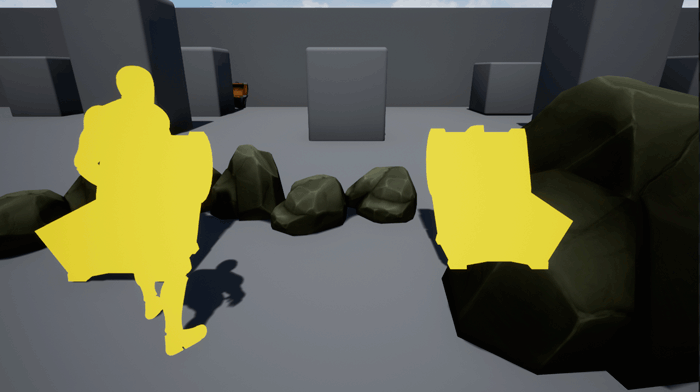
As we can see now the farthest chest has no visible outline effect
To apply this limit to our oultine-with-occlusion material we need to replace the SceneTexture:CustomDepth of the above material with a new HLSL node, this is necessary because we don’t have any depth information in the line of the outline effect, it has been added in realtime to the object and does not belong to it, does not have Custom Stencil or Depth value. So we need a variation of the Neighboring pixel calculation node, we must to use the custom depth values of the object surface to calculate the “depth” for each pixel of the outline.
So instead of use only the Custom Stencil value…
float TL = GetScreenSpaceData(ScreenPosition + float2(-offset_h, -offset_v), false).GBuffer.CustomStencil.r;
… we must add and inline check for the Custom Depth value
float TL = GetScreenSpaceData(ViewportUVToBufferUV(ScreenPosition + float2(-offset_h, -offset_v)), false).GBuffer.CustomStencil.r > 0 ? GetScreenSpaceData(ViewportUVToBufferUV(ScreenPosition + float2(-offset_h, -offset_v)), false).GBuffer.CustomDepth.r : 0;
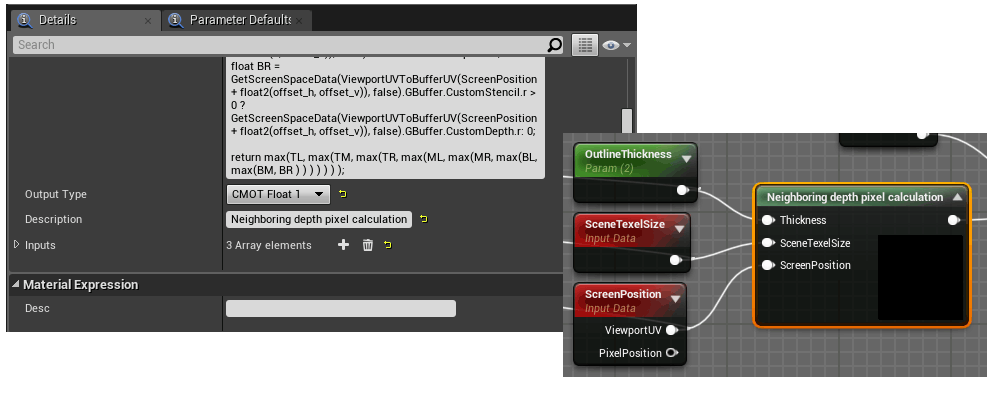
Finally the HLSL code of the Neighboring-depth-pixel-calculation:
#if SCENE_TEXTURES_DISABLED
    return 0;
#endif
float offset_h = SceneTexelSize.r * Thickness;
float offset_v = SceneTexelSize.g * Thickness;

float TL = GetScreenSpaceData(ViewportUVToBufferUV(ScreenPosition + float2(-offset_h, -offset_v)), false).GBuffer.CustomStencil.r > 0 ? GetScreenSpaceData(ViewportUVToBufferUV(ScreenPosition + float2(-offset_h, -offset_v)), false).GBuffer.CustomDepth.r : 0;
float TM = GetScreenSpaceData(ViewportUVToBufferUV(ScreenPosition + float2(0, -offset_v)), false).GBuffer.CustomStencil.r > 0 ?GetScreenSpaceData(ViewportUVToBufferUV(ScreenPosition + float2(0, -offset_v)), false).GBuffer.CustomDepth.r: 0;
float TR = GetScreenSpaceData(ViewportUVToBufferUV(ScreenPosition + float2(offset_h, -offset_v)), false).GBuffer.CustomStencil.r > 0 ? GetScreenSpaceData(ViewportUVToBufferUV(ScreenPosition + float2(offset_h, -offset_v)), false).GBuffer.CustomDepth.r: 0;

float ML = GetScreenSpaceData(ViewportUVToBufferUV(ScreenPosition + float2(-offset_h, 0)), false).GBuffer.CustomStencil.r > 0 ? GetScreenSpaceData(ViewportUVToBufferUV(ScreenPosition + float2(-offset_h, 0)), false).GBuffer.CustomDepth.r: 0;
float MR = GetScreenSpaceData(ViewportUVToBufferUV(ScreenPosition + float2(offset_h, 0)), false).GBuffer.CustomStencil.r > 0 ? GetScreenSpaceData(ViewportUVToBufferUV(ScreenPosition + float2(offset_h, 0)), false).GBuffer.CustomDepth.r: 0;

float BL = GetScreenSpaceData(ViewportUVToBufferUV(ScreenPosition + float2(-offset_h, offset_v)), false).GBuffer.CustomStencil.r > 0 ? GetScreenSpaceData(ViewportUVToBufferUV(ScreenPosition + float2(-offset_h, offset_v)), false).GBuffer.CustomDepth.r: 0;
float BM = GetScreenSpaceData(ViewportUVToBufferUV(ScreenPosition + float2(0, offset_v)), false).GBuffer.CustomStencil.r > 0 ? GetScreenSpaceData(ViewportUVToBufferUV(ScreenPosition + float2(0, offset_v)), false).GBuffer.CustomDepth.r: 0;
float BR = GetScreenSpaceData(ViewportUVToBufferUV(ScreenPosition + float2(offset_h, offset_v)), false).GBuffer.CustomStencil.r > 0 ? GetScreenSpaceData(ViewportUVToBufferUV(ScreenPosition + float2(offset_h, offset_v)), false).GBuffer.CustomDepth.r: 0;

return max(TL, max(TM, max(TR, max(ML, max(MR, max(BL, max(BM, BR ) ) ) ) ) ) );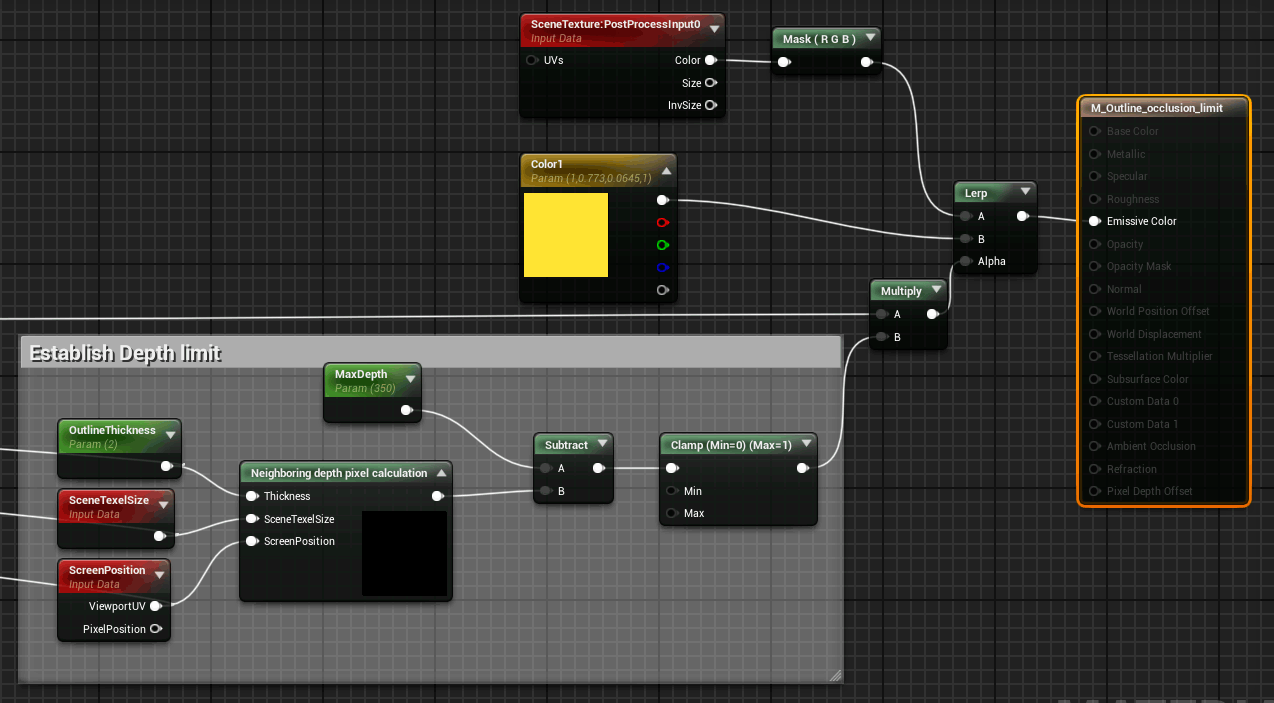
Bringing it all together
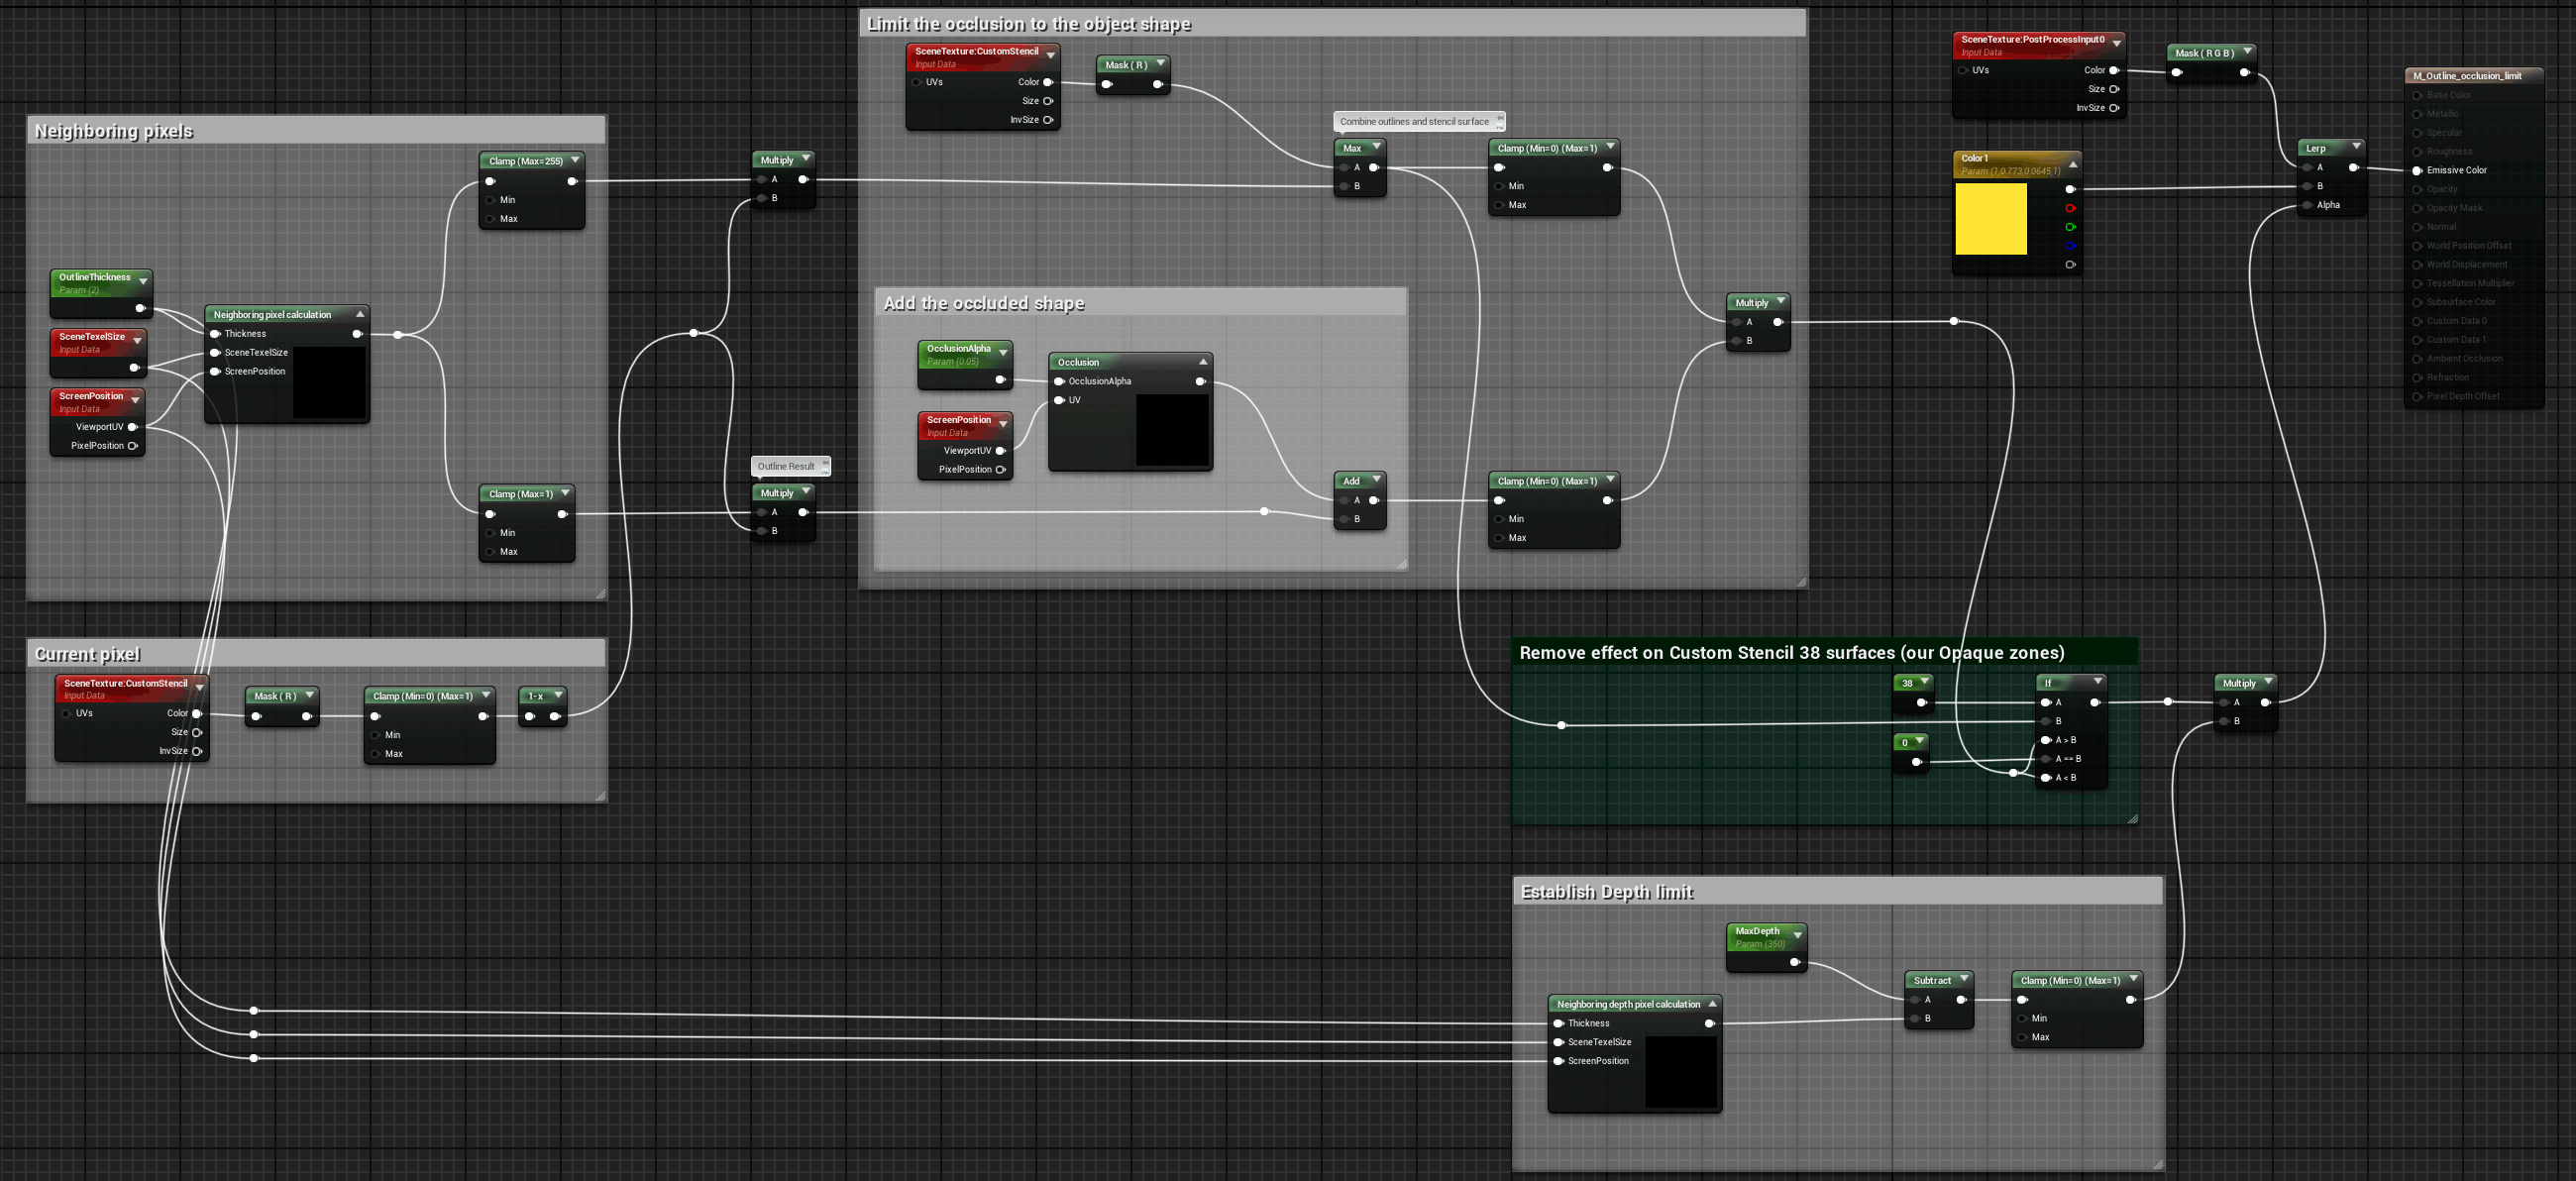
This modification can be used to simulate an “opaque” bubble around the character to limit the visible outline effect. It sets a limitation to the super-vision of the player to not reveal all the map secrets 😛
Tutorial files
You may also like:

Support this blog!
For the past year we have been dedicating more of our time to the creation of tutorials, mainly about game development. If you think these posts have either helped or inspired you, please consider supporting this blog. Thank you so much for your contribution!


Hello,
On Unreal 5.3.2, I noticed when there’s no custom rendered depth objects, a square is present at the top left corner of the game.
Am I the only one getting this issue?
Thanks