Camera shake or screen shake is a technique used in a lot of videogames to simulate world or player movement events resulting in a more realistic or impacting game. In this tutorial we are going to see the most used camera shake effects and how to use this effect in an Unreal Engine 4 project.
Setup on UE4
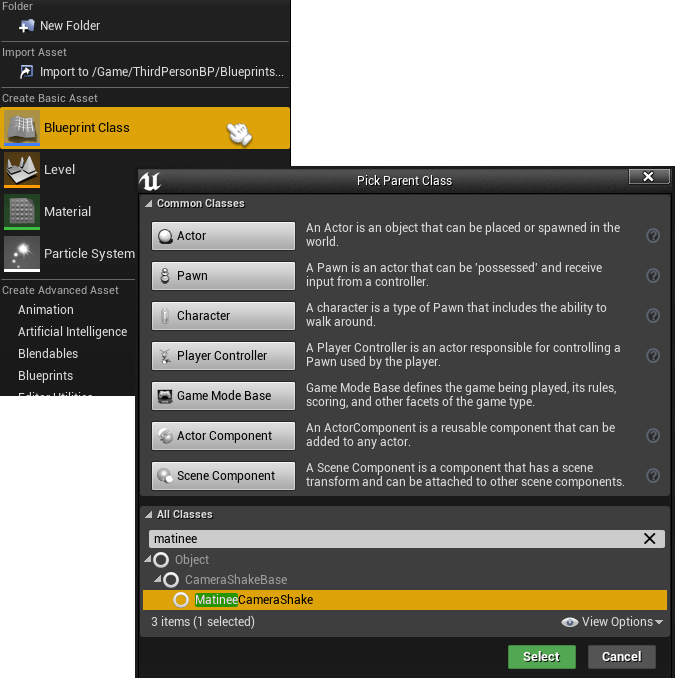
The first step is to create blueprint for each camera shake type, just modifying the parameters of this object we can change the behavior of the shake.
Right click on the content browser new Blueprint Class, and search for MatineeCameraShake
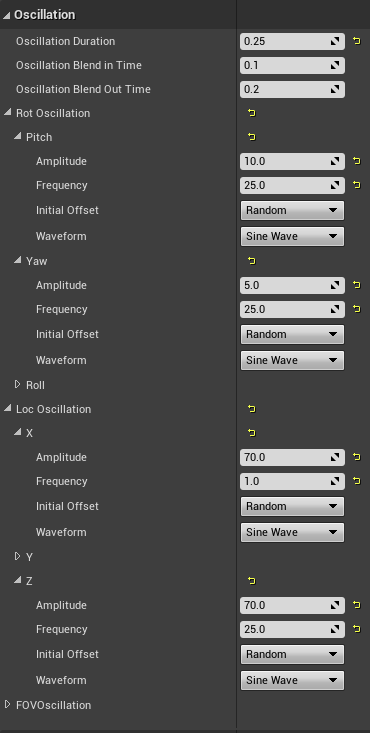
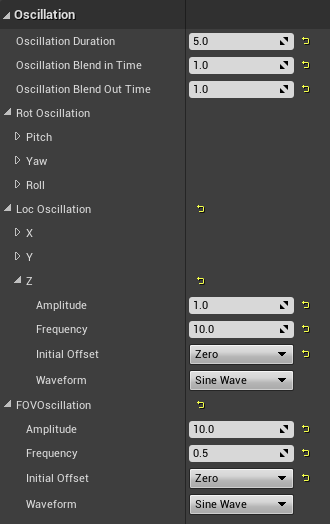
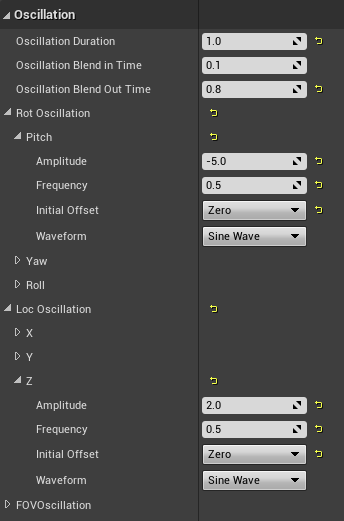
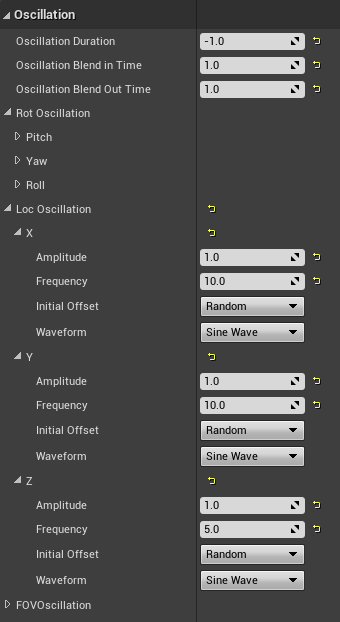
Now we can open the blueprint of this object and see the multiple configurable parameters in their Details tab. Oscillation Duration controls the duration in seconds of our shake effect, also we can apply a fade in/out effect to the start/end of the effect using Blend in/out Time parameters to obtain smoother transition until the shake effect.
After that we have the 3 modifiers section: Rot, Loc and FOV Oscillation, each corresponding to the 3 different ways to transform the geometry, rotation, translation and scale.
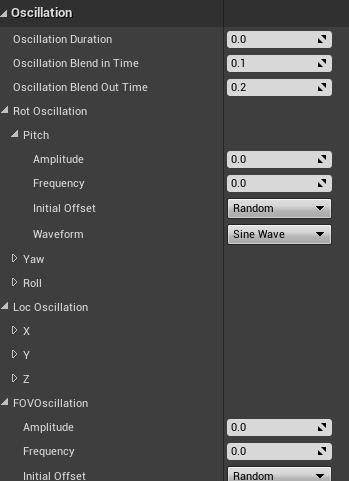
Instead of use fixed values we are using functions that change over time (Sine Wave and Perlin Noise), like in a Timeline node, to define the behavior of the shake.
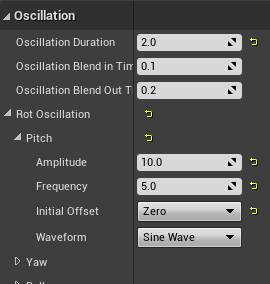
We will find values for this parameters to simulate some events in the next section of the tutorial.
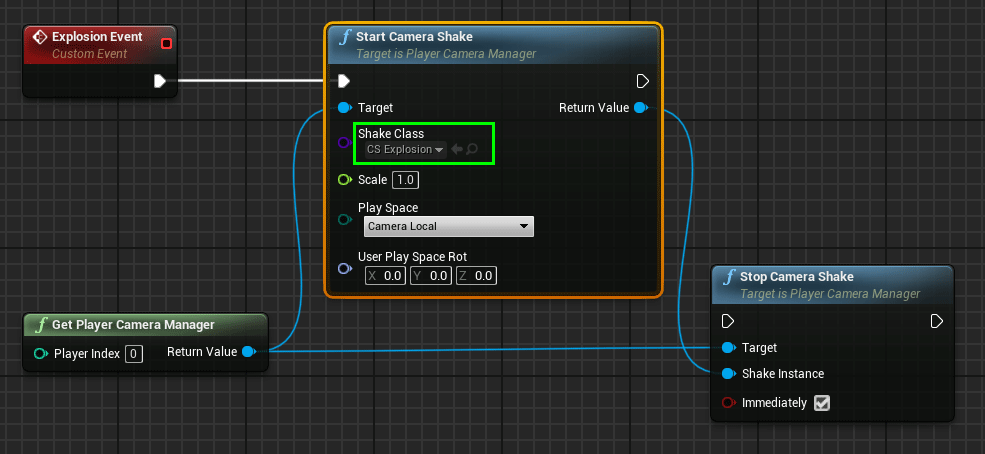
When the event happens we need to retrieve the camera manager of our player and use the node Start Camera Shake with the previous Blueprint as Shake Class. This node returns the Camera Shake instance, this can be useful to stop the shake using the Stop Camera Shake node at any moment.
But what about when the event is not generated by our player?, to cover this case we have the Play World Camera Shake node
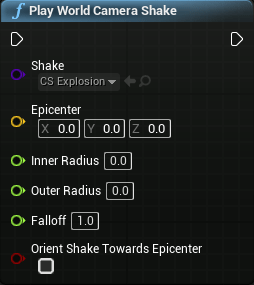
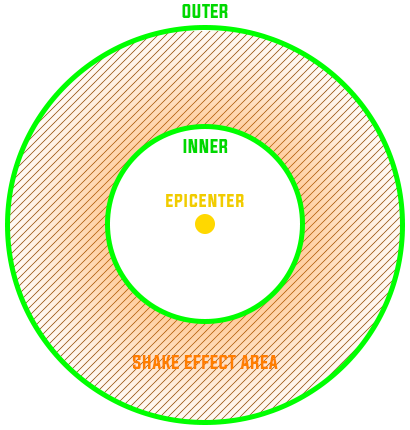
Using this node we can define the origin location of the shake, an explosive barrel for example, and the ring of the area effect with a falloff as the player camera nears to the outer radius. All the cameras inside the inner radius are ignored. Remember the shake affect to the camera, not the player, so if the player camera is a bit far from the player we need to consider this distance in our area effect.
Now we can set up some parameters of the most common camera shake effects.
Explosions
One of the most used events that comes with a camera shake are explosions. When something explodes close to the character the shock wave hits and disorients the player. The magnitude of the shake can vary depending of the distance, this can be adjusted dynamically using the Scale parameter of the Star Camera Shake node. Short shake with high amplitude and frequency can be a nice approximation.
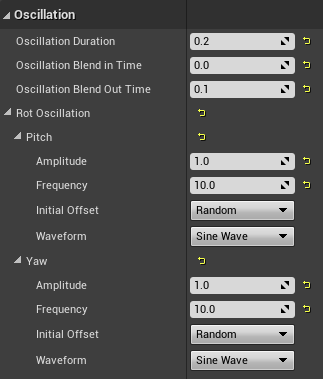
Impacts
Another easy effect that must be added to our games is the related to the character impacts. When our character has been hit by the enemy or some object, or even the character contact the enemy with a melee weapon, a short shake can transmit this useful information to the user. This effect can be used with multiple variations in multiple situations, for example to simulate the recoil of a weapon, or when the character slapping a new magazine, there is a lot of situations that can be improved with a little shake.

Character motion
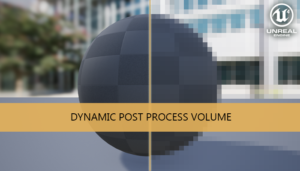
Our next effect is very situational, but mandatory if our character can get intoxicated. When the alcohol level of our character is too high can simulate a swing effect on the camera. This effect can be added with a post processing effect that blurs the vision of the player until the alcohol level drops.

During any game our character can execute a lot of movements that can be accompanied with camera shakes such as jumping, landing after a jump, running… We need to adjust the amplitude or the shake depending of the strength of the character or the force of the movement to make the player feel that force. For example in a running effect we can use the FOV change to give the feeling of acceleration in addition to the subtle height oscillation, also we can add a post processing effect with motion blur, if our character runs very very fast.
Head bobbing is a very subtle effect that can be added to first person games. When the character walks or runs we can add a little oscillation in their vertical axis to simulate this effect. Remember that we can track the velocity of our character to know when he is moving to activate the effect.
Vehicles
On vehicles we have too a lot of shake options, in addition to the shakes that can be produced with the motion of the vehicle and their terrain we can add too their controls manipulation, like buttons and levers, for example in a car we can add a camera shake with the change of gear.

Environment
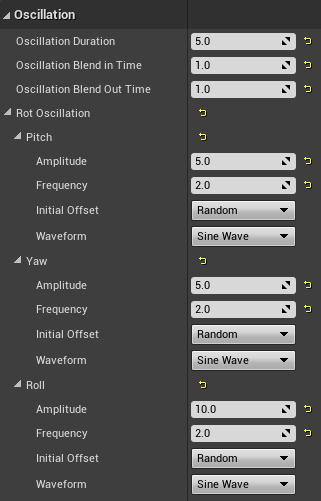
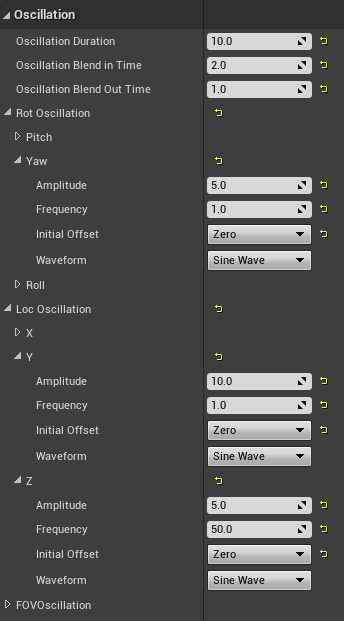
In nature we can find some of the strongest events that can occur. One way to transmit that strength to the player is through camera shakes. The first one we usually think of is in a earthquake. Like in the explosion we can do short oscillations with high frequency to simulate this effect, but with a little yaw and a longer duration.
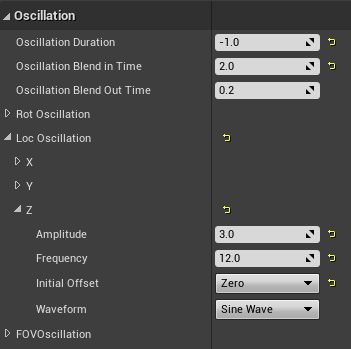
When we are in a ship we have too a continuous movement due to the surge. This effect can be done using a camera shake very easy using Rot oscillations. The greater the surge, the greater the amplitude of that oscillations. Using a negative value as Oscillation Duration will make the duration of the effect infinite.

The last effect of this section is related to the wind. We have found better results if we link the frequency of this effect with the force of the wind instead of only the amplitude. If we want to control the orientation of the shake we can use the Play World Camera Shake node and enable Orient Shake to the Epicenter and adjust the oscillation to match with the orientation of the wind
With this tutorial we have been able to see different ways to make camera shakes to improve the experience of the player and give a more realistic immersion during the gameplay. Camera shake is a very cheap resource that contributes enormously to increase the connection of the player with the character. So don’t forget, do camera shakes.
You may also like:

Support this blog!
For the past year we have been dedicating more of our time to the creation of tutorials, mainly about game development. If you think these posts have either helped or inspired you, please consider supporting this blog. Thank you so much for your contribution!


Hello, I’m a camera artist at 2K/Firaxis, and just came across this post. I agree that these camera shakes are really powerful and useful, and I use them throughout our game. I wanted to comment on your illustration of the epicenter and falloff values. There definitely shouldn’t be a hole in the middle where suddenly the shake is gone if you’re too close to the center, that would bonkers – that area should be 100% intensity, just like audio has positional sounds that get louder as you approach them.
I’m not saying you are wrong to say that’s what it does, though, but I am saying that is not what it SHOULD do. I seem to recall I asked a programmer to look at that blueprint function and he quickly found a discrepancy between the intended design stated in the code’s comments and what is basically a mistake in the code, and he fixed it for me. So it is probably something that needs to be brought to Unreal’s attention.
Yes, I was confused about the Inner Radius parameter too, and usually I set it to 0.0 to obtain the “natural” effect. I think it can be useful only in specific cases, like generate a safe bubble around an object, but I think its a good thing to have as many customization options as possible.
I can’t thank you enough for this pose. This is absolutely gold. Thank you again.