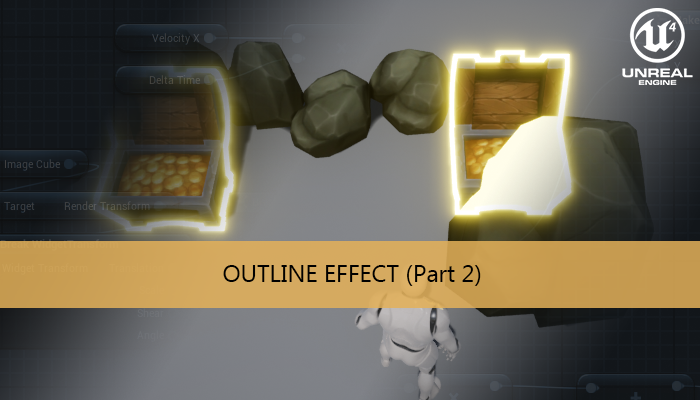
With this tutorial we are going to add more effects and the treatment of the occluded parts of the object that has the outline effect of the previous tutorial.
Part 1: Outline effect
Part 2: Occlusion, colors and glow
Part 3: Opaque zones
Part 4: Depth limit
Occlusion effect
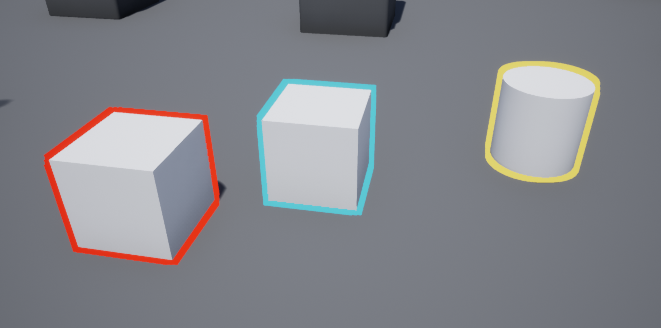
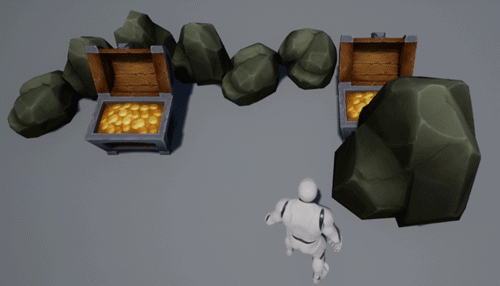
In the previous tutorial we added the outline effect to some objects of a simple scene. This outline could be seen even when the object was hidden, partially or completely, by other object.
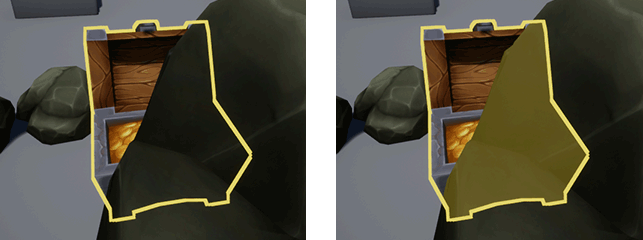
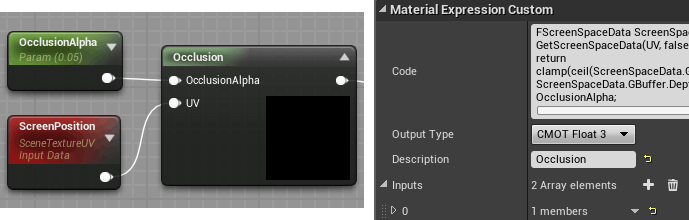
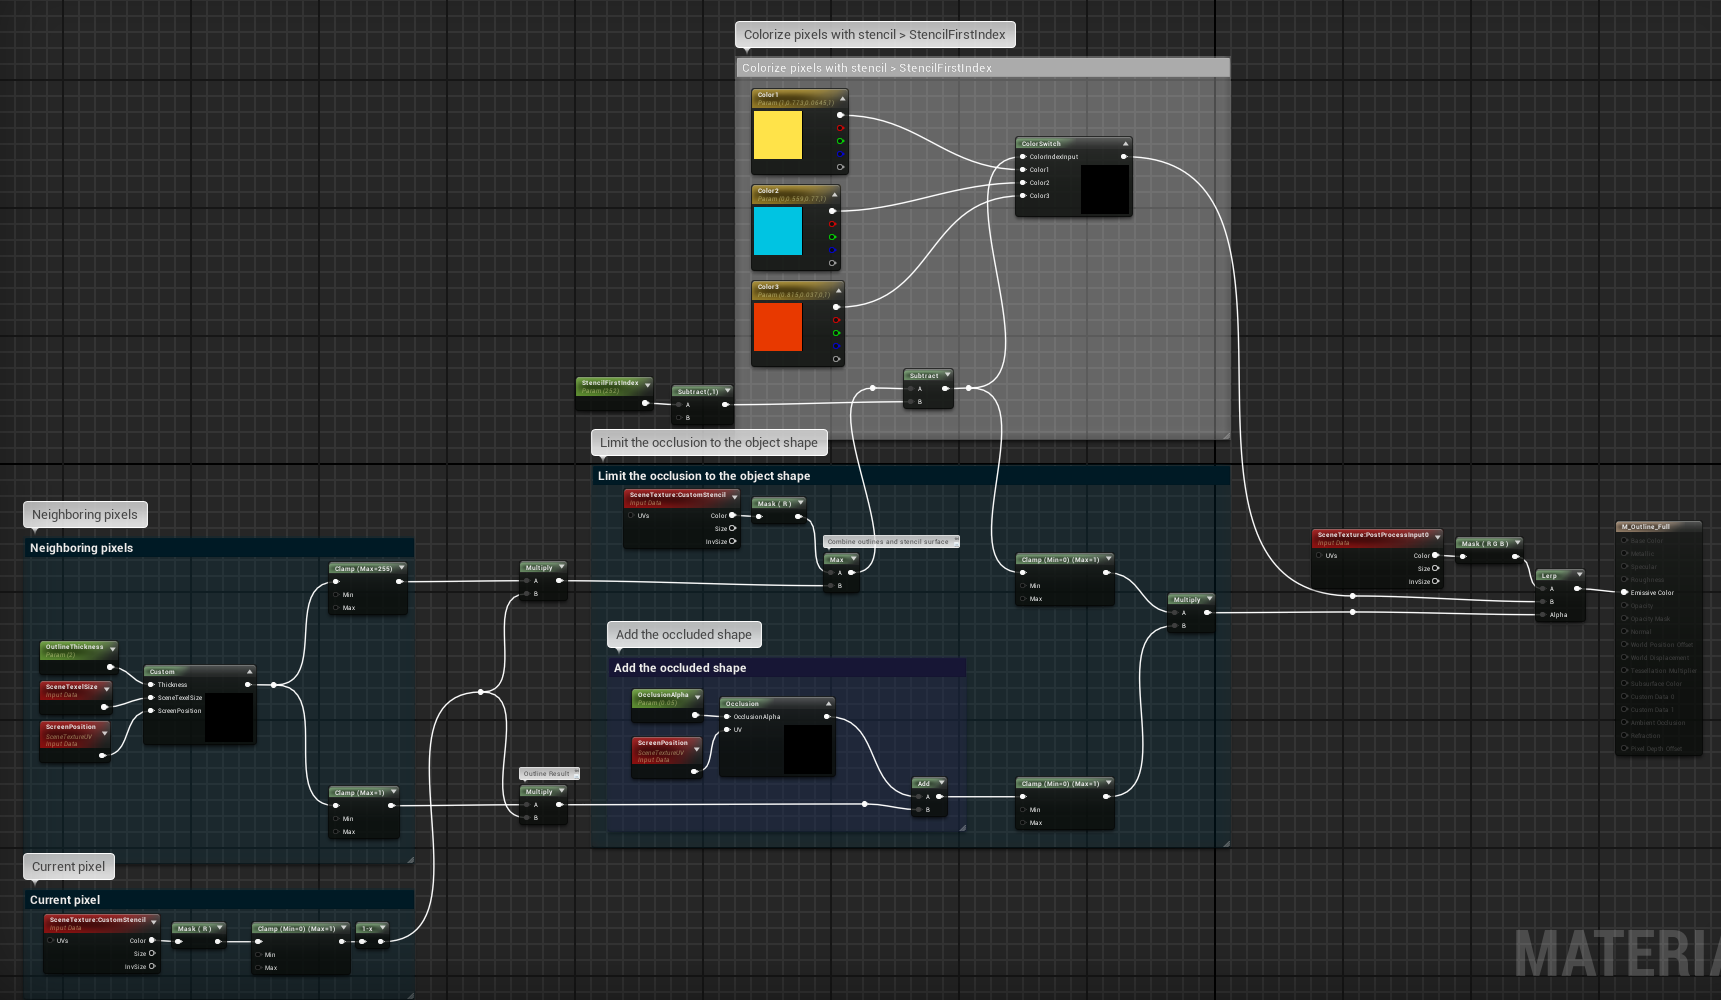
To determine when the object is occluded we need to take the difference between the custom depth and the scene depth. We can add a parameter to control the alpha value of the internal shape of the outline.
#if SCENE_TEXTURES_DISABLED
return 0;
#endif
FScreenSpaceData ScreenSpaceData = GetScreenSpaceData(ViewportUVToBufferUV(UV), false);
return clamp(ceil(ScreenSpaceData.GBuffer.CustomDepth.r- ScreenSpaceData.GBuffer.Depth.r), 0, 1) * OcclusionAlpha;
This code must be added to a custom node expression
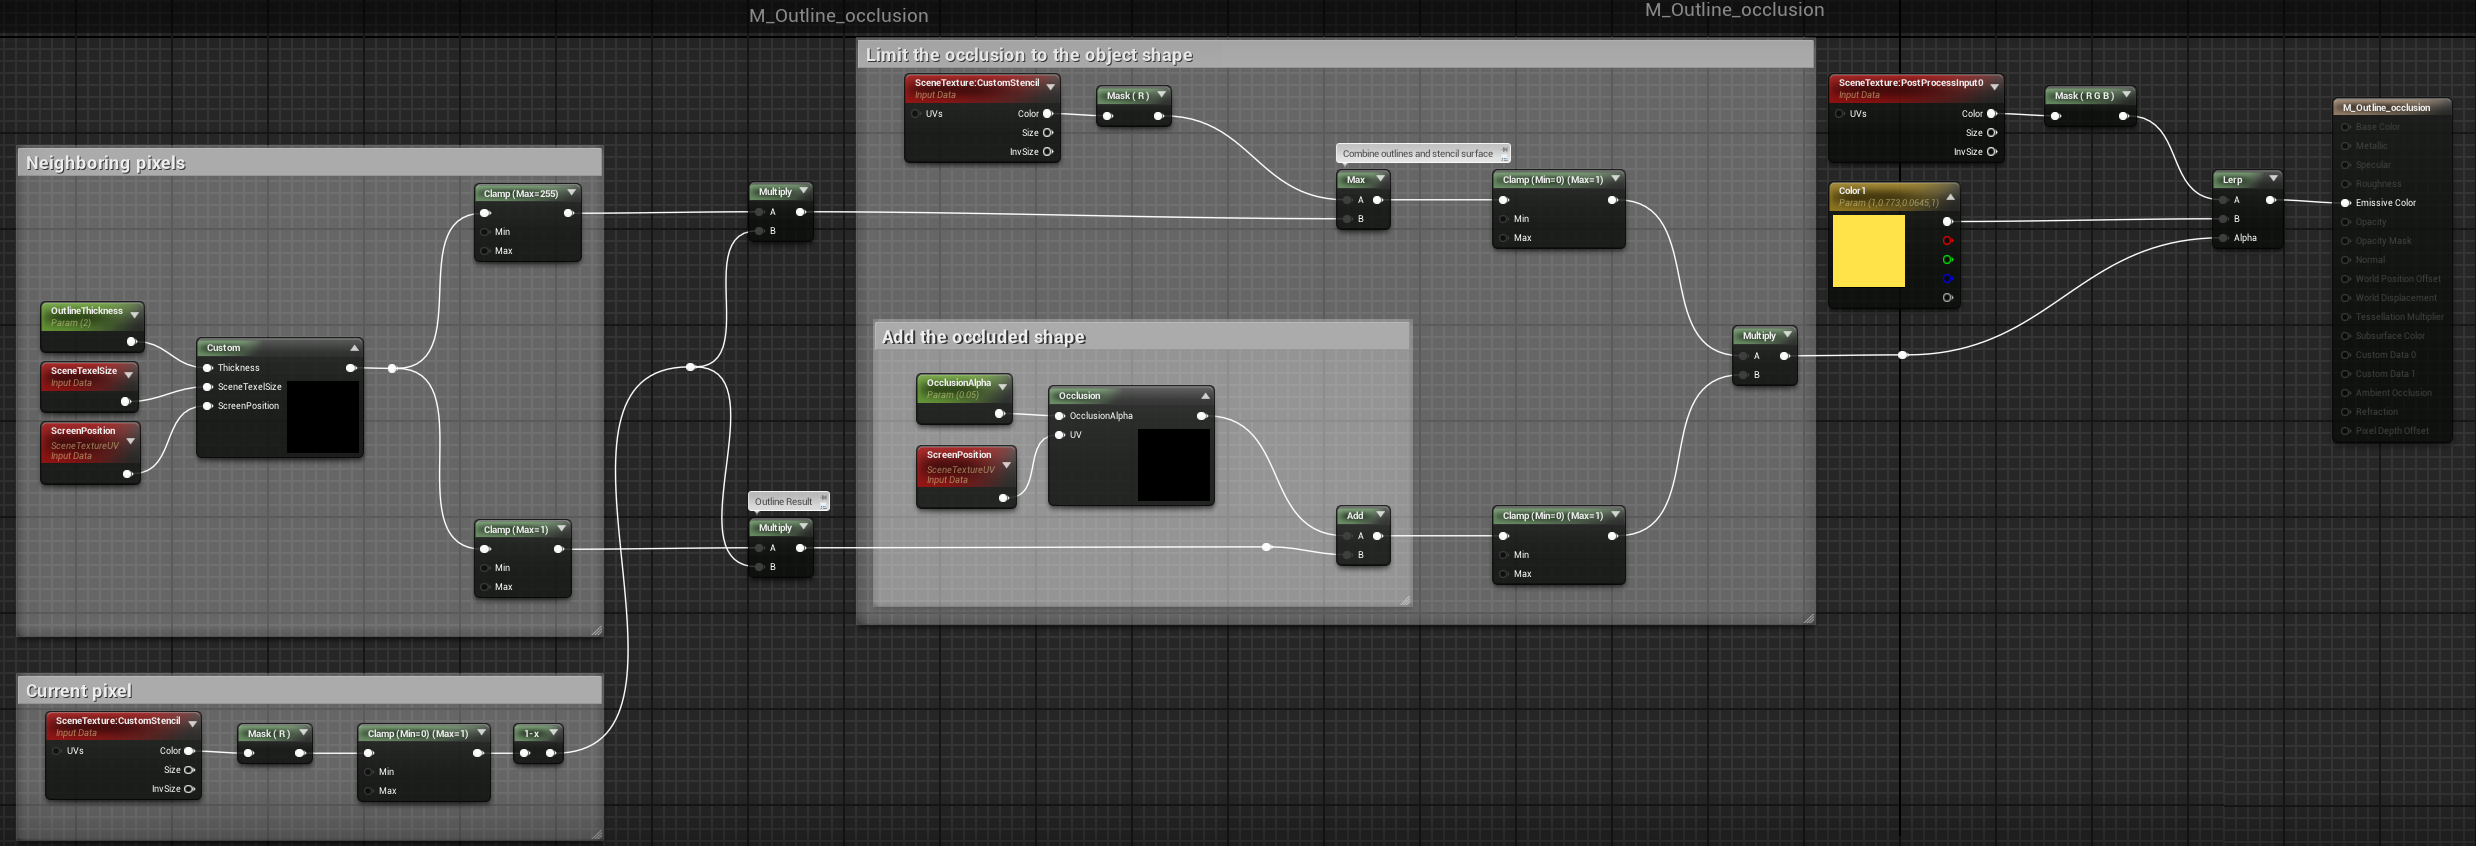
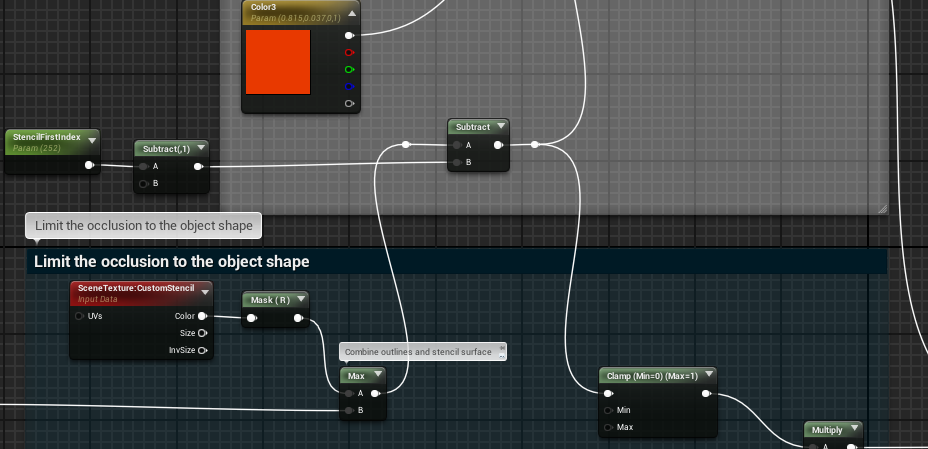
But we need to limit this effect to the object shape, we can take this shape using the Custom stencil values of the image. We can add the outline to this shape too.

Now, putting all together:
We can add more features like more color options, or glow effects.
More colors
We can replace our color node with a color switch, using the stencil value we can choose the color that will be applied to the outline object
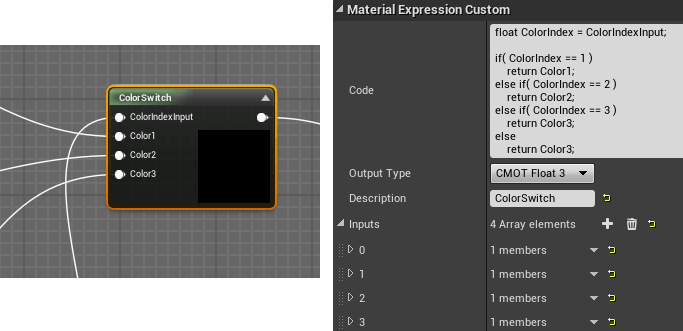
The code inside de custom expression is a switch that returns the color associated to an index value.
float ColorIndex = ColorIndexInput;

if( ColorIndex == 1 )
    return Color1;
else if( ColorIndex == 2 )
    return Color2;
else if( ColorIndex == 3 )
    return Color3;
else
    return Color3;
If we want to add more colors, we only need to add more inputs to the custom node and modify the code to add more if-clauses using the same pattern.
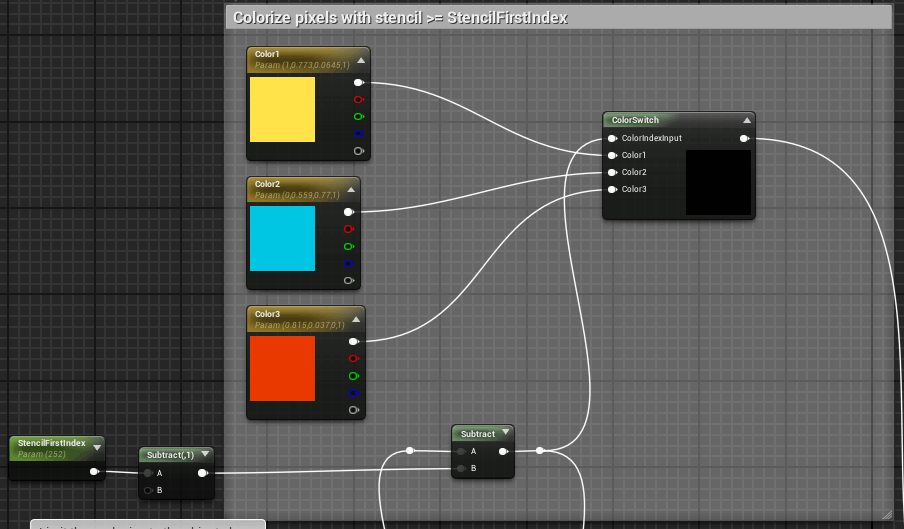
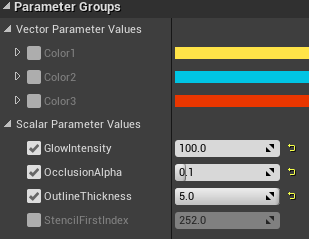
We can establish that values below the StencilFirstIndex parameter will disable the outline effect.
Final material overview:
Now we only need to change the stencil value to change the outline color
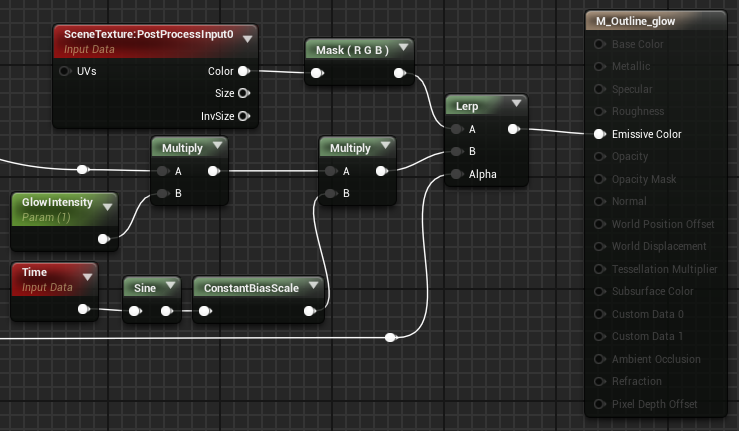
Glow effect
To achieve this effect we must multiply the color output by a value above 1.
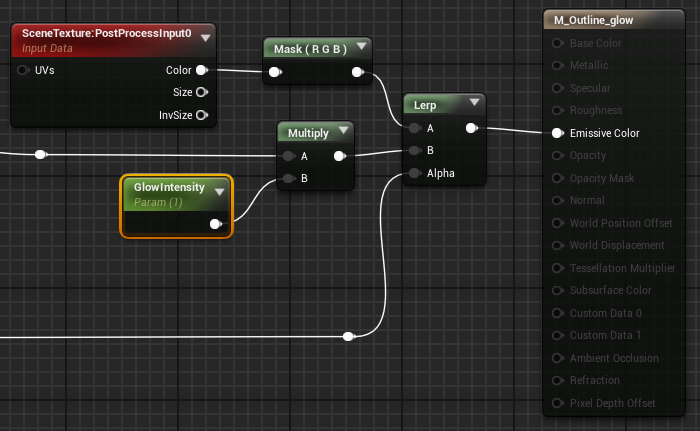
With a value of 100 in the material instance we can obtain a nice glow effect.
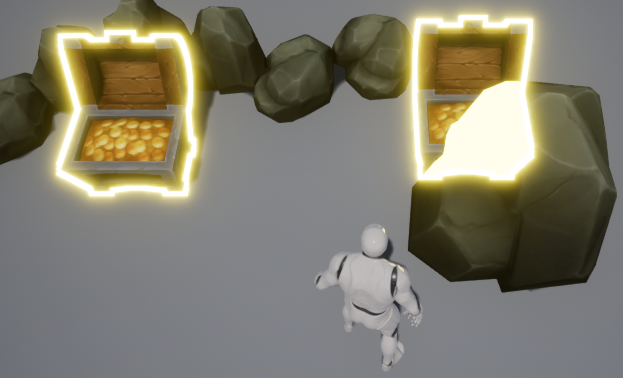
Finally we can add a pulsating effect to the glow to do it more dynamic. Just multiply the color by a sine node connected to a Time node.
These have been some of the outline effect possibilities, we have a lot of combinations and more features can be added to this base effect.
Your imagination is the limit.
Tutorial files
2022/04/14 – Updated to UE5 5.00
You may also like:
Support this blog!
For the past year we have been dedicating more of our time to the creation of tutorials, mainly about game development. If you think these posts have either helped or inspired you, please consider supporting this blog. Thank you so much for your contribution!


My shader won’t compile and I an error message along the lines of [SM5] Base shaders can’t read SceneTextureStruct.
Any clue as to what I’ve missed?
4.20.2
It seems that something related to HLSL has changed in this version, I ‘ll take a look when I have a little of time
Adding
#if SCENE_TEXTURES_DISABLEDreturn 0;
#endif
in the first lines of the custom nodes that access to GBuffer fix the compilation, I will update the tutorial with the new materials for this version
Works like a charm in 4.20. Thanks so much for keeping your code up to date, so many of these tutorials out there just stopped working after 4.17 because of the engine changes. Keep up the good work!
Great stuff! I’m wondering though, as in your chest examples, if one chest is in front of the other chest in view space, how would you render the outline around the entire shape of the “closer” chest, even where the two chests overlap? Currently, if the chests were to overlap, the outline would only render around the combined shapes of the chests, and not each chest individually. Is there a way around this? Thanks!
I think we can use Custom Depth to obtain that effect, but I need to find the time to do some test.