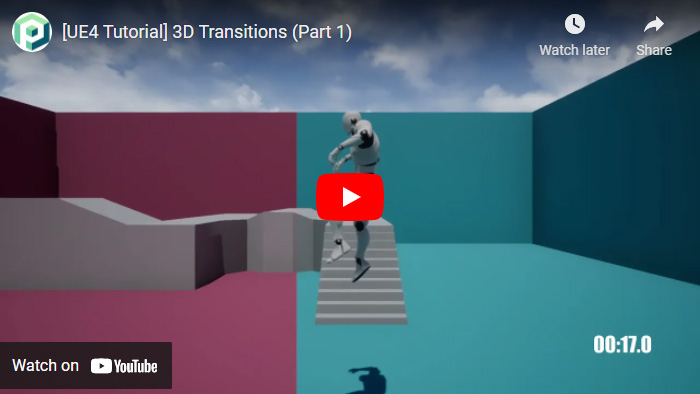
In this tutorial series we are going to explain some ways to do transitions in a 3D world. In a previous tutorial we have seen how to make 2D screen transitions, like in a Pokemon game, now we are going to apply that to 3D environments.
Split screen transition
Cylinder transition
Character mask
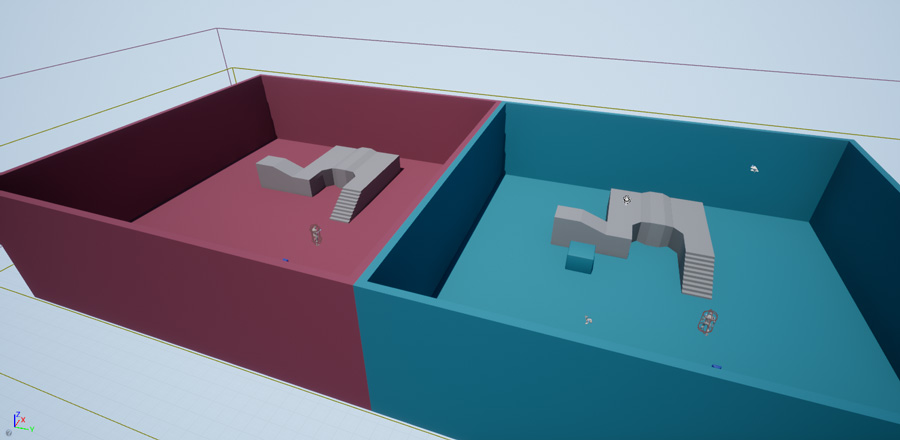
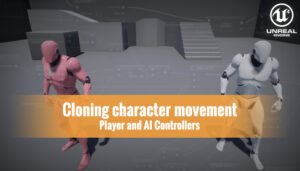
For this example we are going to take the ThirdPerson project and duplicate the room and the character. We want to replicate the movement of one character into the other so we are going to use the characters used in a previous tutorial.
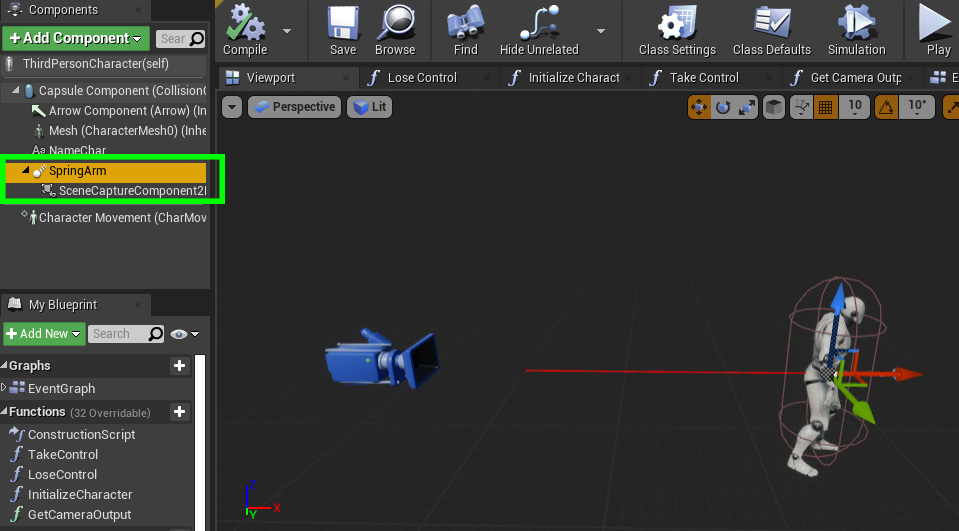
We need to do a few modifications in this characters, the first one is to add a Spring Arm and attach a SceneCapture2D component.
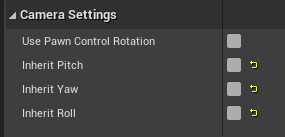
To maintain the orientation of this camera independent of the character orientation we need to disable the inheritance of pitch, yaw and roll in Camera settings
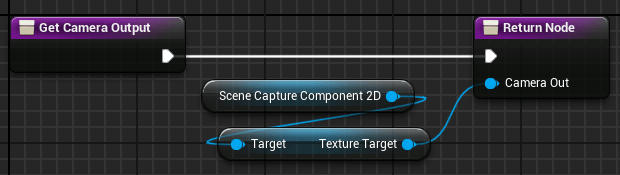
The SceneCapture2D is like a camera that we can put into the level to obtain a texture of what the camera is seeing. We have used this component previously in the Niagara particle system tutorial to make a heightmap texture of the scene.
The Render Target (the output texture of SceneCapture2D) can be created dynamically using Create Render Target 2D node.
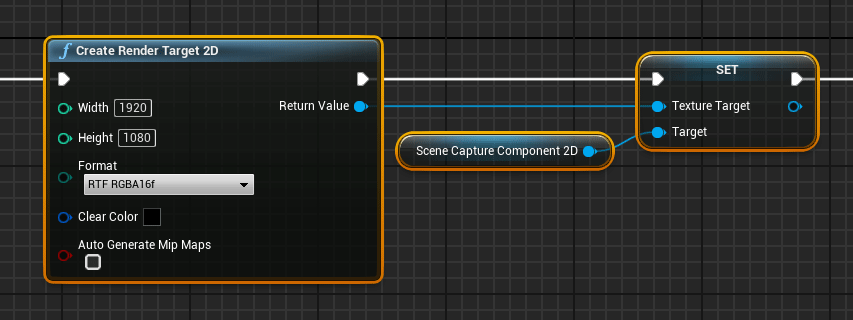
We need to output the texture target of each character SceneCapture2D to be used in the transition material.
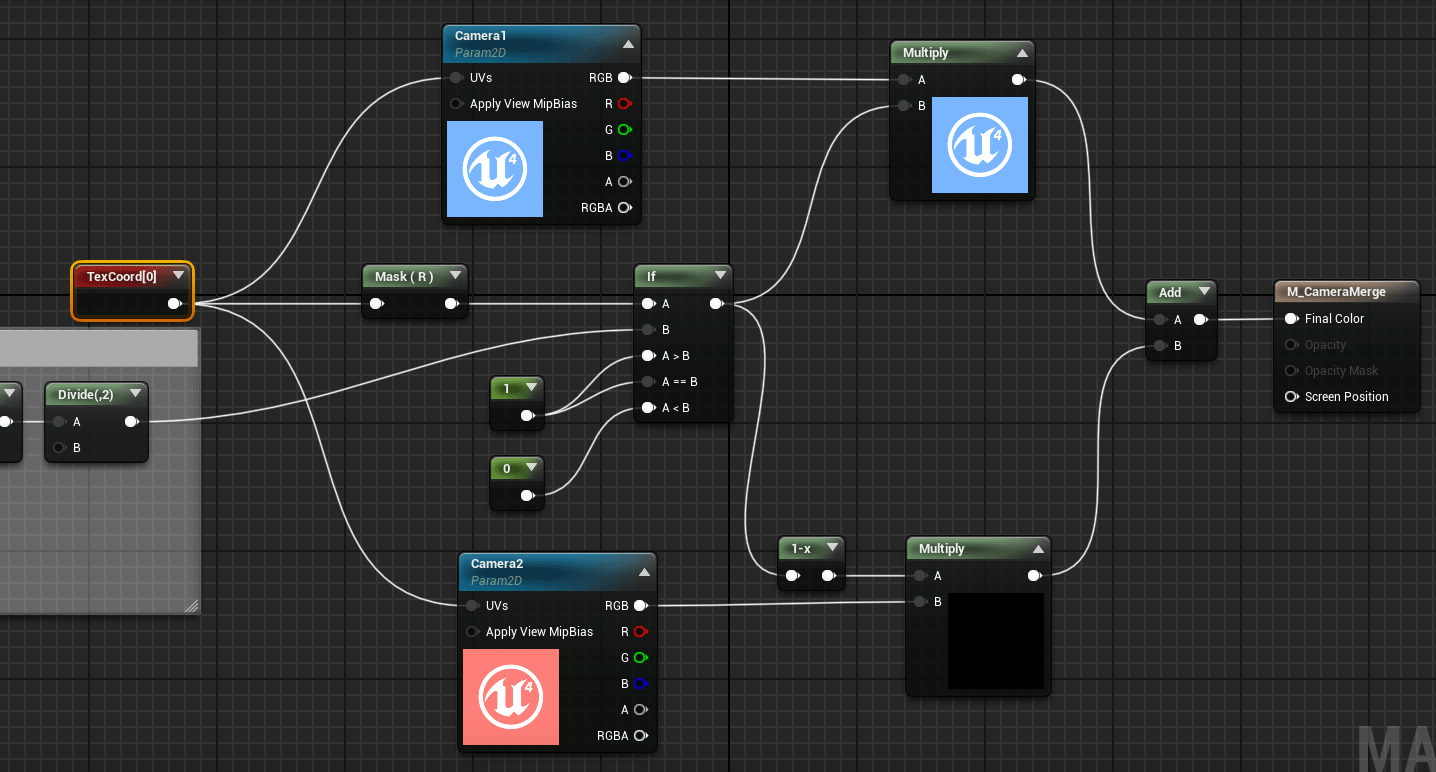
The basic idea is to obtain a render texture of the view of both characters and apply the screen transition from one texture to the other using a material.


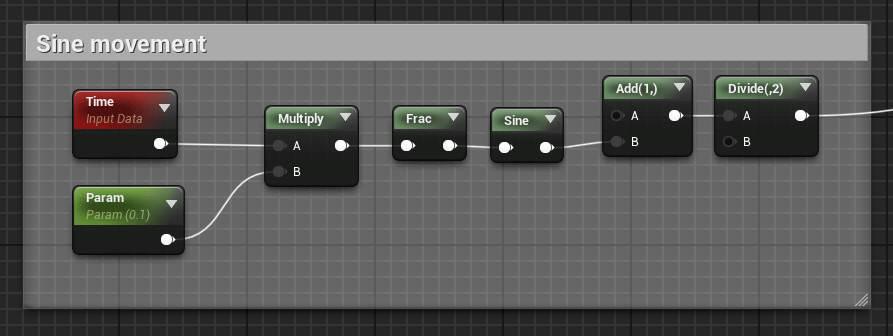
To control the progress of the mask we can use a sine formula.
Multiply the mask to one screen texture and a negative mask to the other, in the last node add the results of apply this masks.
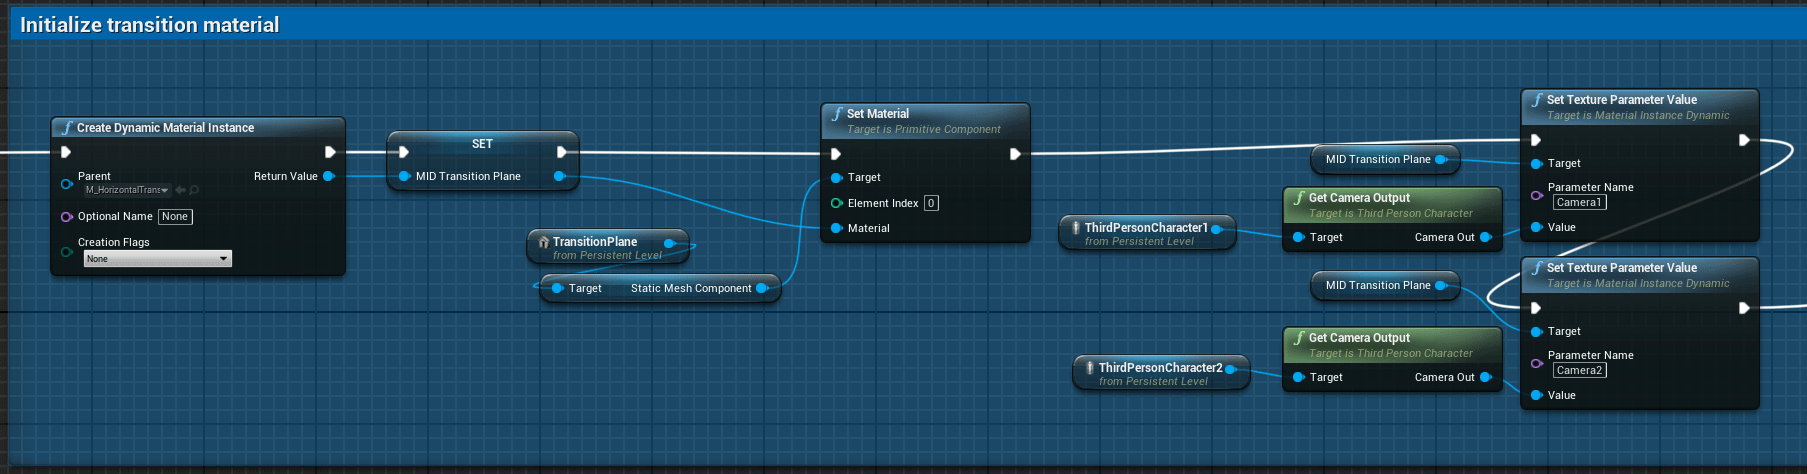
In the initialization of the material we need to pass the textures of each character scenecapture2d to the correct texture reference of the material.
This material can be used in a plane mesh in front or a camera, or in a Widget component image covering the screen, to render the effect during the transition.
After the transition switch to the camera of the destination character and disable the other character.
Tutorial files
You may also like:

Support this blog!
For the past year we have been dedicating more of our time to the creation of tutorials, mainly about game development. If you think these posts have either helped or inspired you, please consider supporting this blog. Thank you so much for your contribution!


This is really cool stuff, I have been looking for something like this for a while now. I’m still somewhat new to Unreal so this goes a bit beyond my understanding and I haven’t been able to set it up manually following your information just yet.
If it’s possible to connect and get more into it, please let me know :)!