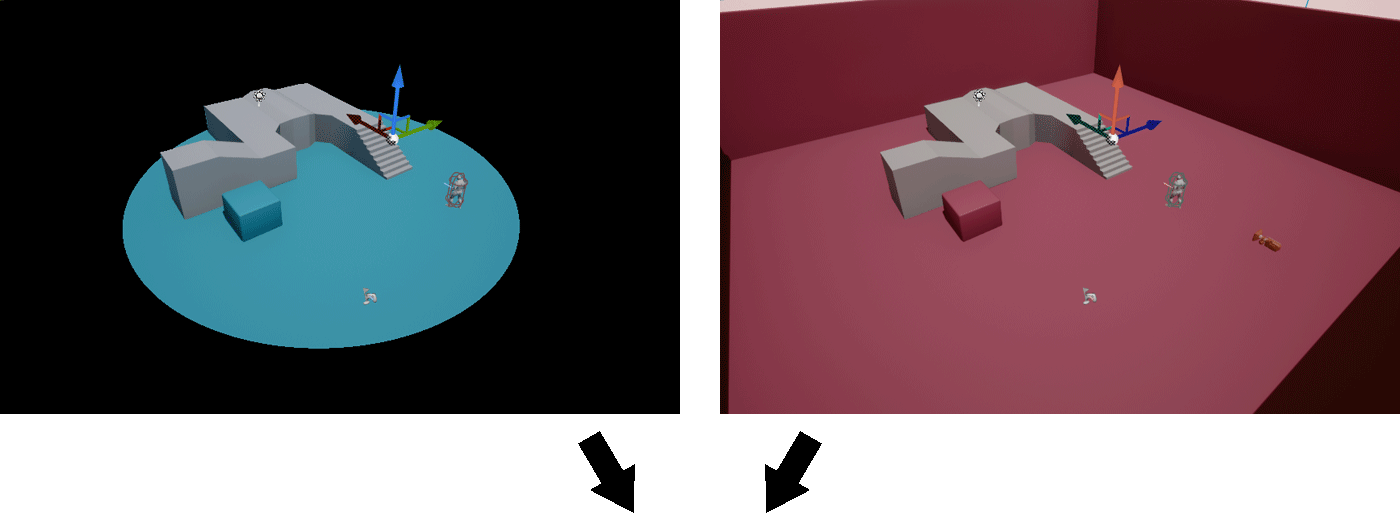
Now that we have the scene ready we can continue doing more changes to obtain different transitions. Using Post Process Volume and a simple mask we can do a 3D transition between the rooms.
Split screen transition
Cylinder transition
Character mask
The basic idea is to apply a cylinder mask using a Post Process Volume in one room and fill the rest of the mask with the image of the Scene Capture of the other room.
The radius of the cylinder will be increased until fill the room, it will be the parameter used to control the speed of this transition.
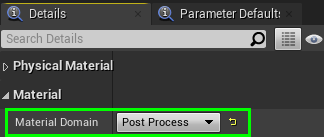
We can start making the material used to generate the cylinder of the mask. This material is going to be used with a Post Process Volume so their Domain must be Post Process.
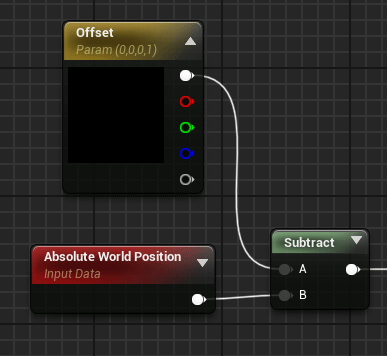
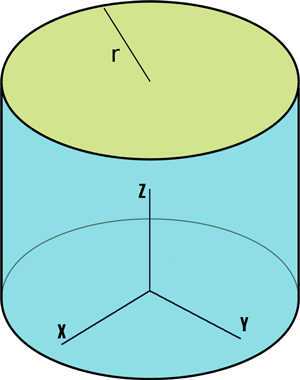
To control the position of the cylinder we are going to use the World Position (Absolute World Positon node) and a vector parameter to add an offset.
To generate the cylinder we are going to use a Custom node with a short HLSL code. The equation of a cylinder with infinite height (z-axis) using coordinates can be formed as:
![\[ x^2 + y^2 < r^2 \]](https://www.parallelcube.com/web/wp-content/ql-cache/quicklatex.com-7bcea4eec19eeae35a79f001d4c97709_l3.png "Rendered by QuickLaTeX.com")
The input parameters of the node are a vector of 3 components and a scalar parameter for the radius.
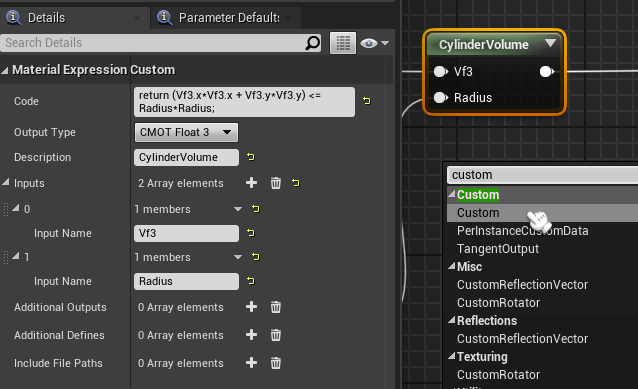
And the implementation of the previous cylinder equation in the Code section. We are going to use the multiply operation instead of pow, has better performance.
return (Vf3.x*Vf3.x + Vf3.y*Vf3.y) <= Radius*Radius;
The radius must be connected to a scalar material parameter to modify the radius of the cylinder in realtime and the speed of the transition. The output of the Custom node is used to do a linear interpolation between Black color and the color of the scene.
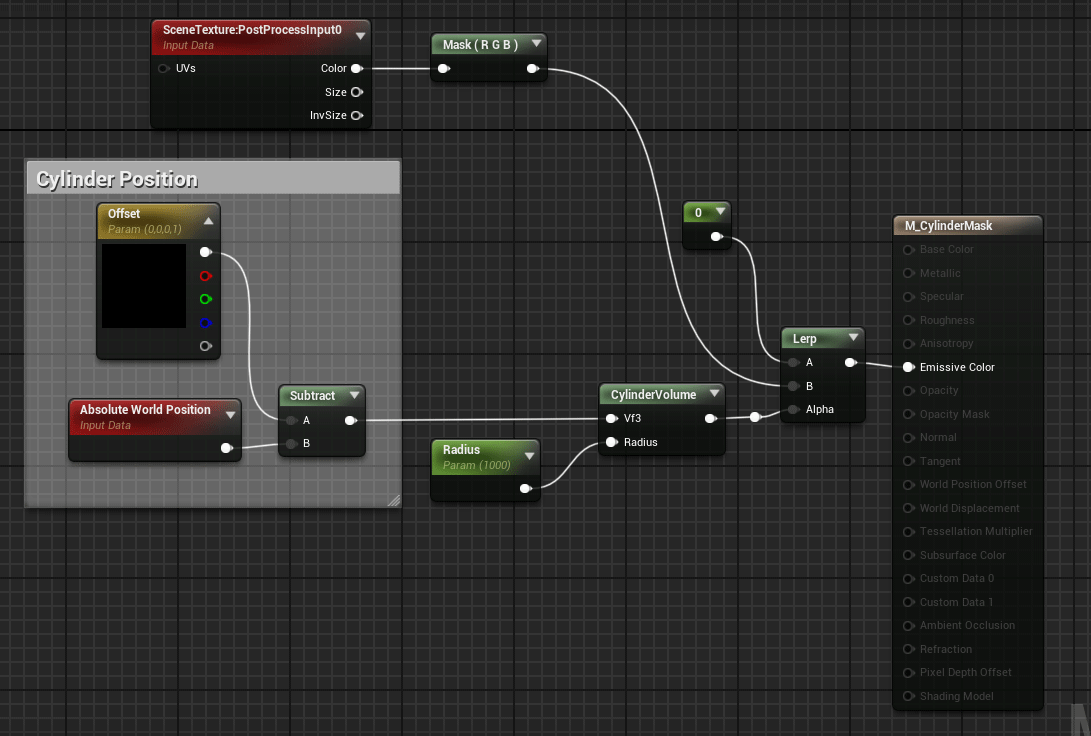
The cylinder node return a value of 1 inside the cylinder and 0 outside so is like apply a sharp mask to the scene, but only inside the bounds of the Post Process Volume that will contain this material.
Our Post Process Volume covers all the volume of the room, and a instance of the previous material will be added to the materials of that component

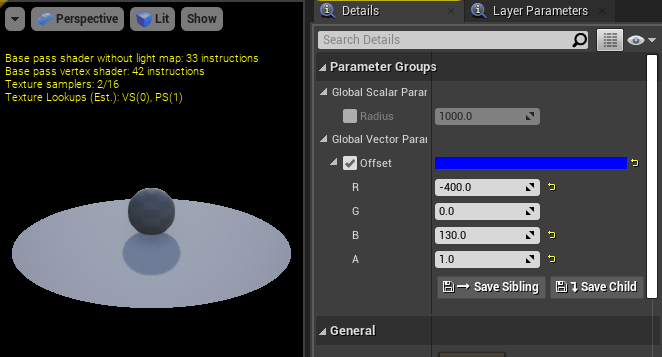
Using the material instance we can move the center of the cylinder to the center of the room.
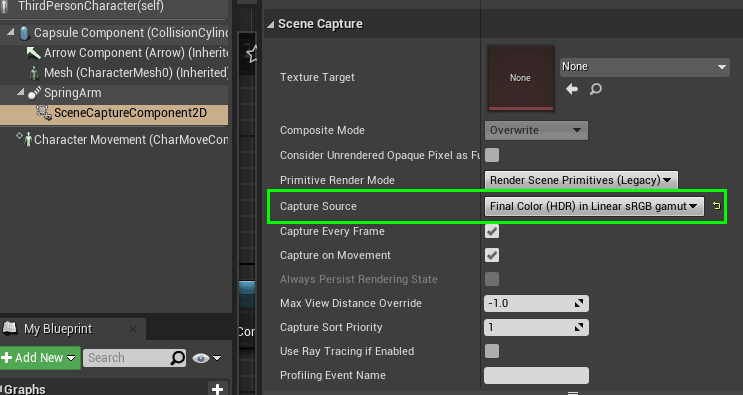
To be able to see the post process effect in our Scene Capture we need to change the Capture Source parameter to Final Color instead of SceneColor. For our example we are going to choose Final Color (HDR).
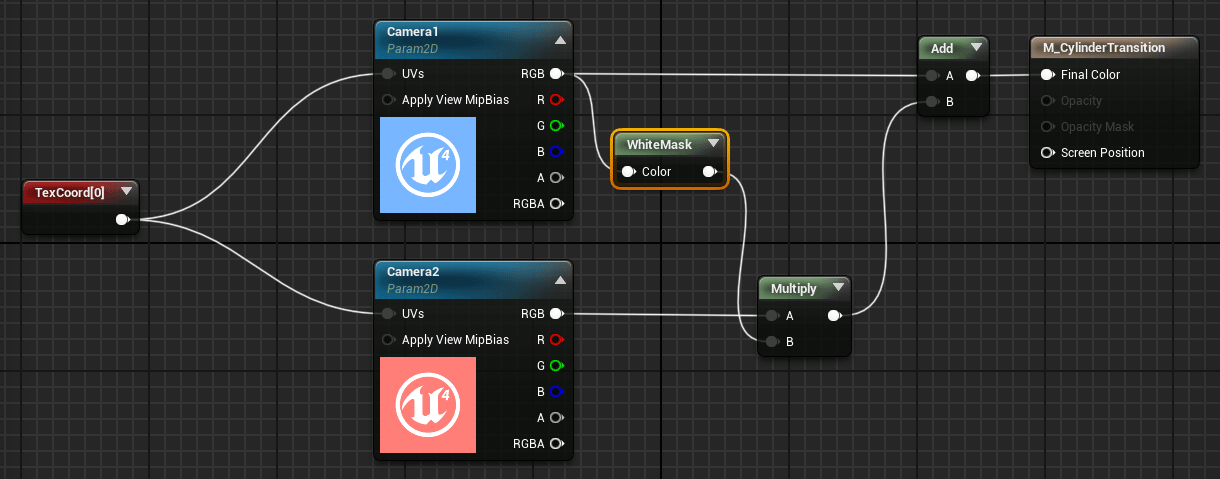
The last change is in the transition material. Now the transition control is in the first material using the radius of the cylinder, so this material only joins the Scene Capture images. We are going to take the inverse mask of the first screen, apply this mask to the second screen and after add both images.
The Custom HLSL node will take the color of the pixel and if their value is 0 (Black) then returns 1 (White), and will return 0 for the rest of values.
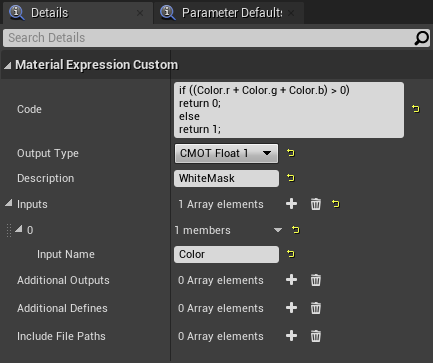
if ((Color.r + Color.g + Color.b) > 0)
return 0;
else
return 1;
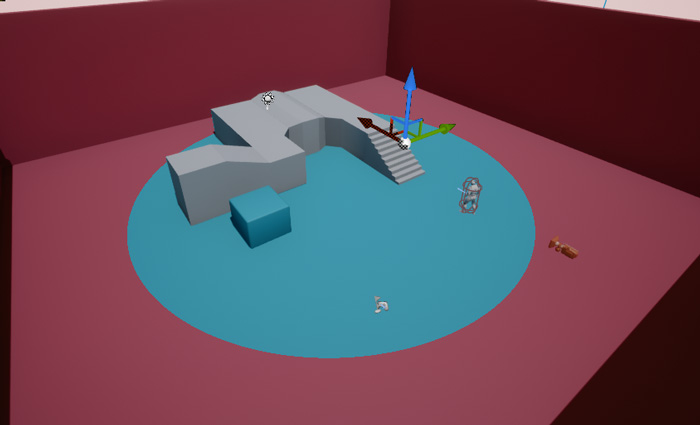
Now we have a 3D circular transition between both rooms, using a cylinder mask. This volume mask can be changed to obtain different effects, for example an sphere or a cube, we only need to change the cylinder equation by the sphere or cube equation in the first material.
Tutorial files
You may also like:
Support this blog!
For the past year we have been dedicating more of our time to the creation of tutorials, mainly about game development. If you think these posts have either helped or inspired you, please consider supporting this blog. Thank you so much for your contribution!


